
This section details the following actions that are associated with loading media:
A) Load Supply Media Roll On Media Shaft
B) Load Take-up Empty Core On Media Shaft
C) Loading the Media - Standard Method
D) Loading the Media - Alternate Method
 Media Feed Direction
Media Feed Direction
Determine first whether you need the media roll to be print side out or in. "Print side out" means that the media unrolls from the bottom of the supply shaft. "Print side in", means that the media unrolls from the top of the shaft (see the diagram below). This allows you to print on the "back" side of the media.
Lifting a media roll has always to be done with the help of an external lifting tool.
Lifting media (e.g. rigids) has to be done with the help of an external lifting tool or at least two persons.
It is very important that the media is wound properly onto the core when it arrives from the manufacturer. The media must be wound straight, tight and even from one end to the other. If you have a roll that is not even, before loading it, hold the roll in a vertical position and carefully and evenly drop one end onto the floor, then tap lightly a few times. If any edges are crushed, unwind and throw away the crushed area or cut off the crushed end of roll. If it is not possible to repair, do not use it.
If media has been stored on its side and has a pronounced flat side, do not use it as it will not advance evenly.
5mm hex key (supplied with the Roll Media Option)
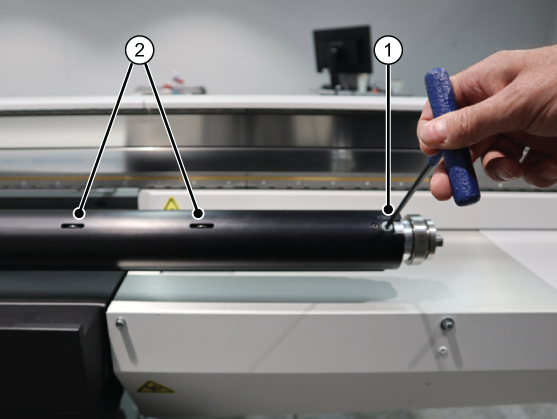 Unlock the Media Shaft Core Locks
Load the shaft with the core lock and coupler end on the right side of the printer.
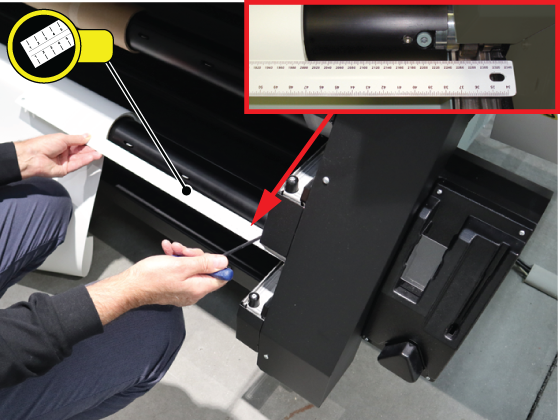 Ruler to Center Media
The supplied ruler has both metric (millimeters) and imperial (inches) scales. When a media roll is centered on the shaft, and the ruler is placed as shown in the photo, the value on the ruler scale will match the width of the roll.
Next: Load an Empty Core and Install it in the Take-up Position
Make sure that the core lock and coupler end of the shaft are on the right side of the printer.