
Some media tend to have dust and fiber that clings to the edge of the media roll. When released near the RMO (Roll Media Option) unit platen, these particles can find their way into the printhead nozzles and cause dropouts that reduce image quality and produce banding.
When you use roll media that has fibers on the edge of the roll, use the media edge protectors to stop this material from entering the active print area where the carriage moves across the platen. The edge protectors are disposable and are intended to extend the time between printhead cleaning when fibrous media is used.
If you use media that is known to have to have "fuzzy" edges you can sometimes minimize the problem by cutting or burning the debris off.
A package of edge detectors is included in the Accessory kit that ships with the RMO unit. If you run out, you can purchase it as a consumable item (see local sales representative).
There are both left and right edge protectors and they are both labeled (a left protector has the height adjustor, the arc and the indent on the right side, while the right protector is reversed).
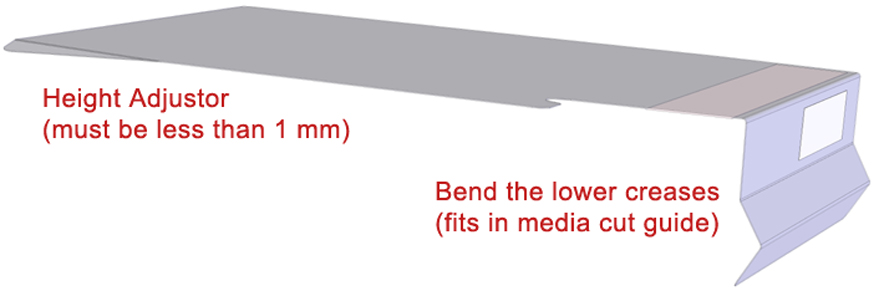 Side View of Media Protector
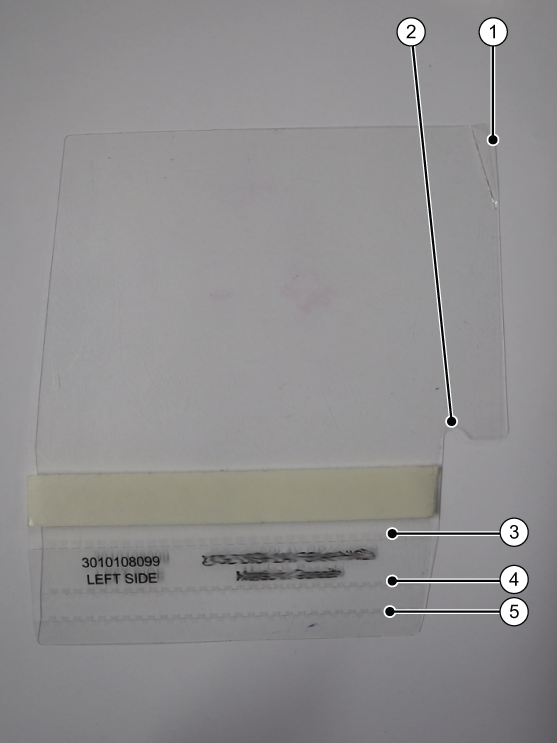 Media Edge Detector Height Adjustor
If the height adjustor area is higher than 1 mm from the platen, there is a possibility that the carriage may hit the edge of the protector and thus damage printhead nozzles.
Do not let the plastic edge near the arc butt up against the media edge or the device may not let the media pass smoothly.
The vacuum in the platen will hold the main part of the protector in place while the image is printed.
 Edge Protector in Position
Height adjustor
Media edge
Cut guide
The adhesive on the edge protector can be re-used approximately ten times. If you find that it is not holding the protector in place, then use a new one.
The media edge protectors will reduce the amount of fiber and other debris. However, it is important to keep the platen and cutting guide areas clean as indicated in the Roll Media maintenance section.
How to Deal with Wide Media
If you use media of the maximum width for the RMO (2.2m or 7.2 feet) that requires media edge protection, you can cut the protectors in half in order for them to fit.