
Ink filters contain air that must be released. Although, you can select Done or Postpone even if the task is not complete, it is in your best interest to follow the recommended schedule. If you don't bleed the filters you will see poor image quality. Air in the ink filter can affect the vacuum and result in dripping ink and deteriorated image quality as a result of nozzle dropout. Bleeding the ink filters is a strategy to avoid persistent nozzle dropout. Failure to bleed the ink filters can lead to an overflow of ink that will result in ink dripping from the carriage and you may need to place a service call. You will be notified by the printer UI when it is necessary to change or bleed a filter.
New ink filters contain air that must be released. Also after a period of use all ink filters will contain air. Follow the schedule for bleeding ink filters indicated in the Maintenance Tasks tab.
The filters are bled using a 60 ml syringe. If bleeding after an ink bag change, let the ink fill finish before bleeding the filter. The filters should be bled while the printer is idle; that is, there should be no active printing.
Wear gloves when contact with ink or maintenance materials is possible. Gloves should always overlap sleeves. Follow the ink related Safety Data Sheets (SDS) guidelines carefully in order to ensure maximum safety. For example use Ansell Microflex 93-260 gloves, which offer a protection against UV inks and flush up to one hour. Pollution with other chemicals can shorten the protection time against UV inks and flush.
Wear eye protection as prescribed in this document when performing a task or action in this area.
Safety glasses with side shields
Gloves (for example: Ansell Microflex 93-260)
Cloth-Poly Wipe 10cm x 10cm (lint-free)
Isopropyl alcohol - IPA (>= 98%)
Syringes (60 ml)
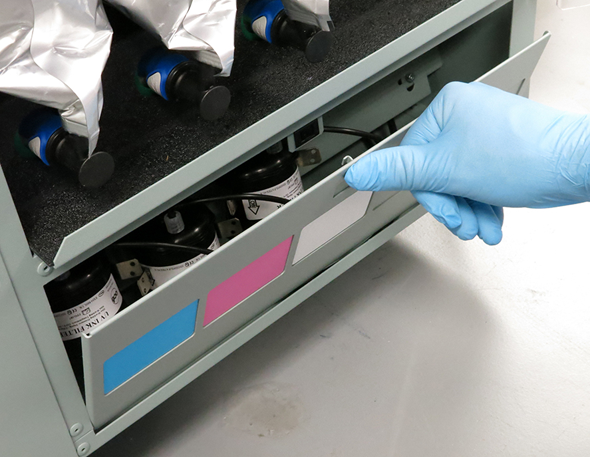 Open the Ink Filter Enclosure Cover
If you want to reuse the syringe, start with the lighter ink colors first. Darker inks will stain the clear plastic wall of the syringe and make it difficult to see the ink as it comes in.
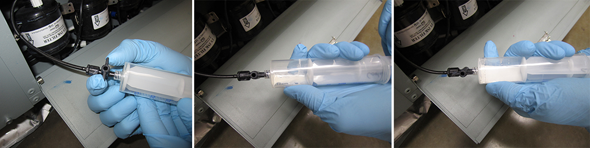
If there is excessive air, more than one syringe full of air may be extracted. In this case, close the stopcock before disconnecting the syringe and expelling the air. Open it again to continue.
Pull back on the syringe plunger in increments and wait for the pressure to equalize before pulling more to prevent over-pulling on the syringe. Note that the White ink channel may need slightly more pulling to overcome the pressure.
The same syringe can be used to bleed all the ink channels if they are done in succession. The syringe cannot be stored and reused as the ink chemistry will degrade the syringe. If only some of the ink channels require bleeding, discard the syringe immediately after finishing those channels. Do NOT reuse it on other ink channels at a later date.
Click the [Done] button of the task.
