
Each ink color has a filter that removes any particulate matter from the ink as it is pumped from the ink bag to the printheads. The ink filters are located in an enclosure below the ink bays with each filter positioned below its ink bag.
An ink filter must be replaced after 50 liters of ink have been consumed or the effects of a clogged filter appear. If the Nozzle Check print shows one color weaker than normal, this is an indication that the ink filter for the affected color is clogged and the filter must be replaced. If an ink filter becomes clogged, it will trap color pigment and affect the color strength of printed images. If you notice that an ink reservoir takes a long time to fill, check the Maintenance tab in the user interface for when the filter for that color of ink was last changed; it may be time to replace it. Make sure that the ink tubing from that filter is not kinked. It is important to change the filter on schedule and before these symptoms occur; damage to the ink system may result.
Ink filters contain air that must be released. If you don't bleed the filters you will see poor image quality. Air in the ink filter can affect the vacuum and result in dripping ink and deteriorated image quality as a result of nozzle dropout. Failure to bleed the ink filters can lead to an overflow of ink that will result in ink dripping from the carriage and you may need to place a service call. You will be notified by the printer Maintenance tab when it is necessary to change or bleed a filter.
Wear gloves when contact with ink or maintenance materials is possible. Gloves should always overlap sleeves. Follow the ink related Safety Data Sheets (SDS) guidelines carefully in order to ensure maximum safety. For example use Ansell Microflex 93-260 gloves, which offer a protection against UV inks and flush up to one hour. Pollution with other chemicals can shorten the protection time against UV inks and flush.
Wear eye protection as prescribed in this document when performing a task or action in this area.
The ink system is under pressure and so it is possible that some ink may spray out when opening the bleed tube valve. Keep the cloth wrapped around the end of the bleed tube so that any ink spray is contained.
Safety glasses with side shields
Gloves (for example: Ansell Microflex 93-260)
Cloth-Poly Wipe 10cm x 10cm (lint-free)
Isopropyl alcohol - IPA (>= 98%)
Ink filters
Use the color codes on the ink filter enclosure door to identify the correct ink bag and filter.
 Remove Ink bag coupler
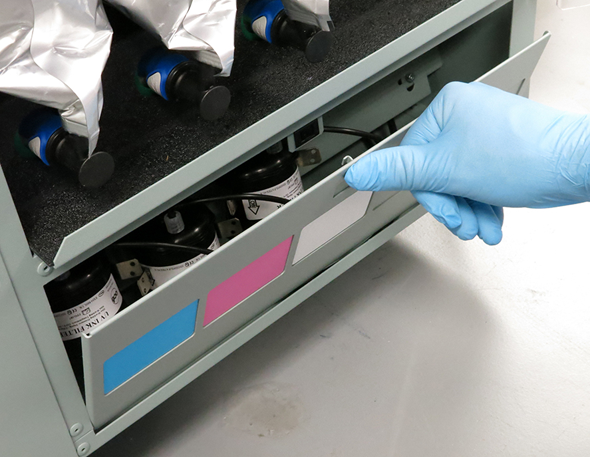 Remove Ink Filter Enclosure Cover
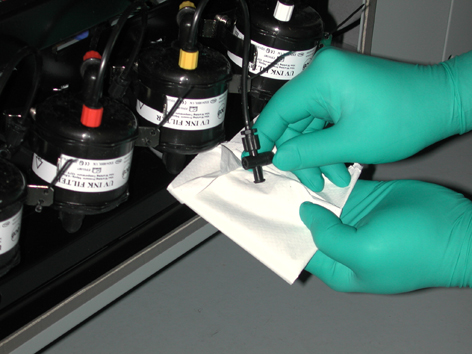 Ink bleed tube valve
The ink system is under pressure and so it is possible that some ink may spray out when opening the bleed tube valve. Keep the cloth wrapped around the end of the bleed tube so that any ink spray is contained.
Wipe off any spilled ink.
Click the [Done] button of the task.
