
When you are unsure about the density of colors on your printed output, you can optimize the printhead performance. Perform a printhead calibration when you want to optimize colors.
When you enable [Automatic nozzle optimization] the printer will create a test print on which each individual nozzle will print a pattern. Failing nozzles are compensated by other nozzles for all print jobs, which results in an optimum print quality.
You can only perform printhead calibration when you print without winding. For more information, see Print without winding.
You have to use a media width that is larger than 1270 mm (50 inch).
You have to use a media type that can be used for printing without winding.
You have to use a smooth, white, opaque, non-reflective media for the printhead calibration of one of the following categories:
Heavy paper > 200 gsm (54 lb bond)
Paper 120-200 gsm (32-54 lb bond)
Film
Polymeric & cast self-adhesive vinyl
Thick film > 200 um (0.0079 inch)
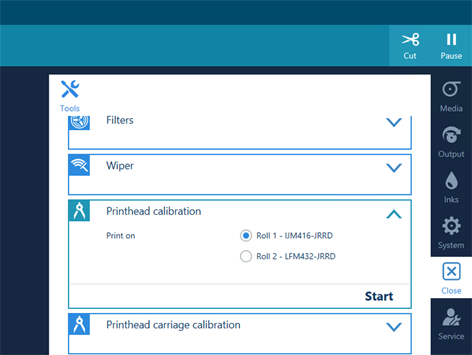
The printer performs the calibration.
The calibration can take quite some time, around 30 minutes. Wait until the printer is finished with the calibration. When the active job disappears and [Start] is no longer greyed out, the calibration is finished.
The calibration can be successful or it can fail.
When a message appears that the calibration has failed, perform printhead calibration again.
When the calibration fails again, perform automatic maintenance three times without automatic nozzle optimisation. For more information, see Start automatic maintenance. Perform printhead calibration again.
When the calibration is still not successful, contact your local Service representative.