Loading

Vacuum the chiller

Introduction

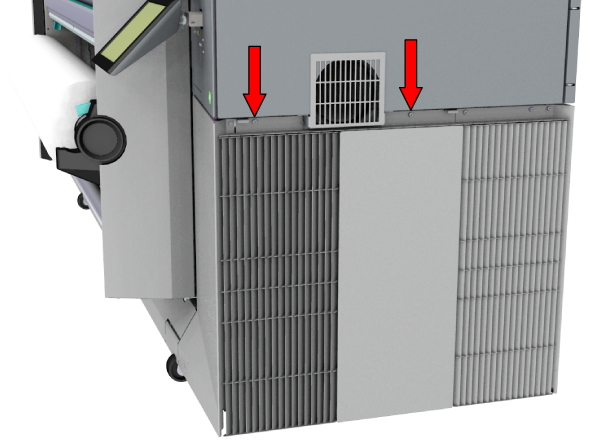
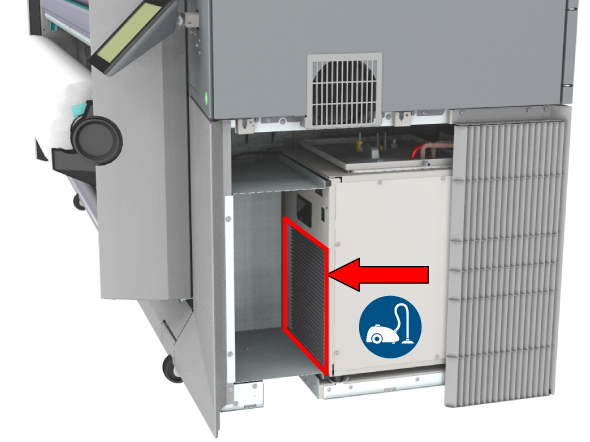
It is advised to vacuum the chiller every month to keep the printer in the best condition. Vacuuming the chiller is part of periodic maintenance so the operator panel gives a warning when you should vacuum the chiller. Always check the fluid level when you vacuum the chiller.

Before you begin

Use Colorado 1650 prescribed:

  • Screwdriver (Torx-25)

  • Vacuum cleaner with a brush head

This maintenance action is explained in a separate maintenance procedure video, click here to visit.

Procedure

  1. Go to the chiller side and locate the cover under the fan.
  2. Unscrew the left and right screws on top of the cover with the Torx-25.
  3. Lift the cover a little up and towards you (1), then lift it up fully and take it out (2).
  4. Vacuum the condenser surface on the left side of the chiller, as indicated. Make sure you remove all the collected dust.
    CAUTION

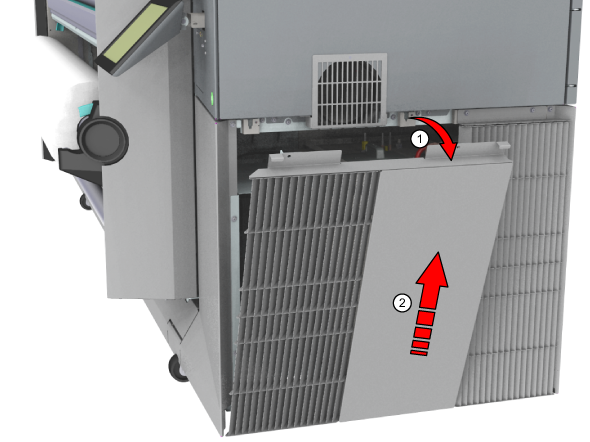
    Vacuum the surface with care, make sure you do not damage the condenser surface.

  5. Place the cover back into position.
    IMPORTANT

    Keep the area next to the chiller free. Do not store any items there, as it can result in insufficient cooling and damage to the machine.

  6. Fasten the left and right screws on top of the cover.
  7. When you vacuumed the chiller as part of periodic maintenance, on the operator panel tap on [Completed] to end the maintenance action.