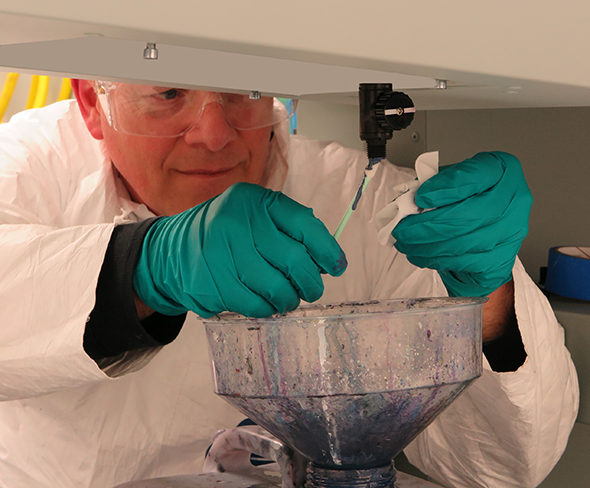
There are two waste trays. The Purge Waste Tray is located under the Maintenance station. It catches ink purged from either Manual maintenance or Automated printhead maintenance. The Spit Waste Tray is located below the ink spit catcher. It accumulates waste ink from printhead spitting.
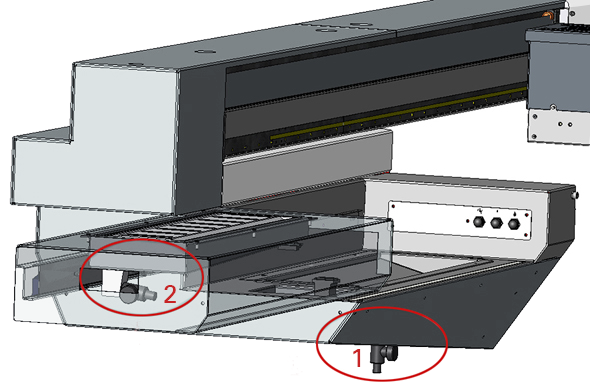 1 = Purge Waste Tray 2 = Spit Waste Tray
Empty both waste trays weekly.
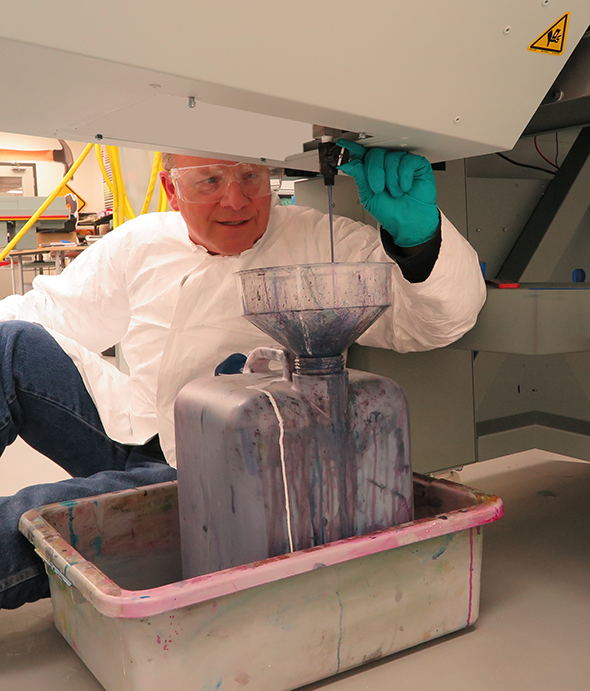
Both ink waste trays contain uncured ink. For safety reasons, it is necessary to wear nitrile gloves, a lab coat and safety glasses with side shields to protect users from contacting the ink. UV-curable inks contain chemicals which can lead to sensitization with prolonged or repeated exposure to skin. These chemicals inside the UV ink can begin to penetrate the gloves in less than 10 minutes. Since they have no pigment, exposure is not obvious. Therefore, Océ recommends that only approved nitrile gloves are used for a maximum of 10 minutes after being contaminated with ink and never reused. Damaged gloves should be changed immediately (see the Maintenance Guidelines section and Safety chapter for more details on the recommended nitrile gloves). .
Although the carriage is oriented so that the nozzles spit into the slots in the spit catcher, some ink will find its way onto the flat surfaces. Open the maintenance drawer to check the surface of the spit catcher daily. If you see any ink wipe it up with a clean cloth or paper towel.
Foam Tipped Swab or Cloth-Poly Wipe
An empty semi-transparent 1.0 liter plastic container for the Spit Waste tray
An empty semi-transparent 5 liter plastic container for the Purge Waste tray
Two plastic funnels: one small and one large (see photos)
A plastic basin that can hold both containers and also catch any ink spilled during draining
Tip:
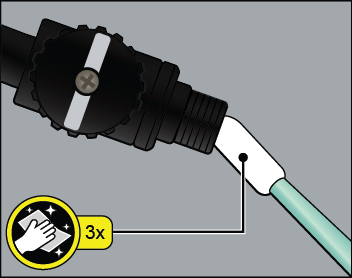
If ink has dried on the spigot from previous draining, it may be necessary to carefully use a significant amount of force to open the valve..