
Ink tends to accumulate on the bottom of the printhead nozzles and must be cleaned off on a regular basis. Clean printheads at least once a week and more often if needed.
To maintain print quality it is very important to swab the printheads once a week, or more frequently, if required. Failure to do this may result in plugged nozzles and poor image quality.
Safety glasses with side shields
Gloves (for example: Ansell Microflex 93-260)
Foam tipped swabs
Cloth-Poly Wipe 10cm x 10cm (lint-free)
Isopropyl alcohol - IPA (>= 98%)
Perform AMS before and after you swab the printheads. This ensures that the swabbing is more effective at cleaning the printheads as any debris in the ink is first sucked out of the nozzles and then any residual alcohol left on the nozzles after maintenance is also sucked away.
UV inks and flush liquids can be harmful if not properly handled. Follow always the Safety Data Sheets (SDS) guidelines carefully in order to ensure maximum safety.
Wear protective sleeves during printhead maintenance (for example DuPont Tychem 6000 F oversleeve model PS32LA).
Do NOT use flush liquid for daily printhead maintenance. It may contribute to increased ink/flush pollution levels on the printheads and the underside of the carriage.
Do NOT perform a purge before you swab the printheads.
Keep swabs clean prior to use. Do not dip a used swab in the Isopropyl alcohol (IPA) solution.
Do not let the seam on the foam contact the bottom of the printhead. This can damage the printhead. See figure below.
 Proper Swab Orientation
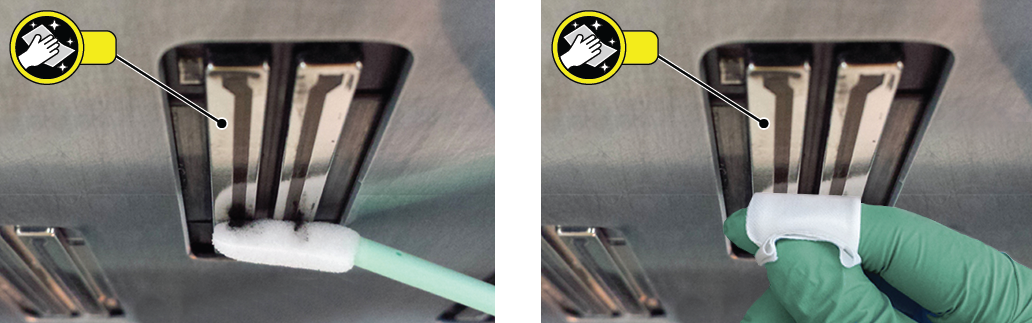
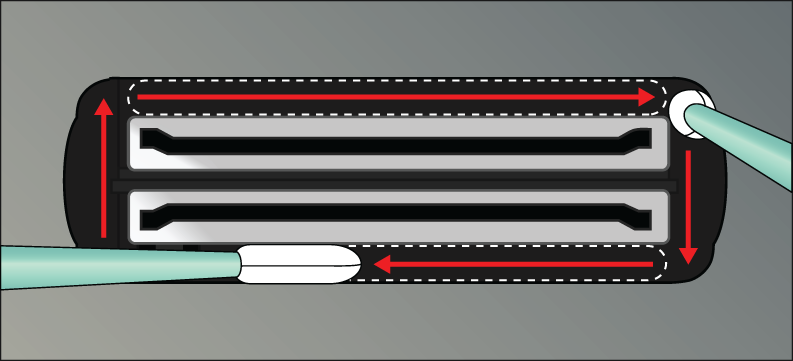
Take special care to remove ink from the gap between the metal plates of the printhead and carriage base plate. See area indicated by the white ellipses in the figure above.
A single wet swab is used to clean the surface of 1 double printhead. A dry swab is used to clean the opening around the printhead.
Never use the same swab on two different color channels.
Never "scrub" the printhead with a swab as this will drag debris into other nozzles.
Clean the Carriage Underside. See Clean the Carriage Underside.
Perform an Automatic Maintenance with the AMS. See Automatic Printhead Maintenance (AMS).
If too many nozzles are still clogged after cleaning the printheads, try the procedure: Manual Ink Purge and Printhead Swabbing.