
The printer uses two UV lamps, one on each side of the carriage, to cure the UV ink during printing. The bulbs in these UV lamps have a limited lifetime and must be replaced by the operator if they fail or when they can no longer cure the ink at maximum available power.
Although the minimum functional life of the UV lamp bulbs is 1000 hours, there are factors that can reduce the expected life. Operational practices, such as turning the lamps off and on frequently, using them at high intensity all of the time, or touching the bulbs with your fingers, can shorten their life. Canon recommends that both UV Lamp bulbs be replaced at the same time to ensure that the curing effect is balanced when printing in both directions. In the case of a premature failure or accidental breakage of one lamp, the operator can decide to replace only one lamp but should confirm image consistency after the replacement. Uneven curing can cause gloss banding in the printed image.
The Flatbed Settings icon on the printer interface allows the operator to control the power output of each UV lamp independently. To extend lamp life, use the lowest setting that provides adequate curing for a particular media. However, avoid handling media with insufficient curing as partially cured UV ink on your skin can cause irritation and sensitization.
The UV lamps and the carriage may be hot if the printer has been active. Avoid touching the lamp assembly until it is cool.
These UV lamp bulbs contain mercury, and if they are broken the vapor is toxic if inhaled. The lamp bulbs must be disposed of according to local environmental regulations.
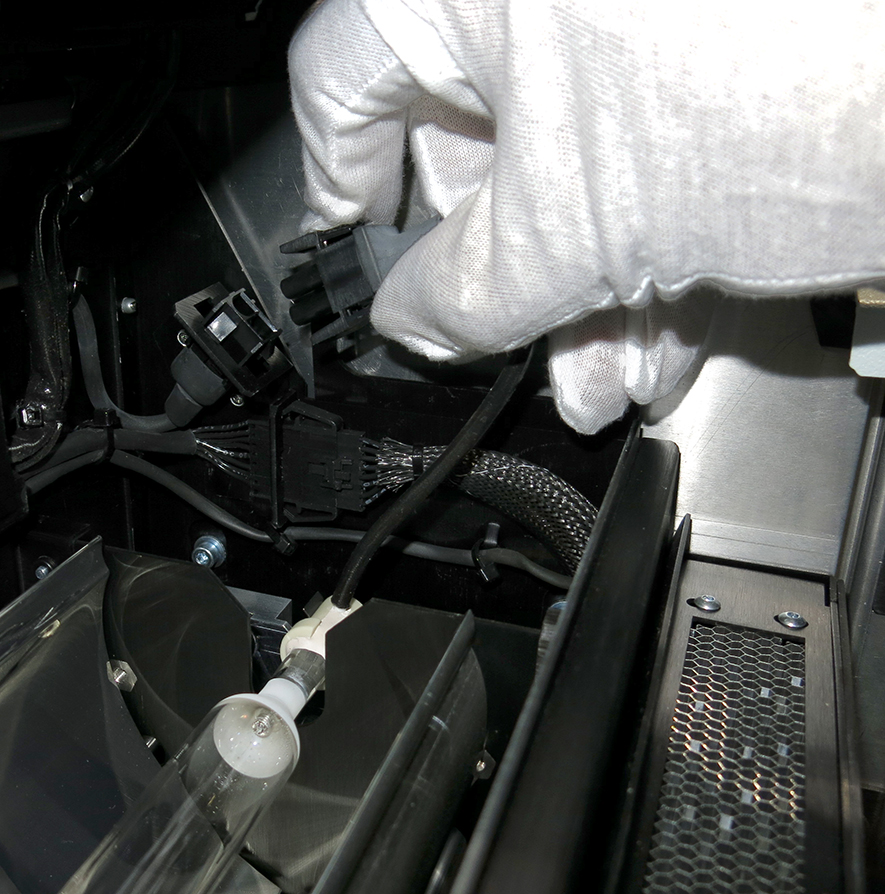
Wear cotton or nitrile gloves when handling UV lamp bulbs. Avoid bare skin contact with the UV lamp bulbs. When heated, compounds from the skin can form permanent etching on the surface of the UV bulb. A contaminated bulb may fail prematurely.
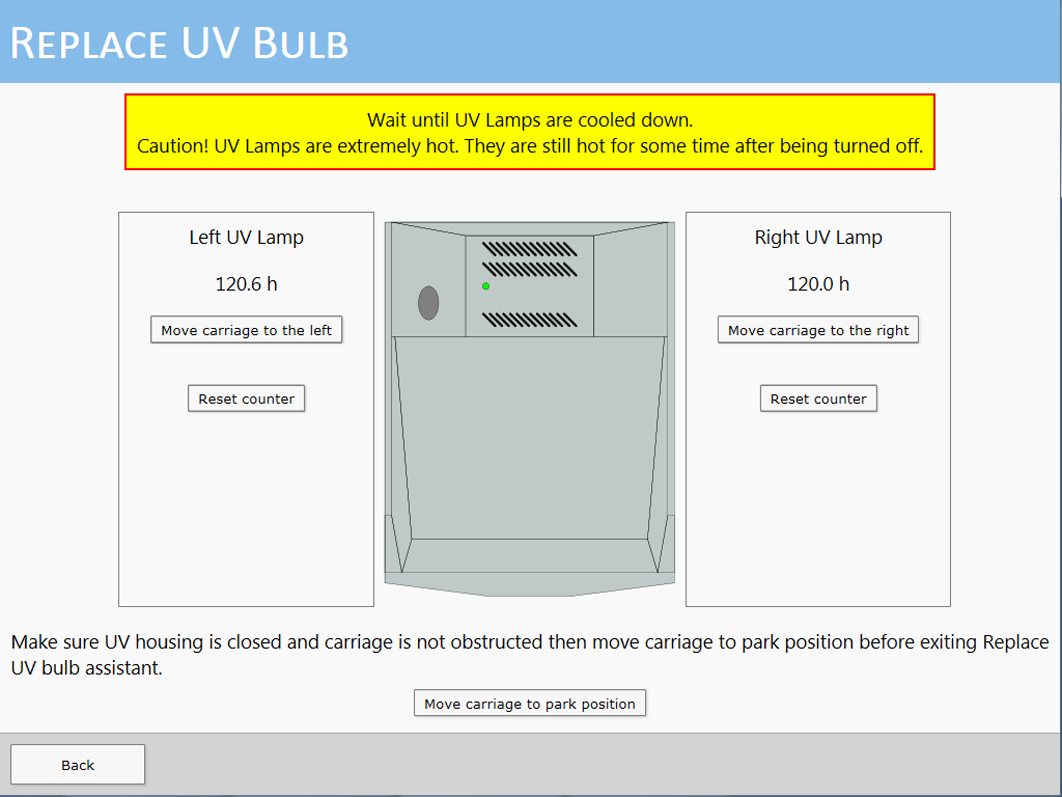
The housings for the two UV lamps are located on each side of the carriage. When you view the printer from the end where the Start button is located, the Right lamp is located on the Home side where the carriage parks when it is not printing. To replace bulbs select UV Bulb replacement from the Maintenance Tools menu in the Maintenance tab. Move the carriage for the UV bulb you want to change. Reset the counter after you change the bulb.

It is not necessary to shut the printer power off the while replacing the UV lamp bulbs. However, make sure you turn them off by de-selecting the lamp icon in the user interface before you start and allow a few minutes for the bulbs to cool down.


Note the orientation of the ceramic end in the retainer clip so that you can put the new lamp in the same spot. The clip clamps to the small diameter ceramic section at the end of the bulb.


Dispose of the old UV lamp bulbs according to local environmental regulations for products that contain mercury.