
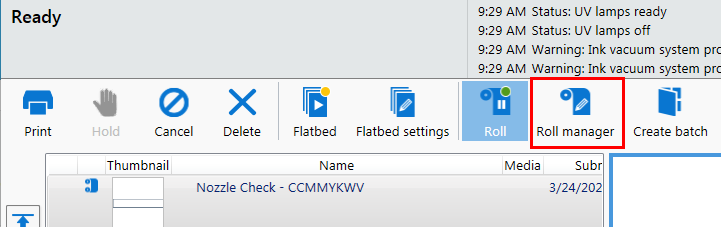
To print an RMO image, media must be loaded and the RMO initialized. Use the Print Job module and the Roll Media Manager to prepare and start the print job.
How to Print on Backlit Media
If your roll media is transparent or opaque and you are going to backlight the image and you want to increase the density, set Quality mode in ONYX Thrive. Then click on the Quality parameter in the Print Job menu and select Quality-Density before you initialize the job. This mode increases the density of ink for this image as it prints and therefore improves the appearance of backlit images.
The red Emergency stop buttons do NOT stop the media transport when you print on roll media (they only stop gantry and carriage movement). If you encounter a situation where the roll media runs continuously without operator input, the only recourse is to shut off the printer's AC power switch.
This allows you to check media parameters before the job actually prints. This is done in case the job was not given a Hold status when it was generated in ONYX Thrive.

If the media width entered is less than 1067 mm (3.5 ft), the standard nozzle check will not fit across the media.
Nozzle Check print: 617.3 x 73.7 (32.03 x 0.24 ft)
Any changed parameter in the dialogue window will be applied to the next roll media print job, even if the change was not saved. This allows temporary changes to the parameters without the need to save the media.
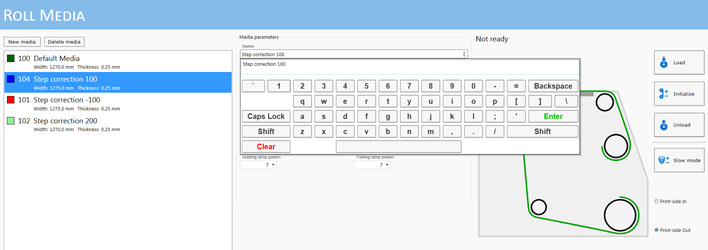
There is always at least one media in the list that is called Default Media. It cannot be deleted, but you can change its parameters if you want to use it. If you choose to delete it, the parameters will go back to its original values, but the item will still appear in the list.
Leave it at 50 unless you see light or dark lines of banding in the printed image (refer to Determine the Media Step Correction Factor for more details).
Any print jobs that are in the queue (not on hold) and marked as roll jobs will print. There is no explicit confirmation required to start a roll media print job. Any roll media jobs in the print queue will start to print immediately.