
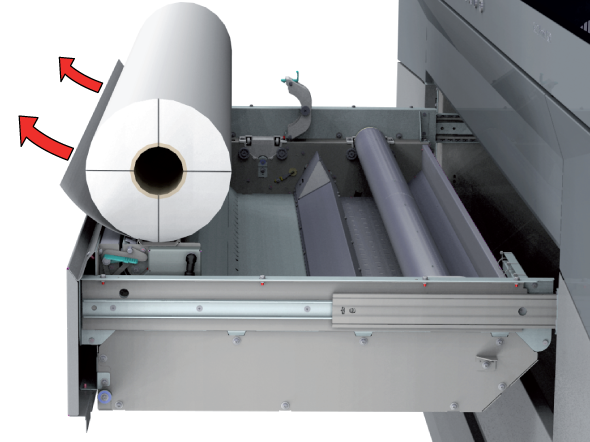
This topic describes how to load a media roll in position 1.
You can use an optional grip lock to insert the feed media shaft into the core of the new media roll. You can load a media roll without the optional grip lock. This procedure describes both situations.
Before you load a roll on the printer:
Make sure you have added a media profile with the correct media type via the RIP. For more information, see Configure media in the RIP.
Check the media width of your roll before loading. When your media width is not present in the list on the operator panel, you can type it in.
Put on gloves to avoid pollution of the paper by your fingerprints.
Watch your fingers when you handle the media roll.
Loading heavy media, 25 kg (55 lb) or more, has to be done by two people or with the help of external lifting tools.
Do not use dented or damaged media rolls to prevent damage to the printheads.
Only open the media drawer when the indicator light on the drawer is on. Do not open the drawer when the light is off, you can damage the machine.

With the optional grip lock:
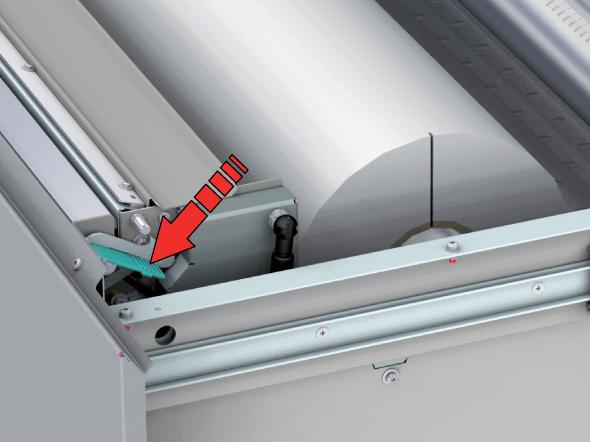
Pull (1) the handle of the locking mechanism towards you.
Place the grip lock (2) in the feed media shaft.
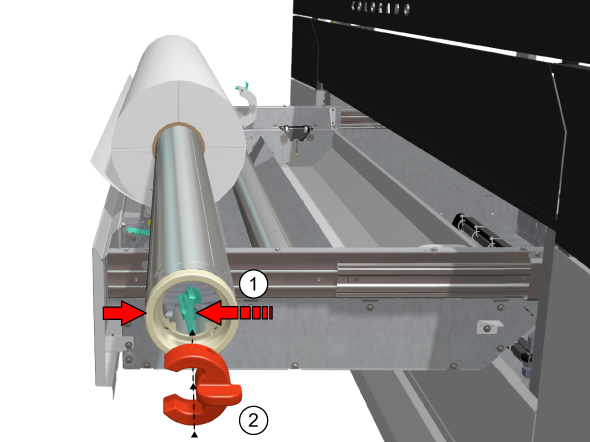
Slide (3) the media shaft into the side of the core of the new media roll.

Remove the grip lock.
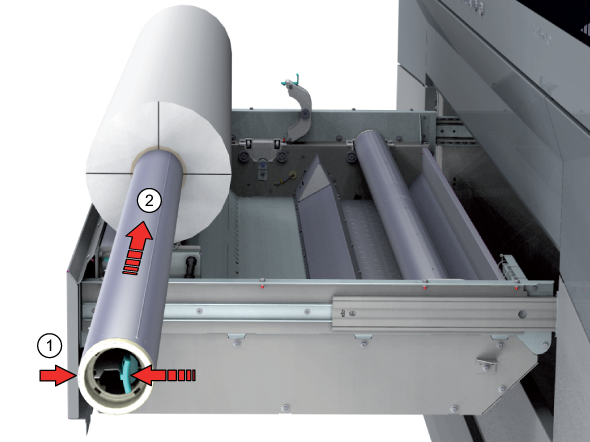
Without the optional grip lock:
Pull (1) the handle of the locking mechanism towards you.
Slide (2) the media shaft into the side of the core of the new media roll.

Place the media roll in the media drawer.

Make sure you close the clamp completely until you hear a click, otherwise the roll can come loose and can damage the machine.

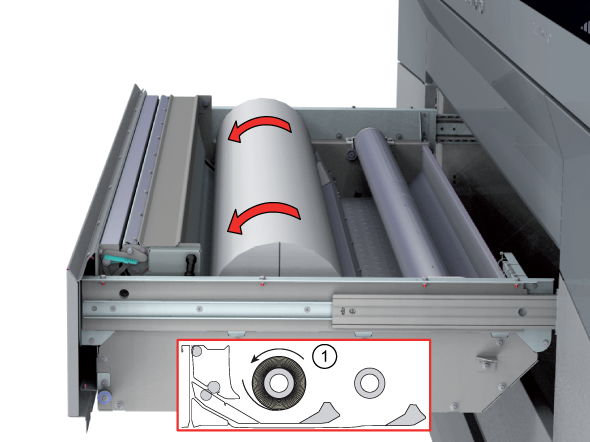
Make sure media is always rolled up evenly on the core. Do not load media that is not rolled up evenly (telescoping) as it can damage the machine.

When the printer does not take the media (no beeping sound), you can feed the media manually. The manual feeding option is recommended for weak and difficult to load media, such as canvas and textiles.
For manual feeding:

Always use a straight cut leading edge for media types that are more difficult to transport (e.g. canvas).
Do not open the media drawer when the indicator light is off, you can damage the machine.

This setting persists as long as the media is assigned. When enabled, the system feeds the media to the output position. You can then open the top cover and guide the media. After you close the top cover, the media is transported to the clamp. Open the top cover and guide the media again. Printing starts after these actions have been completed.
For winding with a tension bar or with a locked tension bar the clean cut is neglected.
For the highest output quality, it is advised to always perform a media calibration when you load a new media type or a new media width. For more information, see Calibrate the media.