
Enable and configure remote assistance to give the service organization access to your system. The service technician is then able to operate your system and provide assistance remotely. Remote assistance is by default disabled and is limited to 172 hours.
You have to log in as System administrator to change some settings. For more information, see Log in as a System administrator.
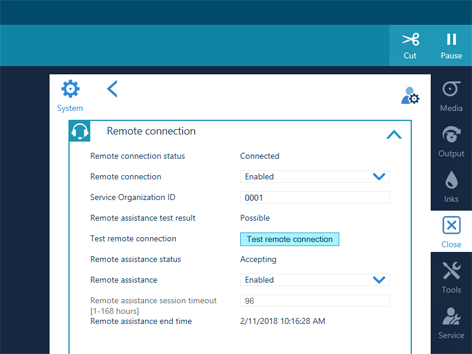
When you cannot connect remote assistance, contact your local Service representative.
Since a remote assistance session is established via a point to point connection, only this specific system and none of the other systems at your site can be reached.
Disable the remote connection when you want to terminate the connection with the service organization. Then you are always in control.