Introduction
When you see your print is polluted with a clear ink stamp coming from the guide plate, you must clean the guide plate and replace the foams and roller assy.
Video:
 Replace the winder foams and the roller assy.
Before you begin
Use Colorado 1630 prescribed:
 CAUTION
Procedure
-
Make sure the printer is not printing and the guide plate is in open position.
-
Remove the media before you replace the foams and roller assy. For more information, see
Remove media from the paper path
-
Put on the Colorado 1630 approved gloves.
-
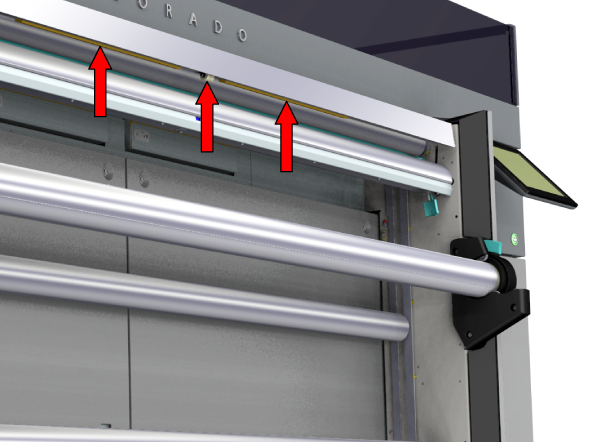
Go to the media output side and locate the guide plate with the roller assy and foams.
-
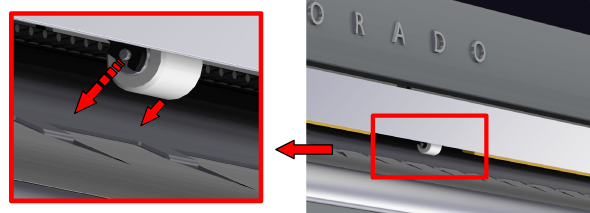
Locate the roller assy under the guide plate.
-
Pull to take out the roller.
-
Locate the foam left of the roller assy. A pin is placed at the left end of the foam.
-
Pull the pin and plug out with your fingers.
-
Locate the foam right of the roller assy. A pin is placed at the right end of the foam.
-
Pull the pin and plug out with your fingers.
-
Slide both foams towards the middle to remove them.
-
Dispose the roller assy, foams, pins and plugs as chemical waste according to local regulations.
-
Take a lint free cloth and clean any residue ink left on the guide plate.
If necessary, dampen the cloth with the cleaning liquid to remove any remaining ink.
 IMPORTANT
Use the prescribed cleaning liquid. Do not use any other cleaners.
-
Dispose the gloves and cloth as chemical waste according to local regulations.
-
Take the new foams and slide them in place.
-
On the left end, push in a new plug and push in a new pin.
-
On the right end, push in a new plug and push in a new pin.
-
Push and click a new roller assy in place.