
All the cloud applications use the devices set up in this workspace.
You first need to add devices to this list and mark them as [Registered].
Once a device in the list is selected, depending on its status, certain operations become available.
Use the icons on the selected row to change the device state:
Delete the device: ![]()
This operation will remove the device from the list.
Applications and other users will no longer be able to access this device.
Register the device: ![]() .
.
This operation will register the device for use by the users of the current tenant.
This operation is only available for [Unregistered] devices.
Unregister the device: ![]() .
.
This operation will keep the device in the list, but applications and other users will no longer be able to access this device.
This operation is only available for [Registered] devices.
Take over the device from another tenant: ![]() .
.
This operation will register the device for use by the users of the current tenant.
This operation is only available for devices that are already [Registered] by another tenant.
Navigate to [Devices] .
Click [Discover devices].
Type in a range of IP addresses from the local network.
If you want to add a specific, singular IP, fill in both fields with the same address.
You cannot change the network mask, so only the devices connected to the same network will be visible.

Click [Search].
Click [OK] to save the new device.
Click ![]() to register the device in your tenant.
to register the device in your tenant.
If a device has no serial number or if it cannot be read automatically, the Cloud Proxy will prompt you to type it in. Normally, the serial number should be available in device's menus.
Click [Test device connection] to make sure the device is actually reachable by the applications in PRISMA Home.
Remember to check the [Connection status]:
[Success]: the device can be accessed.
[Error]: the device is turned off or otherwise unreachable.
Most of the time, you will receive a reason for the status.
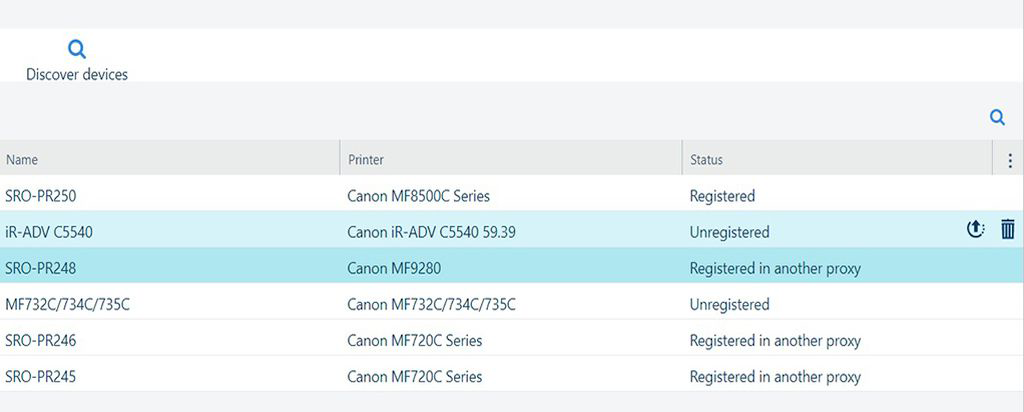
For each device, you are presented with the following information:
|
Column header |
Description |
|---|---|
|
[Name] |
Name of the device. |
|
[Device description] |
A full description of the device. |
|
[Printer] |
Device model. |
|
[Print server] |
Print server. The following statuses are possible:
|
|
[Serial Number] |
The serial number of the device. If this field is empty, the device cannot be registered. |
|
[Version] |
Software version installed on the device. |
|
[Status] |
Once added to the list, a device can have one of the following states:
|
|
[IP address] |
The network IP address of the device. |
|
[Hostname] |
The network host name, if available. |
|
[Connection status] Not displayed in the table. Only appears in the details panel, for [Registered] devices. |
Shows the [Test device connection] button and the last [Connection status] returned. |
All the information in the list of devices is taken directly from the device and cannot be changed.
One exception: you can change the [Name] for a device and replace it with something easier to remember.
Click [Save] after changing the name.