Loading

Load a media roll (position 1)

Introduction

You can load multiple media rolls on your printer for optimal productivity.

Before you begin

Before you load a roll on the printer:

  • Make sure you have added a media profile with the correct media type via the RIP. For more information, see Configure media in the RIP.

  • Check the media width of your roll before loading. When your media width is not present in the list on the operator panel, you can type it in.

  • Put on gloves to avoid pollution of the paper by your fingerprints.

CAUTION
  • Watch your fingers when you handle the media roll.

  • Loading heavy media, 25 kg or more, has to be done by two people or with the help of external lifting tools.

IMPORTANT
  • Do not use dented or damaged media rolls to prevent damage to the printheads.

  • Only open the media drawer when the indicator light on the drawer is on. Do not open the drawer when the light is off, you can damage the machine.
Procedure

  1. Pull firmly to open the media drawer.
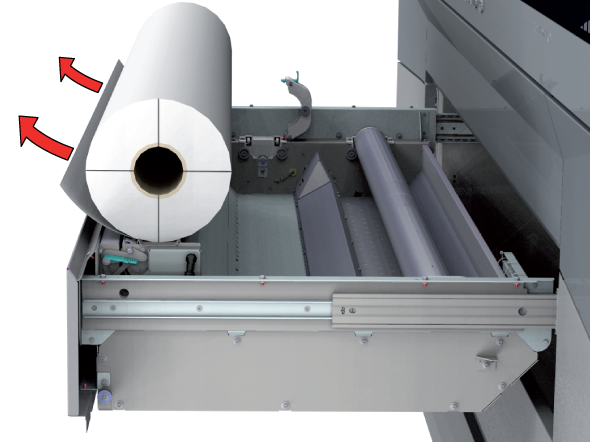
  2. Place the new media roll, with the media flap on the bottom and towards you, on the roll loading station.
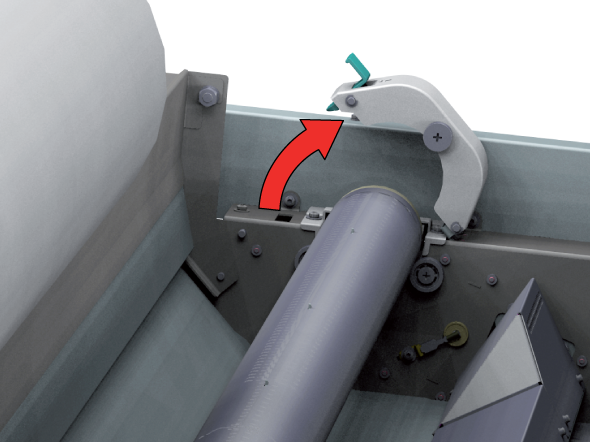
  3. Pull the lever and open the clamp.
  4. Take the feed media shaft out of the drawer.
  5. Pull (1) the handle of the locking mechanism towards you.

    Slide (2) the media shaft into the side of the core of the new media roll.
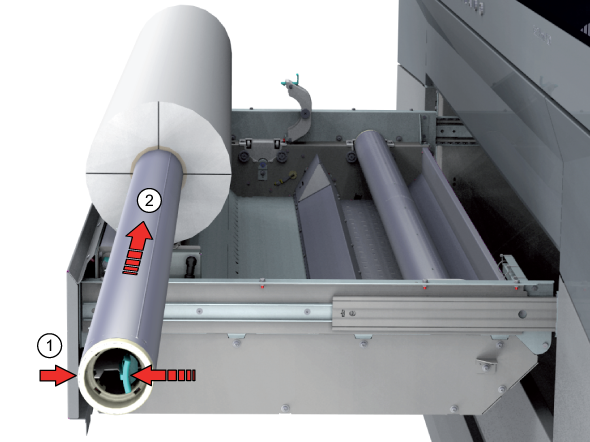
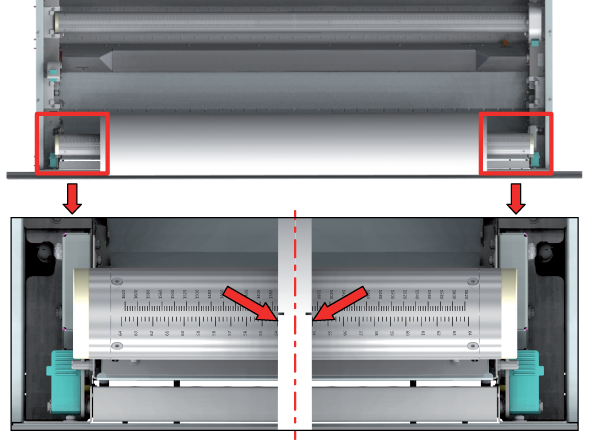
  6. Accurately align the roll on the media shaft. Place it on the corresponding media size with the help of the ruler. Check on the left and right side of the roll if both are aligned on the same size.
  7. Release the handle of the locking mechanism.
  8. Remove the tapes from the new media roll, if present.

    Place the media roll in the media drawer.
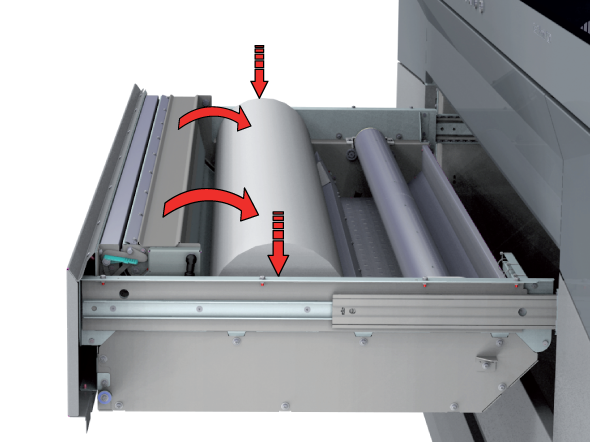
  9. Close the clamp firmly.
    IMPORTANT

    Make sure you close the clamp completely until you hear a click, otherwise the roll can come loose and can damage the machine.
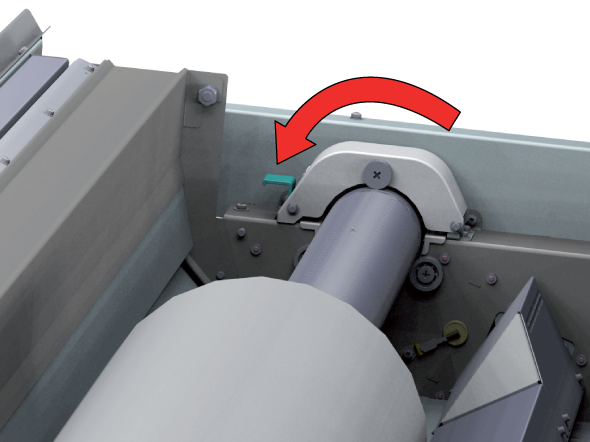
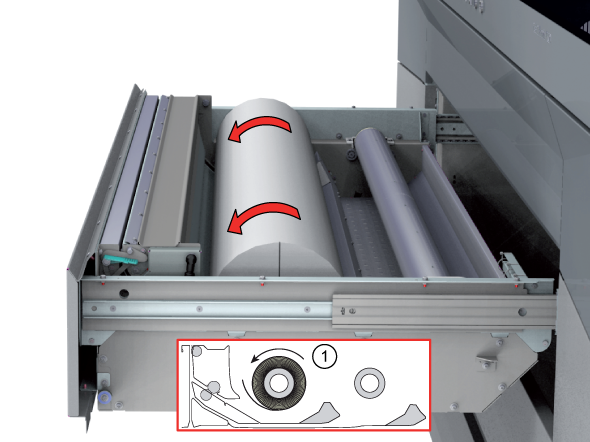
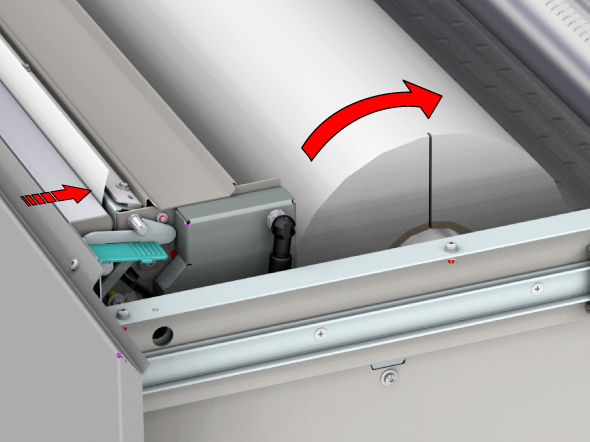
  10. Use both hands to turn the media roll backwards (1) until the media flap has passed the metal paper guide.
  11. Use both hands to move the media forward and slide it under the metal paper guide (2) until the media is transported automatically. You will hear a beeping sound when the media is correctly fed and loaded.
    IMPORTANT

    Make sure media is always rolled up evenly on the core. Do not load media that is not rolled up evenly (telescoping) as it can damage the machine.
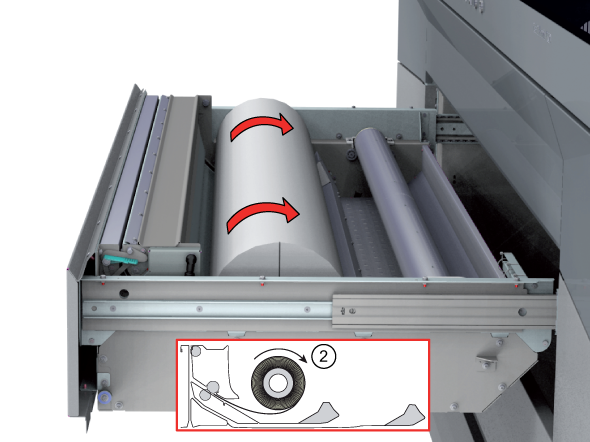
    When the printer does not take the media (no beeping sound), you can feed the media manually. The manual feeding option is recommended for weak and difficult to load media, such as canvas and textiles.

    For manual feeding:
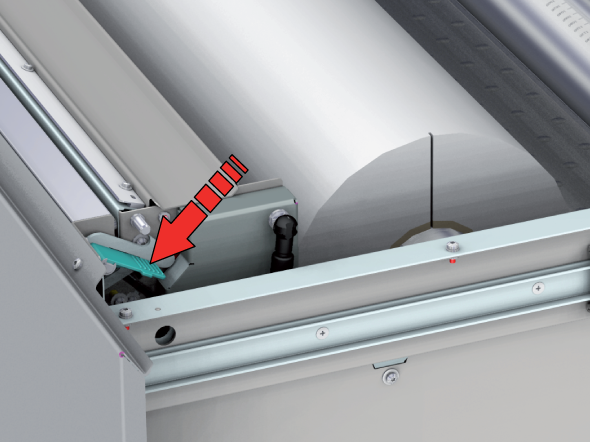
    1. Push the handles on the left and right side of the loading station to open the media feed.
    2. Use both hands to move the media forward and slide the media under the metal paper guide until you see it coming out on top.
    3. Close the media feed.
    4. If necessary, you can manually cut the leading edge of the media when it has not been cut straight. Take a knife and cut the media in the cutting guide.
      NOTE

      Always use a straight cut leading edge for media types that are more difficult to transport (e.g. canvas).

  12. Close the media drawer carefully. The operator panel displays the message that new media is detected.
    IMPORTANT

    Do not open the media drawer when the indicator light is off, you can damage the machine.
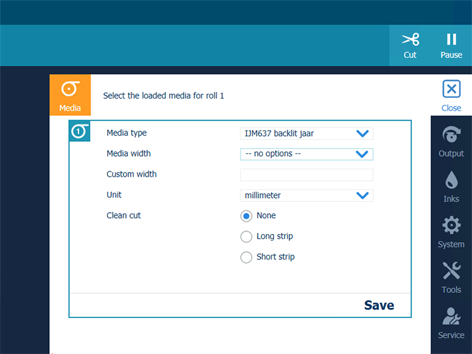
  13. On the operator panel, select the correct media type and fill in the media width.
  14. Select if and what type of clean cut you want the printer to make, when you use the media for the first time.

    For winding with a tension bar or with a locked tension bar the clean cut is neglected.

  15. Tap on [Save].
    NOTE

    For the highest output quality, it is advised to always perform a media calibration when you load a new media type or a new media width. For more information, see Calibrate the media.