
You can submit and print a job via the RIP.
Make sure you have one of the supported RIP applications installed and connected to the printer.
For more information, see Configure media in the RIP or check the website of your RIP supplier for documentation.
When you have problems submitting your job, check if the physical width in the RIP corresponds with the width of the media roll.
Take into account the margin used for [Automatic advance correction] (_AAC_NONE, _AAC_NORMAL, _AAC_ENHANCED). You can check the value that is used for the [Automatic advance correction] setting in the RIP
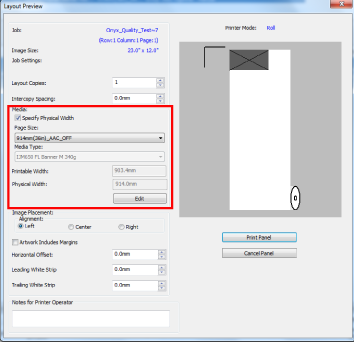
In ONYX check the box in front of [Specify Physical Width] when you want to set the page size and physical width manually.
In Caldera you can choose to let the printer or the RIP do the roll selection. Click on the wrench icon and under [Roll selection], select [Printer] or [RIP].

If requested, tape the media for winding. For more information, see Print and wind without a tension bar, Print and wind with a tension bar, or Print and wind with a locked tension bar.