Introduction
In the custom preset section of the [Copy job defaults] in WebTools Express you can enable the stamp functionality. Under the [Stamping] tab you can create your own predefined stamp.
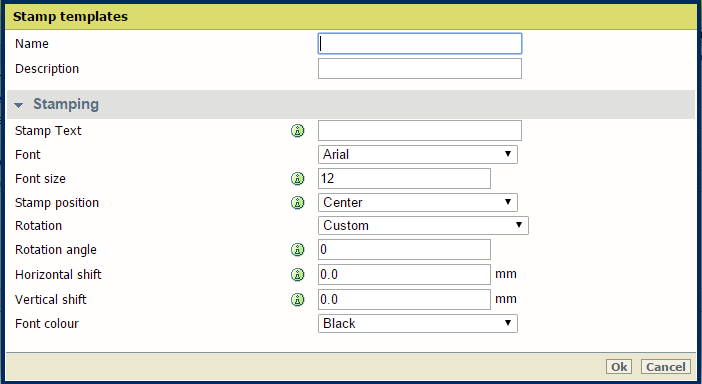
Procedure
-
Open the [Preferences] - [Stamping] tab.
-
Click on [Create new] in the upper right hand corner .
-
Enter a [Name] recognisable for the user.
-
Enter a [Description] of the stamp.
-
Enter the [Stamp text] that will appear on the stamp. If you insert text, also choose the [Font] and the [Font size].
-
Choose the [Stamp position] on the original.
-
Choose the [Rotation] and the [Rotation angle], when you want to turn the stamp on the original.
-
Enter the [Horizontal shift] and [Vertical shift] in mm, to specify the position you have chosen at step 5.
-
Select the [Font colour].
 NOTE
NOTE
Most settings are optional, so you do not have to enter all settings if it is not necessary.
Results
Your stamp is created. You can now enable your stamp under [Preferences] - [Copy job defaults] - [Custom Image preset for copy] - [Stamping] to use it on the user panel.
For more information, see
Define the custom copy preset.