
The control panel will indicate when paper must be removed from the TTF.
When the control panel displays the message [Touch Next to unlock the door.], touch [Next].
Wait until the printer is turned off.
Put on the heat-resistant gloves.
Heat-resistant gloves
Socket wrench
New spiral cleaner
You must wear heat-resistant gloves.
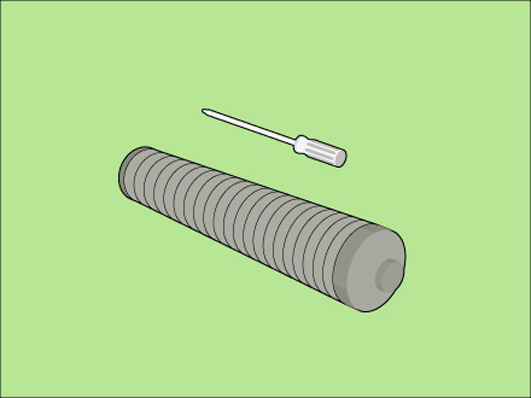 Required tools
You must wear the heat-resistant gloves when you remove paper from the TTF.
|
Step |
Action |
Illustration |
|---|---|---|
|
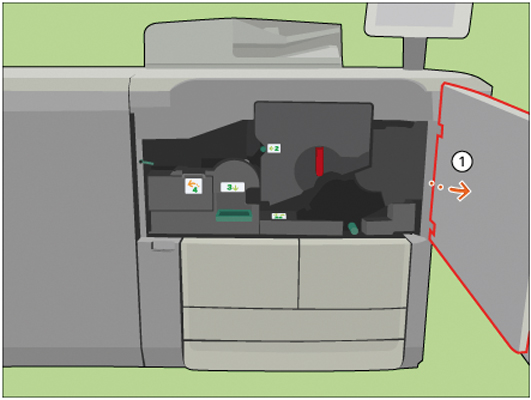
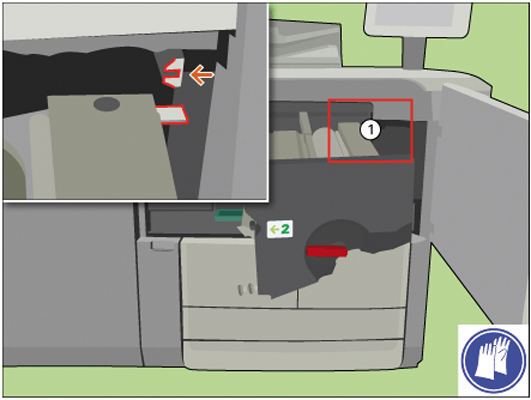
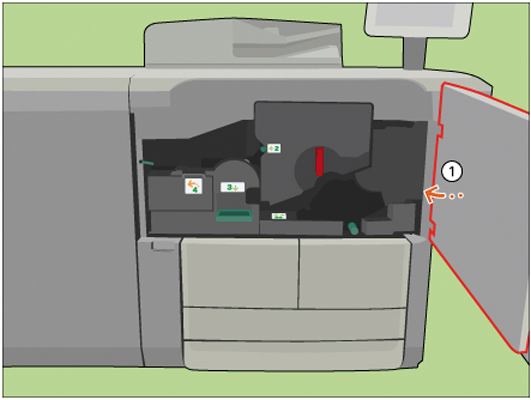
1 |
[Open the front door.] |
|
|
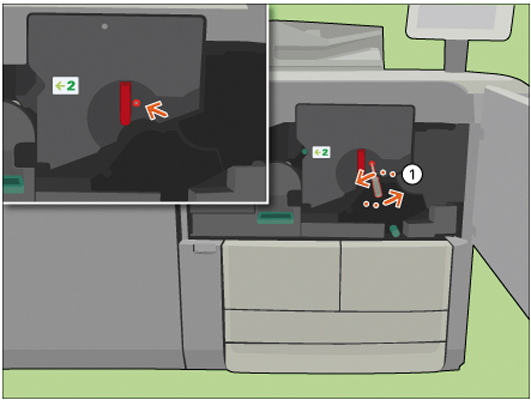
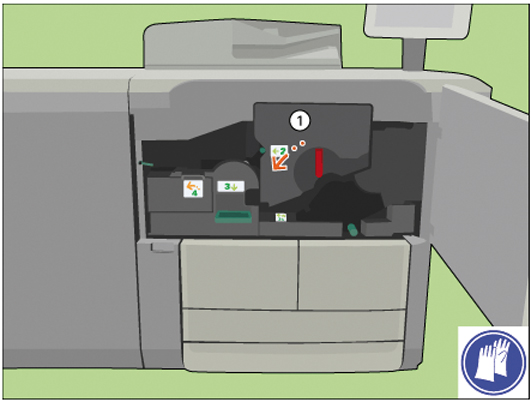
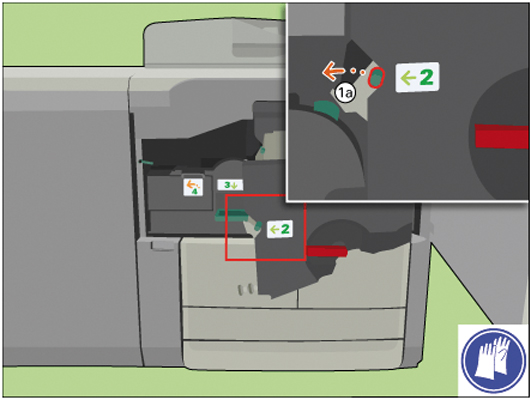
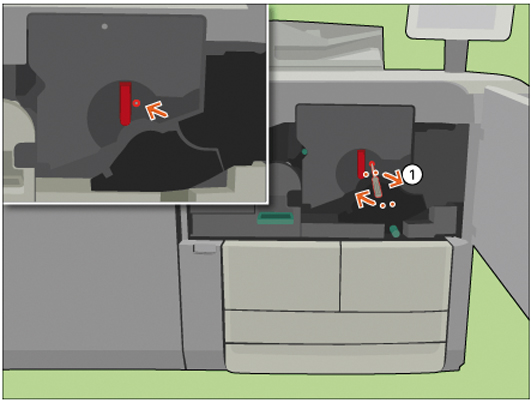
2 |
[Use the socket wrench to loosen the 2 fixation pens.] |
|
|
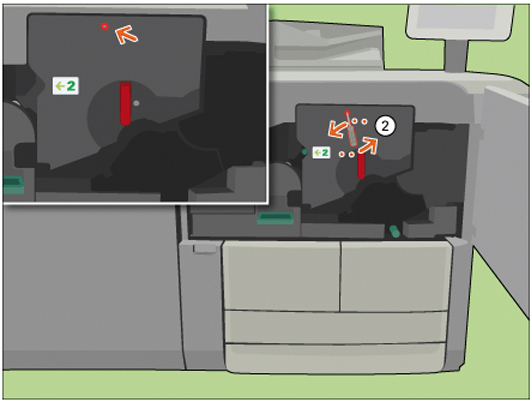
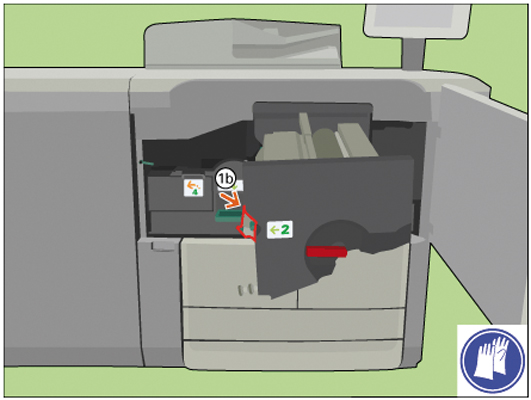
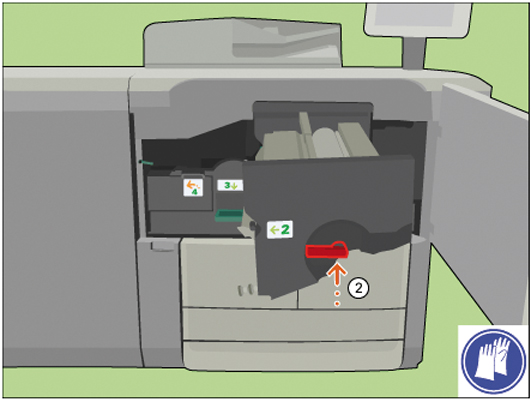
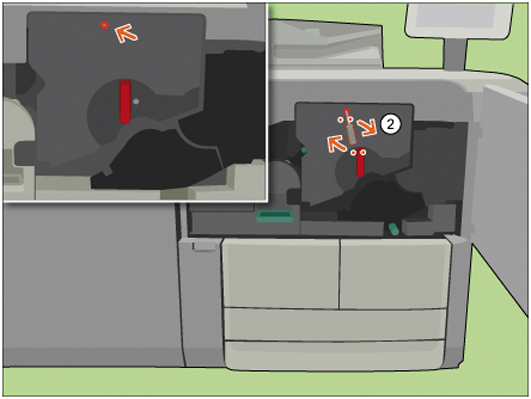
3 |
[Turn the red handle anticlockwise.] |
|
|
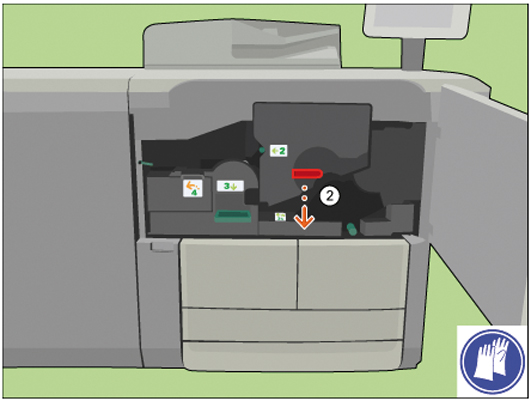
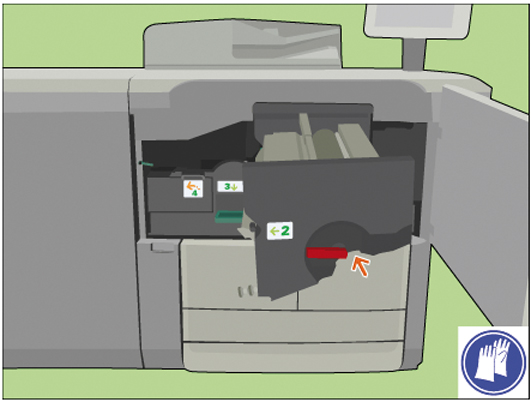
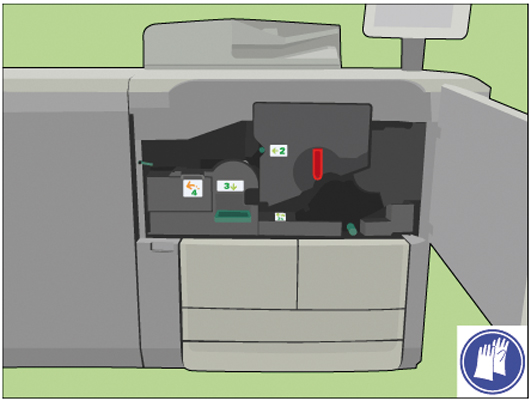
4 |
[Slide out the TTF unit from its frame.] |

|
|
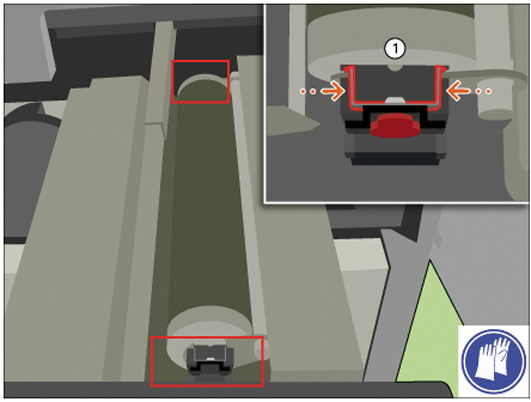
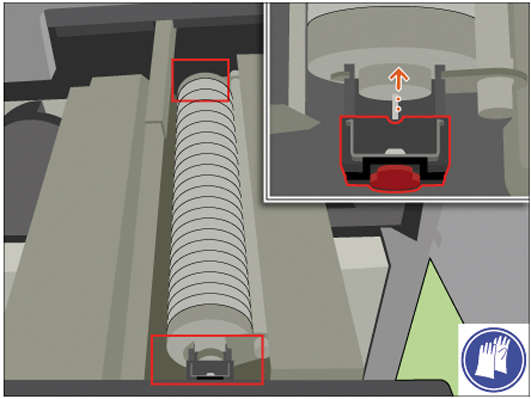
5 |
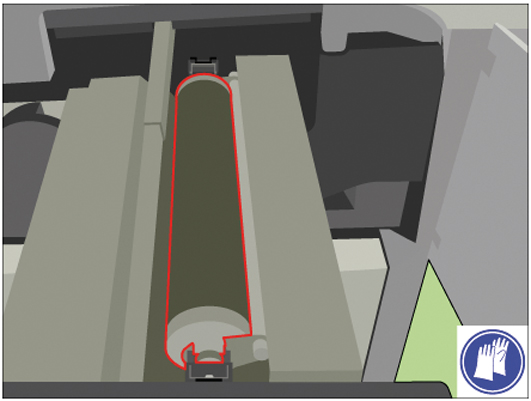
[Pinch both fixation springs.] |
|
|
6 |
[Slide the fixation caps from the cleaner ends.] |
|
|
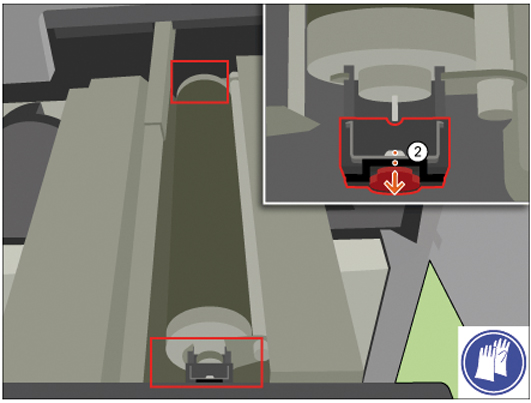
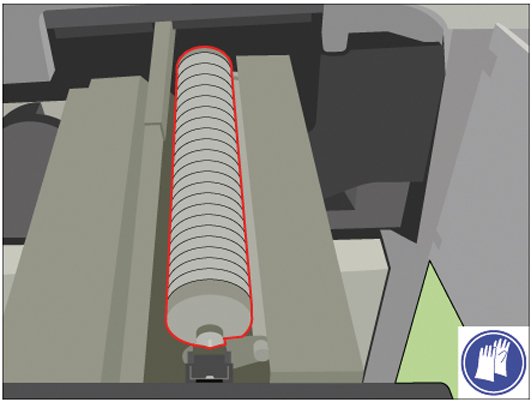
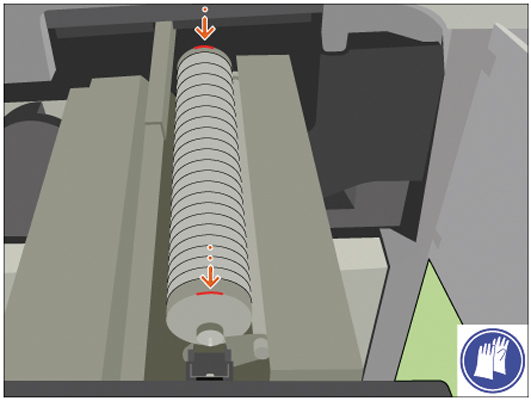
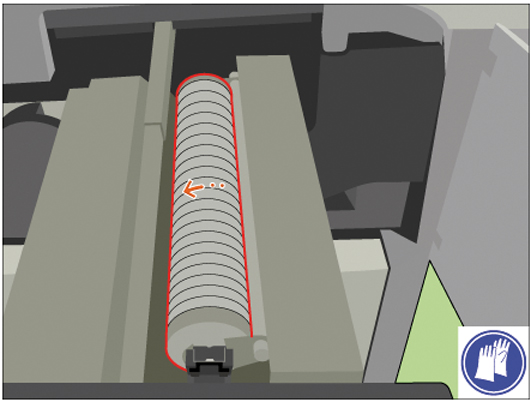
7 |
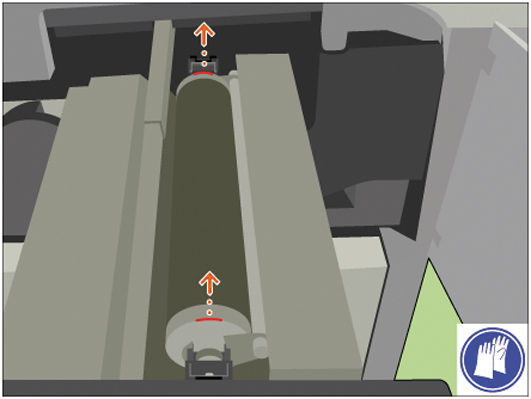
[Remove the spiral cleaner from the TTF.] [Place the spiral cleaner on the packaging of the new cleaner.] [When the spiral cleaner has cooled down, discard the cleaner into a common dustbin.] Or return the cleaner to your service organisation. |
|
|
8 |
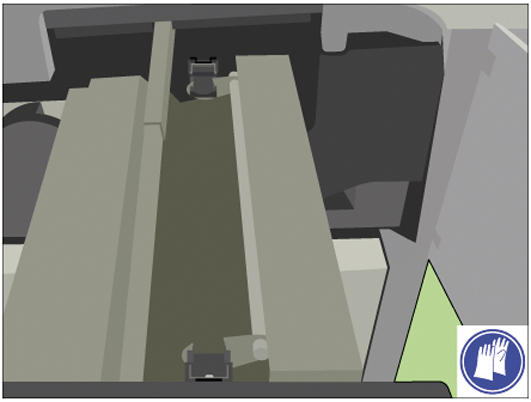
[Remove paper underneath the spiral cleaner.] |
|
|
9 |
[Use handle 2 to open the flap and check for paper.] |
|
|
10 |
[Remove sheets underneath the TTF.] |
|
|
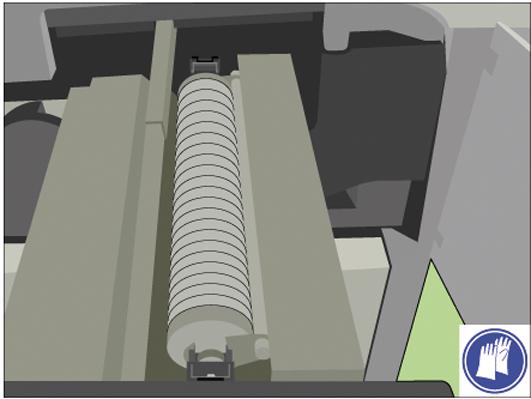
11 |
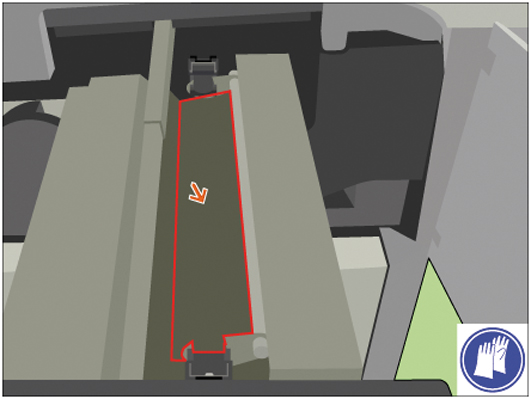
[Place the new spiral cleaner in the TTF.] |
|
|
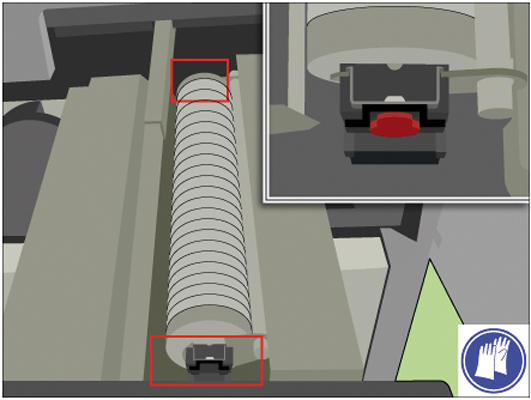
12 |
[Slide both fixation caps over the cleaner ends until the caps click in place.] |
|
|
13 |
Check if the spiral cleaner can rotate freely. |
|
|
14 |
[Align the TTF with the rail.] |
|
|
15 |
[Slide the TTF unit back.] |
|
|
16 |
[Turn the red handle clockwise.] |

|
|
17 |
[Use the socket wrench to tighten the 2 fixation pens.] |
|
|
18 |
[Close the front door.] |
|
|
19 |
Answer the question [Which spiral cleaner did you put back?] with [New] to confirm that you installed a new spiral cleaner. When you did not replace the spiral cleaner, touch [Existing]. |