
You can create your own FTP, SMB, WebDAV, external locations with Océ Express WebTools.
Make sure you enable [SMB] protocol.
Make sure you enable [FTP] under the [Configuration] - [Connectivity] tab.
Make sure the URL for [WebDAV] is not blocked.
For this procedure, you need to log in as a System Administrator.
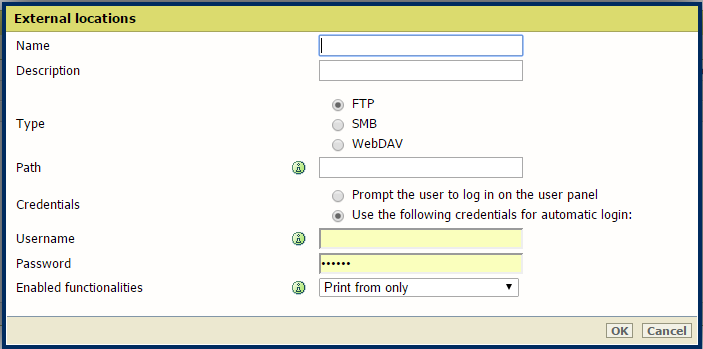
For [FTP], use the syntax: hostname[/path] (example: myhost/mydirectory/scantofile).
For [SMB], use the syntax: \\hostname\sharename[\path] (example: \\myhost\myshareddirectory\scantofile).
For [WebDAV] locations, use the full HTTP URL (for example: http://example.webdav.org:8080/repository/).
Select [Prompt the user to log in on the user panel] when you want the user to log in on the user panel.
Login will appear when the user tries to access the external location on the user panel.
Select [Use the following credentials for automatic login:] when you want to configure the credentials here.
The user is not requested to log in on the user panel when he tries to access the external location.
The [Username] gives access to the external location. The user must at least have read and write permissions for the external location. For SMB destinations the format must be as follows: Local user name: “IPaddress\username” or “hostname\username”. Domain user name: “domain\username”.
Enter the [Password] that belongs to the username.
The system will validate the external location and give an error message if the validation fails.
In case of an error, you can click "Save" to save the external location with the error or click "Change" to change the entries.
The external location can be used via the user panel and in Océ Express WebTools.