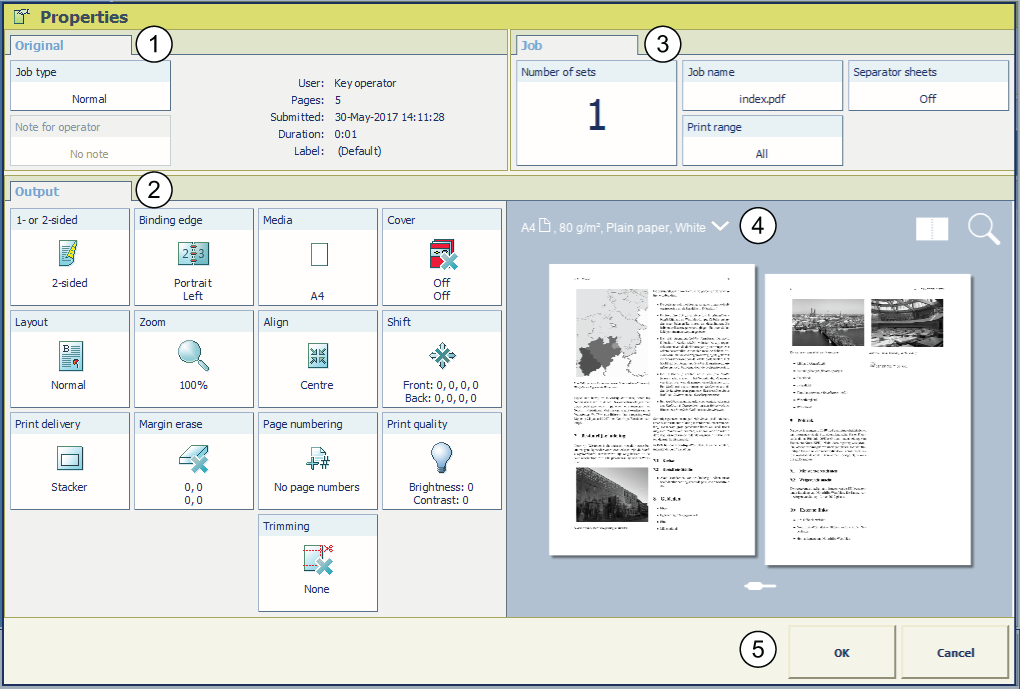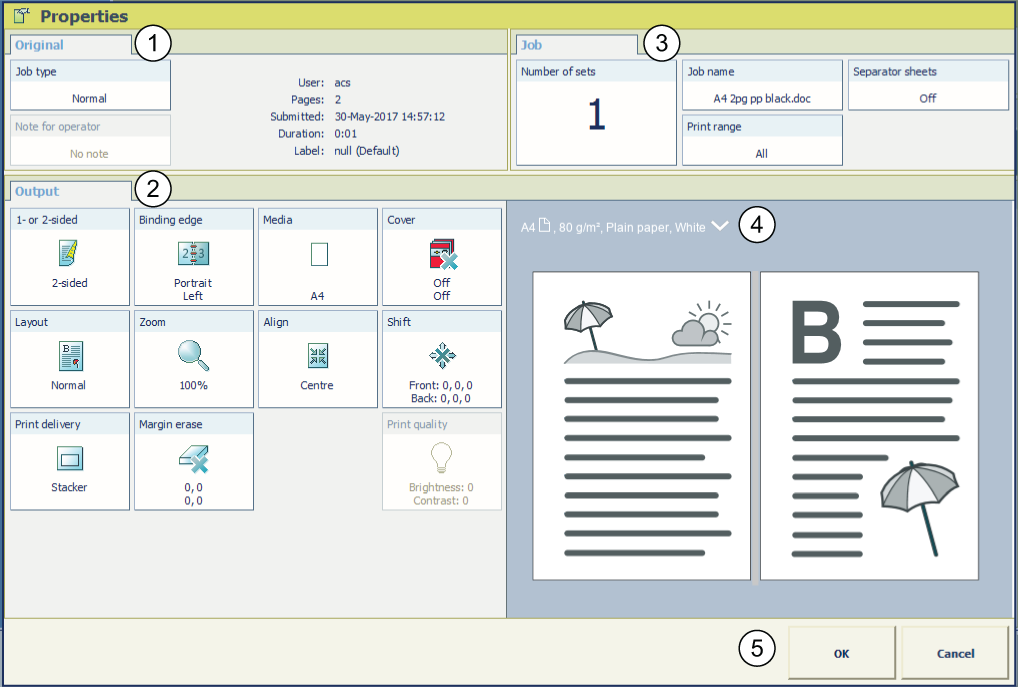

When you select a job in a DocBox and touch [Edit], the current settings of the selected job are displayed. Below, the available settings are described.
Depending on the type of job you want to edit some settings cannot be changed. When a setting cannot be changed, the setting is greyed out.
For PDF print jobs a realistic preview is displayed in the job properties. For other jobs a general preview is displayed indicating most of the settings.

View the result of the job and imposition settings in the sheet view
 .
.
Touch the
 icon and browse the document.
View how the document will look after printing in the document view
 .
.
Use the zoom function
 to view specific details.

|
Setting |
Values |
Description |
|---|---|---|
|
[1- or 2-sided] |

[1-sided] |
The output contains an image on one side. |

[2-sided] |
The output contains an image on both sides. |
|
Setting |
Values |
Description |
|---|---|---|
|
[Binding edge] [Portrait] |
[Left] |
|
|
[Right] |
|
|
|
[Top, head to toe] |
|
|
|
[Top, head to head] |
|
|
|
[Bottom] |
|
|
|
[Binding edge] [Landscape] |
[Left] |
|
|
[Right] |
|
|
|
[Top, head to toe] |
|
|
|
[Top, head to head] |
|
|
|
[Bottom] |
|
|
Setting |
Values |
Description |
|---|---|---|

[Media] |
Names of the media in the media catalogue |
Here you can select the media for the job. The list displays all the media that are available in the media catalogue including the temporary media. The media catalogue is a list of media that you can define in the Settings Editor. You can only change to another media with the same size, for example from A4 blue to A4 green. |
|
Setting |
Values |
Description |
|---|---|---|
|
[Cover] |

[Front cover] |
Touch the button to toggle between [On] and [Off]. When [Front cover] is [On] than the [Media] setting below [Front cover] becomes enabled. |
|
[Media] |
When [Front cover] is [On], you can select a media from the media catalogue to use as front cover. |
|
|
[Print sides] |
When [Front cover] is [On], you can indicate which side of the front cover must be printed. You can select.
|
|

[Back cover] |
Touch the button to toggle between [On] and [Off]. When [Back cover] is [On] than the [Media] setting below [Back cover] becomes enabled. |
|
|
[Media] |
When [Back cover] is [On], you can select a media from the media catalogue to use as back cover. |
|
|
[Print sides] |
When [Back cover] is [On], you can indicate which side of the back cover must be printed. You can select:
|
|
Setting |
Values |
Description |
|---|---|---|
|
[Layout] |

[Multiple up] |
The machine prints 2, 4, 6, 9 or 16 consecutive images on 1 side of a sheet. By default, the system keeps the size of the originals. If necessary, use the Zoom function to reduce or enlarge the size of the images. |

[Imposition template] |
Use the [Imposition template] setting to fold a document: once to create a booklet, twice to create a quarto or three times to create an octavo. The sheets are printed in such a way that the pages of the folded document are presented in sequential order. |
|

[Same-up] |
The printer prints the same image 2, 4, 6, 9 or 16 times on 1 side of a sheet. By default, the system keeps the size of the originals. If necessary, use the Zoom function to reduce or enlarge the size of the images. [2, rotate]: The printer prints the same image w times on 1 side of a sheet. The images are rotated compared to each other. By default, the system keeps the size of the originals. If necessary, use the Zoom function to reduce or enlarge the size of the images. When you have the Advance Impose licence, you can also select [Custom] in the drop-down list. |
|
Setting |
Values |
Description |
|
|---|---|---|---|
|
[Zoom] |
[Fit to page] |
When [Fit to page] is [On], the image will be resized in such a way that it fits onto the page. When [Fit to page] is [Off], the original size of the image is kept. |
|
|
[Percent] |
Use the + and - buttons to reduce or enlarge the size of the image (from 25% - 400%). The preview pane will immediately show the result of your action. |
||
|
Setting |
Values |
Description |
|---|---|---|
|
[Align] |

[Top left] |
An image on a sheet may be smaller than the media size of the output, for example because you scaled the image to 70% of its original size. The [Align] setting allows you to indicate the position of the image on the sheet. [Top left] moves the image to the upper left corner of the sheet. |

[Top centre] |
[Top centre] moves the image to the centre at the top of the sheet. |
|

[Top right] |
[Top right] moves the image to the upper right corner of the sheet. |
|

[Centre left] |
[Centre left] moves the image to centre of the left side of the sheet. |
|

[Centre] |
[Centre] moves the image to the centre of the sheet. |
|

[Centre right] |
[Centre right] moves the image to the centre of the right side of the sheet. |
|

[Bottom left] |
[Bottom left] moves the image to the lower left corner of the sheet. |
|

[Bottom centre] |
[Bottom centre] moves the image to the centre of the bottom side of the sheet. |
|

[Bottom right] |
[Bottom right] moves the image to the lower right corner of the sheet. |
|
Setting |
Values |
Description |
|---|---|---|
|
[Shift] |
[Margin shift] |
Use this setting to increase or decrease the margin. By default, the values of the front side and the back side are interlocked. This means that the values for the front side and the back side remain identical. Widening of the margin can be useful if you want to staple or punch the output, for example. Narrowing the margin can be useful if you do not need additional space for stapling or punching the output, for example. By default, the front side and the back side are linked |
|
[Image shift] |
Use this setting to shift the image horizontally or vertically. By default, the values of the front side and the back side are interlocked. This means that the values for the front side and the back side remain identical. By default, the front side and the back side are linked |
|
Setting |
Values |
Description |
|---|---|---|
|
[Print delivery] |
[Output tray] |
Select the output location for the job. Depending on the settings for your job, the machine automatically suggests the preferred output location for your job. However, you can manually overrule this suggestion. |
|
[Sort] |

[By page] The output is sorted by page. 
[By set] The output is sorted by set. |
|
|
[Offset stacking] |
This setting is only available when in the workflow profile the [Offset stacking] setting is set to [As in job]. 
[Each set] Each set that is delivered to an output location will have a small shift on top of the previous set. This makes it easier to recognise individual sets. 
[Off] All the sets or jobs that get to an output location will be stacked in a straight stack. |
|
|
[Advanced settings] |
It may only be necessary to change the advanced settings when an offline finisher processes sheets in a non-standard way. Please refer to the finisher manuals for more information. |
|
|
[Print delivery] [Advanced settings] |
[Sheet order] |

[Face up] Deliver the prints face up, first sheet on top. 
[Face up reverse] Deliver the prints face up, last sheet on top. 
[Face down] Deliver the prints face down, first sheet on top. 
[Face down reverse] Deliver the prints face down, last sheet on top. |
|
[Sheet orientation] |

[Header up LEF] Deliver the prints with the header on top side and in portrait position (vertical). 
[Header up SEF] Deliver the prints with the header on top side and in landscape position (horizontal). 
[Header down LEF] Deliver the prints with the header at the bottom side and in portrait position (vertical). 
[Header down SEF] Deliver the prints with the header at the bottom side and in landscape position (horizontal). |
|
|
[Print delivery] [Advanced settings] |
[Print order] |
|
|
[Rotation] |
|
|
Setting |
Values |
Description |
|
|---|---|---|---|

[Margin erase] |
Numbers |
Indicate if you want to erase the margins of the image. When you adjust the [Margin erase] you erase areas of the image, with a maximum of 100 mm / 3.94". |
|
|
Setting |
Values |
Description |
|---|---|---|
|
[Print quality] |
[Brightness] (default 0) |
When your prints are too dark or too light, changing the brightness can correct this problem. -1 to -3 creates darker prints. +1 to +3 creates lighter prints. |
|
[Contrast] (default 0) |
When the difference between light and dark areas of a print is not big enough, you can change the contrast to correct this problem. Example: When a blue text is displayed rastered, you can increase the contrast to make the text more black and sharper. |
|
Setting |
Values |
Description |
|
|---|---|---|---|
|
[Binding] |
Here you can define how to bind your document, for example where to put the staple. The available options depend on the finishers present. Check the preview for the result of the selection. |
||
|
Setting |
Values |
Description |
|---|---|---|
|
[Number of sets] |
[Check first set] |
When the [Check first set] setting is enabled, the printer stops after the first set of a job has been printed. You can check the quality of the output. This setting is only available when in the workflow profile [Check first set] is set to [As in job]. |
|
[Number of sets] |
You can indicate how many copies of the job you need. You can enter a value from 1 - 65,000. The default value is 1. |
|
Setting |
Values |
Description |
|
|---|---|---|---|
|
[Job name] |
To identify your job more easily, you can change the name of the job. When you touch the [Job name] button a keyboard appears. Then you can change the name of the job. |
||
|
Setting |
Values |
Description |
|---|---|---|
|
[Print range] |
[All] |
When [All] is selected, all pages or records of the job will be printed. |
|
[Page range] |
When [Page range] is selected, you can indicate the first page and the last page that must be printed in the [From] and [To] fields. |
|
|
[Record range] |
When [Record range] is selected, you can indicate the first record and the last record that must be printed in the [From] and [To] fields. |
|
Setting |
Values |
Description |
|---|---|---|
|
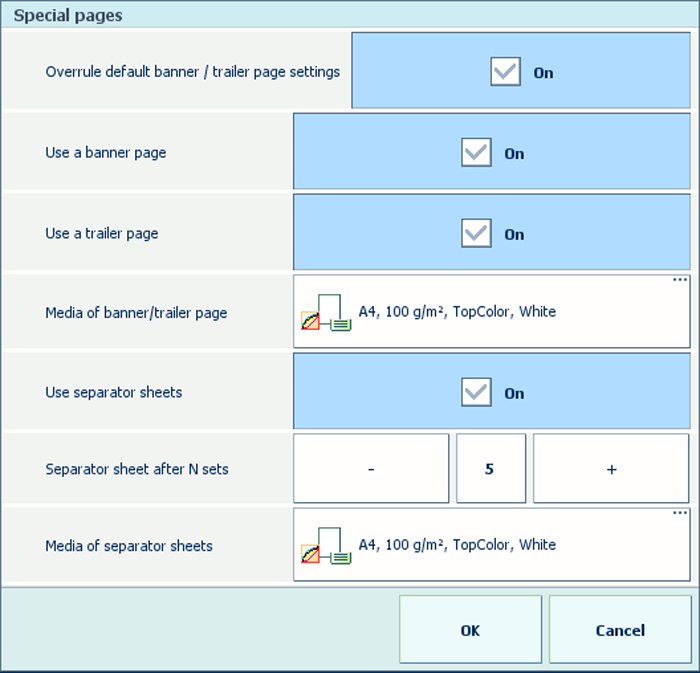
[Special pages] |
Banner pages, trailer pages and separator sheets 
|
|
|
This setting is only available for PDF jobs.
|
Setting |
Values |
Description |
|---|---|---|

[Page numbering] |
[On] |
Print a page number on each page of the job. |
|
[Off] |
No page number on each page of the job. |
|
|
[Location] |
[Top left, alternating] [Top centre] [Top right, alternating] [Bottom left, alternating] [Bottom centre] [Bottom right, alternating] |
The position of the page number on the page. |
|
[Start with page number] |
The number with which the page numbering starts. |
|
|
[Text before page number] [Text after page number] |
The text that is printed before or after the page number. |