
The copy function shows a number of factory default templates to copy paper originals. When you select a template, PRISMAsync automatically uses copy and original settings for the job. You can change each individual setting of a template and define your own templates.
The table below show the available copy job templates.
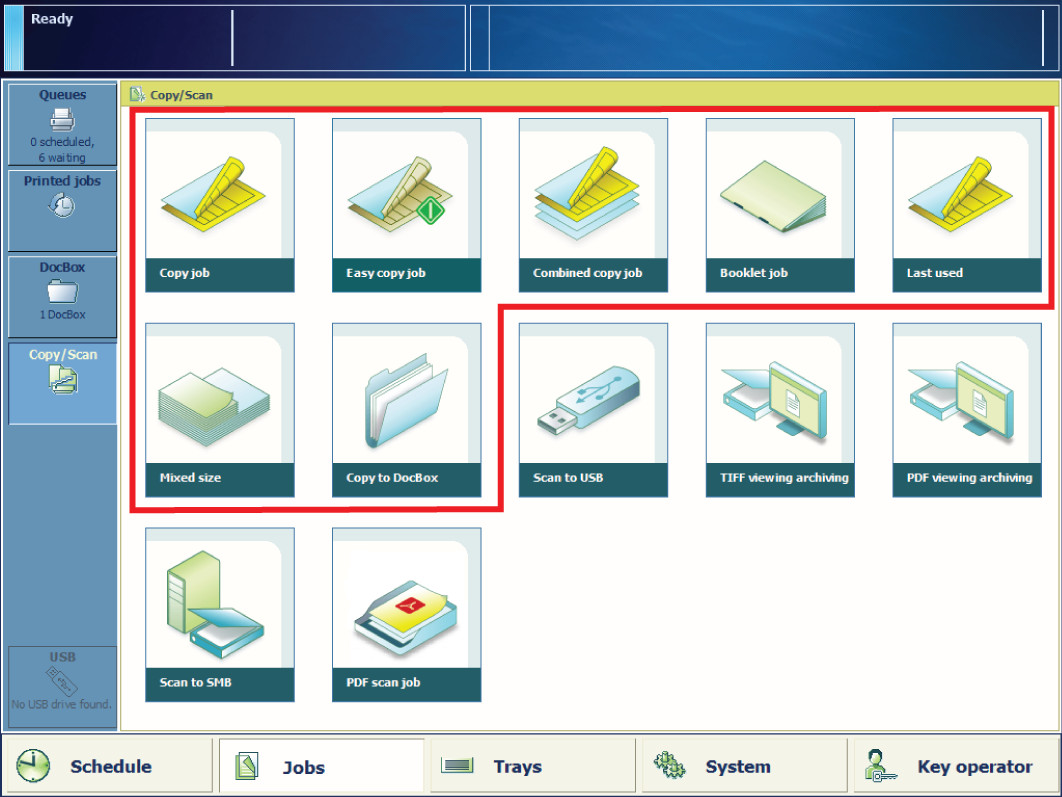 [Copy/Scan] templates
|
Template |
When to use |
|---|---|
|
[Copy job] |
When you have a copy job. |
|
[Easy copy job] |
When you have a simple copy job. |
|
[Combined copy job] |
When you have a copy job with subsets of originals. |
|
[Booklet job] |
When you need copied booklets. |
|
[Mixed size] |
When you have a copy job with mixed-size originals. The copy will also have these media sizes. |
|
[Last used] |
When you want to reuse the settings of the previous copy job. You cannot use this function for a combined copy job. |
|
[Copy to DocBox] |
When the destination of the copy job is the first available DocBox folder or a DocBox folder of your choice. |
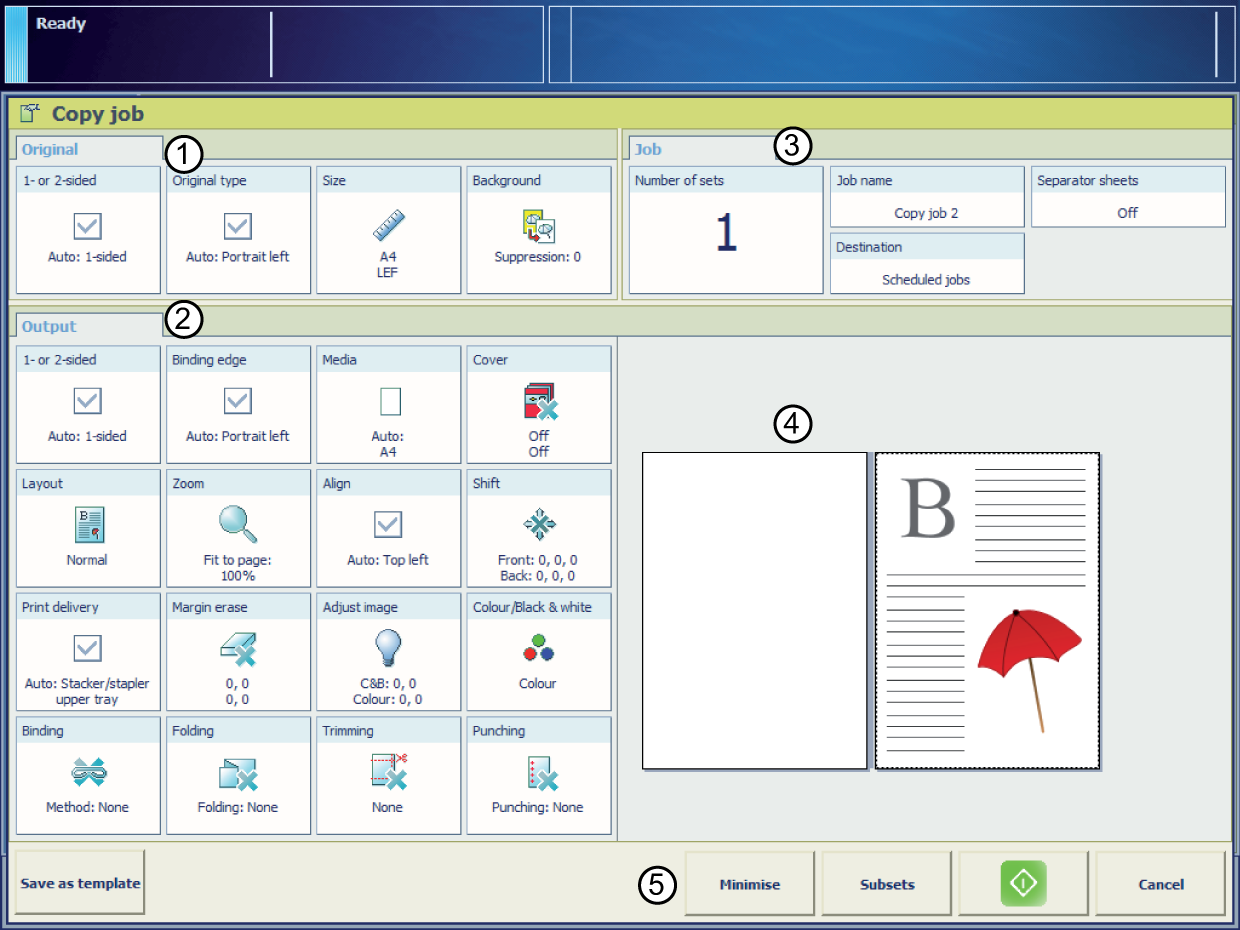
The following tables show the copy job properties you can change. Use the [Minimize] setting to minimize the copy job definition when you want to do other tasks on the control panel.
 The copy job settings
|
Section |
Description |
|
|---|---|---|
|
1 |
[Original] |
The [Original] section contains the settings to define how the original looks. |
|
2 |
[Output] |
The [Output] section contains the settings available to define how the resulting copy must look. All the settings have a fixed position. If a setting is not possible, then the location of that setting is empty. Example: The [Trimming] setting is only be available when you have a trimmer. Otherwise, the location of the [Trimming] setting is empty. |
|
3 |
[Job] |
The [Job] section enables you to define generic properties for the whole job. |
|
4 |
Preview |
The preview section shows the result of the settings defined for the output. |
|
5 |
Action buttons |
The buttons in this section allow you to select actions, for example, save settings to a template, cancel a job, or start scanning. With the optional [Page programming] function, you can insert pages and define the media and finishing settings for the page ranges in a job. |
|
Setting |
Values |
Description |
|
|---|---|---|---|
|
[1- or 2-sided] |

|
The automatically set value for this setting. |
|

[1-sided] |
Only the front side contains an image or text. |
||

[2-sided] |
Both the front side and the back side contain an image or text. |
||
|
Setting |
Values |
Description |
|
|---|---|---|---|
|
[Original type] |
|
The automatically set value for this setting. |
|
|
[Portrait left] |
|
||
|
[Portrait top] |
|
||
|
[Landscape left] |
|
||
|
[Landscape top] |
|
||
|
[Book] |
Make copies/scans from a book original on the glass plate. You can copy/scan the individual pages of a book. [Pages]
|
||
|
Setting |
Values |
Description |
|
|---|---|---|---|
|
[Size] |

A4, A3, Letter, Tabloid, etc. |
Original in the ADF or on the glass plate:
|
|

[Portrait] 
[Landscape] |
|
||
|
Setting |
Values |
Description |
|
|---|---|---|---|
|
[Image type] |

[Mixed] |
The original contains a combination of text and images. |
|

[Photo] |
The original contains mainly or only images. |
||

[Text] |
The original contains mainly or only text. |
||

[High detail] |
The original contains an image with lots of details. |
||
|
Setting |
Values |
Description |
|
|---|---|---|---|
|
[1- or 2-sided] |
[Auto] |
The automatically set value for this setting. |
|
|
[1-sided] |
The output contains an image on one side. |
||
|
[2-sided] |
The output contains an image on both sides. |
||
|
Setting |
Values |
Description |
|---|---|---|
|
[Binding edge] [Portrait] |
[Left] |
|
|
[Right] |
|
|
|
[Top, head to toe] |
|
|
|
[Top, head to head] |
|
|
|
[Bottom] |
|
|
|
[Binding edge] [Landscape] |
[Left] |
|
|
[Right] |
|
|
|
[Top, head to toe] |
|
|
|
[Top, head to head] |
|
|
|
[Bottom] |
|
|
Setting |
Values |
Description |
|
|---|---|---|---|
|
[Media] |
Names of the media in the media catalogue |
Here you can select the media for the copy job. The list displays all the media that are available in the media catalogue. The media catalog is a list of media that you can define in the Settings Editor application on the PRISMAsync controller. |
|
|
Setting |
Values |
Description |
|
|---|---|---|---|
|
[Cover] |

[Front cover] |
Here you can indicate that the print job requires a front cover. When the setting is enabled the corresponding setting [Media] becomes enabled. |
|
|
[Media] |
When the setting [Front cover] is enabled, you can select a media from the media catalog. |
||
|
[Print sides] |
Here you can select the sides of the front cover you want to print on.
|
||

[Back cover] |
Here you can indicate that the print job requires a back cover. When the setting is enabled the corresponding setting [Media] becomes enabled. |
||
|
[Media] |
When the setting [Back cover] is enabled, you can select a media from the media catalog. |
||
|
[Print sides] |
Here you can select the sides of the back cover you want to print on.
|
||
|
Setting |
Values |
Description |
|---|---|---|
|
[Layout] |
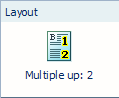
[Multiple up] |
The machine prints 2, 4, 6, 9 or 16 consecutive images on 1 side of a sheet. By default, the system keeps the size of the originals. If necessary, use the Zoom function to reduce or enlarge the size of the images. |
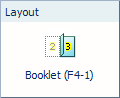
[Imposition template] |
Use the [Imposition template] setting to fold a document: once to create a booklet, twice to create a quarto or three times to create an octavo. The sheets are printed in such a way that the pages of the folded document are presented in sequential order. |
|
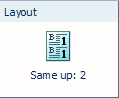
[Same-up] |
The printer prints the same image 2, 4, 6, 9 or 16 times on 1 side of a sheet. By default, the system keeps the size of the originals. If necessary, use the Zoom function to reduce or enlarge the size of the images. [2, rotate]: The printer prints the same image w times on 1 side of a sheet. The images are rotated compared to each other. By default, the system keeps the size of the originals. If necessary, use the Zoom function to reduce or enlarge the size of the images. When you have the Advance Impose licence, you can also select [Custom] in the drop-down list. |
|
Setting |
Values |
Description |
|
|---|---|---|---|
|
[Zoom] |
[Fit to page] |
When [Fit to page] is [On], the image is resized so it fits onto the page. When [Fit to page] is [Off], the original size of the image is maintained. |
|
|
[Percent] |
Use the + and - buttons to reduce or enlarge the size of the image (from 25% to 400%). The preview pane immediately shows the results of your action. |
||
|
Setting |
Values |
Description |
|
|---|---|---|---|
|
[Align] |
[Auto] |
The automatically set value for this setting. |
|

[Top left] |
The [Align] setting allows you to indicate the position of the image on the sheet. [Top left] moves the image to the upper left corner of the sheet. |
||

[Top center] |
[Top center] moves the image to the center at the top of the sheet. |
||

[Top right] |
[Top right] moves the image to the upper right corner of the sheet. |
||

[Center left] |
[Center left] moves the image to center of the left side of the sheet. |
||

[Center] |
[Center] moves the image to the center of the sheet. |
||

[Center right] |
[Center right] moves the image to the center of the right side of the sheet. |
||

[Bottom left] |
[Bottom left] moves the image to the lower left corner of the sheet. |
||

[Bottom center] |
[Bottom center] moves the image to the center of the bottom side of the sheet. |
||

[Bottom right] |
[Bottom right] moves the image to the lower right corner of the sheet. |
||
|
Setting |
Values |
Description |
|
|---|---|---|---|
|
[Shift] |
[Margin shift] |
Use this setting to increase or decrease the margin. By default, the values of the front side and the back side are interlocked. This means that the values for the front side and the back side remain identical. Widening the margin can be useful if you want to staple or punch the output, for example. Narrowing the margin can be useful if you do not need additional space for stapling or punching the output, for example. If you want to define a different value for each side, press
|
|
|
[Image shift] |
Use this setting to shift the image horizontally or vertically. By default, the values of the front side and the back side are interlocked. This means that the values for the front side and the back side remain identical. If you want to define a different value for each side, press
|
||
|
Setting |
Values |
Description |
|---|---|---|
|
[Print delivery] |
[Output tray] |
Select the output location for the job. Depending on the settings for your job, the machine automatically suggests the preferred output location for your job. However, you can manually overrule this suggestion. |
|
[Sort] |

[By page] The output is sorted by page. 
[By set] The output is sorted by set. |
|
|
[Offset stacking] |
This setting is only available when in the workflow profile the [Offset stacking] setting is set to [As in job]. 
[Each set] Each set that is delivered to an output location will have a small shift on top of the previous set. This makes it easier to recognise individual sets. 
[Off] All the sets or jobs that get to an output location will be stacked in a straight stack. |
|
|
[Advanced settings] |
It may only be necessary to change the advanced settings when an offline finisher processes sheets in a non-standard way. Please refer to the finisher manuals for more information. |
|
|
[Print delivery] [Advanced settings] |
[Sheet order] |

[Face up] Deliver the prints face up, first sheet on top. 
[Face up reverse] Deliver the prints face up, last sheet on top. 
[Face down] Deliver the prints face down, first sheet on top. 
[Face down reverse] Deliver the prints face down, last sheet on top. |
|
[Sheet orientation] |

[Header up LEF] Deliver the prints with the header on top side and in portrait position (vertical). 
[Header up SEF] Deliver the prints with the header on top side and in landscape position (horizontal). 
[Header down LEF] Deliver the prints with the header at the bottom side and in portrait position (vertical). 
[Header down SEF] Deliver the prints with the header at the bottom side and in landscape position (horizontal). |
|
|
[Print delivery] [Advanced settings] |
[Print order] |
|
|
[Rotation] |
|
|
Setting |
Values |
Description |
|
|---|---|---|---|

[Margin erase] |
Numbers |
Margins of a document sometimes contain notes or punch holes, for example. The machine allows you to hide these elements on the copy. With the + and - buttons of the [Margin erase] setting you can define how much margin of the original you want to erase. You can enter a value up to 100 mm / 3.94". |
|
|
Setting |
Values |
Description |
|
|---|---|---|---|
|
[Exposure] |
[Dark] |
You can adjust the settings for light areas and dark areas on the print separately.
|
|
|
[Light] |
|
||
|
Setting |
Values |
Description |
|
|---|---|---|---|
|
[Binding] |
Here you can define how to bind your document, for example where to put the staple. The available options depend on the finishers present. Check the preview for the result of the selection. |
||
 Finishing settings
|
Job setting |
What you can define |
|---|---|
|
[Binding] |
Binding method Indicate how to bind your document. |
|
[Folding] [Creasing] |
Folding or creasing method Indicate how to fold or crease the printed documents. |
|
[Trimming] |
Trimming method Indicate how to trim the printed documents. |
|
[Punching] [Perforating] |
Punching or perforating method Depending on the installed die set, select the method for punching or perforating. |
|
Setting |
Values |
Description |
|---|---|---|
|
[Number of sets] |
[Check first set] |
When the [Check first set] setting is enabled, the printer stops after the first set of a job has been printed. You can check the quality of the output. This setting is only available when in the workflow profile [Check first set] is set to [As in job]. |
|
[Number of sets] |
You can indicate how many copies of the job you need. You can enter a value from 1 - 65,000. The default value is 1. |
|
Setting |
Values |
Description |
|
|---|---|---|---|
|
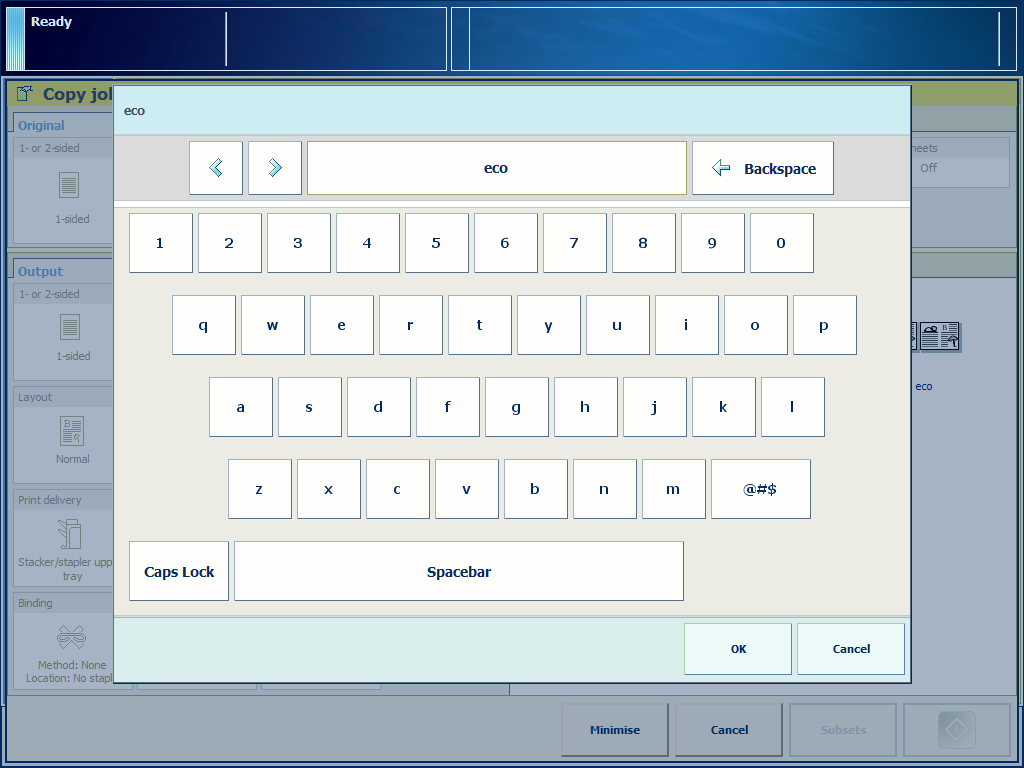
[Job name] |
To identify your job more easily, you can change the name of the job. When you touch the [Job name] button a keyboard appears. Then you can change the name of the job. |
||
 Change the job name
|
Setting |
Values |
Description |
|
|---|---|---|---|
|
[Destination] |
[Scheduled jobs] |
Add the copy job to the list of [Scheduled jobs] in the [Jobs] view. |
|
|
[Waiting jobs] |
Add the copy job to the list or [Waiting jobs] in the [Jobs] view. |
||
|
[DocBox] |
Add the copy job to the [DocBox] (if licensed). |
||
|
Setting |
Values |
Description |
|
|---|---|---|---|
|
[Special pages] |
Banner pages, trailer pages, and separator sheets 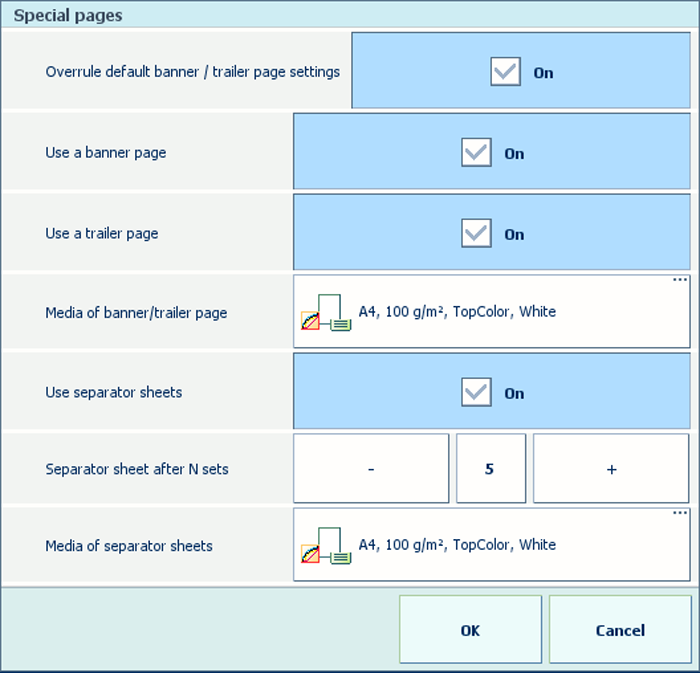
|
||
|
|||
|
Setting |
Values |
Description |
|
|---|---|---|---|
|
[Accounting ID] |
Accounting information Enter information for billing and charging job costs:
|
||
 . The icon changes to the unlocked status. Now you can define the values for the front side and the back side separately.