Introduction
When you make a copy, you can add a strip to a document.
Use [Cut size] to copy an original without a strip and add a strip to the copy. You can add a strip at the top or bottom of a copy.
Procedure
-
Feed the original face up and centered on the original feeding table.
-
Tap the copy tile. A window with a list of presets opens.
-
Tap [Show all settings]. A list with settings opens.
-
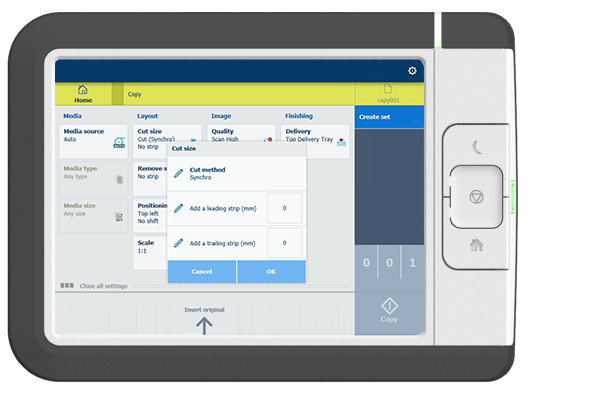
Tap [Cut size] under the [Layout] preset.
|
|
|
|
[Add a leading strip]
|
[Add a trailing strip]
|
-
Tap [Add a leading strip] or [Add a trailing strip] and define the values.
-
Make your settings and tap [OK].
-
Define the number of copies and tap the green button.
Results
The document is printed with a strip attached to the top or bottom.