
Printers with the Varnish Option can overprint varnish on top of a printed image in selected areas in a print job or as a flood coat. The printing of varnish applies only to flatbed printing and is not available with the RMO.
The Varnish option is not available for print jobs that use the High Definition print mode. Varnish can be used with all other print modes.
Printing varnish creates a high value-added special effect. However, since this is an additional process after printing image data, it also decreases productivity. Due to the low productivity of printing large areas of varnish, it is best to concentrate the use of this feature on spot decoration. Fortunately, the Arizona printer "blank space" skipping feature skips over areas in the print that do not contain varnish, and greatly improves the net productivity of spot applications.
Varnish is printed as a second process after the CMYK(W) image is printed. Immediately after printing a CMYK(W) image. The gantry moves to the start of image position and prints a varnish spot or printer generated flood data using three additional passes.
Varnish is actually "clear ink" and is for decorative purposes only. It does not provide additional protection to the printed image.
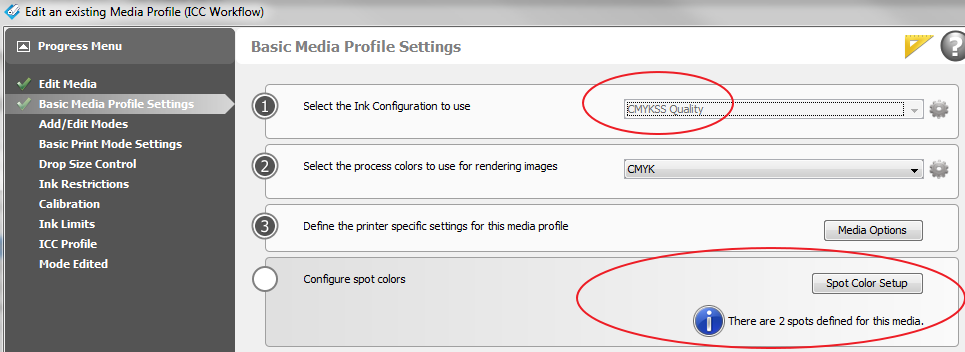
Printing with varnish requires an ONYX media profile (media model) that was made with a CMYKSS ink configuration with two spot colors defined. All print modes are supported except the High Definition print mode.
Media models are available for download on our website: https://graphiplaza.cpp.canon.
High gloss data can be applied to a print job in two ways: Printer Flood Fill or Spot Data.
Define a Printer Flood Coat Layer
This is the easiest way to print varnish ink. It does not require any pre-rip file preparation. All that is required is to define a Flood Coat layer. It will print a varnish layer that contains the whole image (bounding box) . There is also an option to control the amount of flood by choosing the drop level. See Print High Gloss Jobs.
Use Spot data to define the glossy areas
There are two spot channels available: Spot1 and Spot2. In general Spot1 data is used for white ink and Spot2 data is for high gloss. However the same spot data can be used to print either white ink, high gloss, or both. There are two ways to add the spot data to your print job:
ONYX Spot Layer Tool
The spot data is created in ONYX Thrive with the Spot Layer Tool. It offers many options to process an image, and thus allows various possible configuration choices. You can save these configurations as Filters and place them in a Quick Set and this makes it possible to re-create with minimal effort settings that are often used. All work with the Spot Layer tool requires an ONYX media profile with at least one spot color. See Create Spot Data with the Spot Layer Tool.
Spot Data Image Preparation
The spot data is created in image editing programs such as Adobe Illustrator or Photoshop. You must use specific naming conventions and image use protocols in order for the ONYX RIP-Queue software to process the data as desired. This method may be the best choice if the desired spot data includes complicated selections or if data is being created for outsourcing. A reasonable level of proficiency in these programs is recommended to use this technique. See Create Spot Data in Adobe Illustrator or Create Spot Data in Photoshop.