
The Maintenance Station is located below the carriage. When you perform printhead maintenance, any excess ink and associated debris are removed from the nozzles with the result that ink drops can jet properly when the nozzles are clear.
The nozzle plate on the printhead has a non-wetting coating - contact with this surface may affect the performance of the printhead. Do not wipe the nozzle plate with anything other than the suction-head (or the supplied swabs when following the swab procedure) as this can damage the nozzles and impair performance.
Make sure the carriage is in the parked position. The carriage and gantry automatically return to this position after an image is printed. Do not move the carriage or gantry from this position as this will disable the ink pumps and thus prevent the performance of an ink purge, which is necessary for printhead maintenance.
It is not necessary to turn off the UV lamps as they are shuttered. However, they will be hot if they are on, so avoid touching them.
Ink must be at the operating temperature of at least 40° Centigrade (104° Fahrenheit) before you perform printhead maintenance. The Job Control module displays the ink temperature. If the temperature is low, activate the ink heater by clicking the icon and then monitor the temperature display.
3010104959 Cloth-Poly Wipe 10cmX10cm
The underside of the UV lamps may be hot, avoid touching them. Also, be aware that the carriage moves up and down during printhead maintenance and there is a crushing hazard if your hand or arm are placed in the area above the three switches.
Do NOT press up too hard on the printhead while you swipe it with the suction-head as this can dislodge the printhead and require a service call to re-seat the printhead.
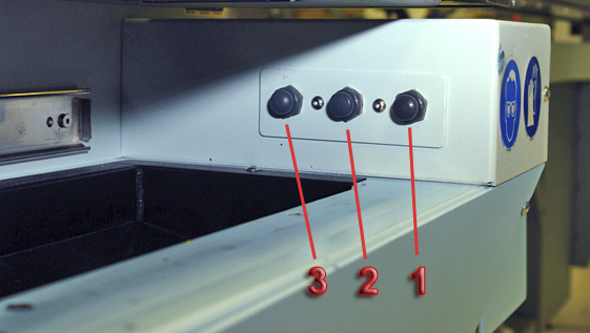
Maintenance Station Switches:
There are 3 switches inside of the maintenance station . They can be operated in any order. For example, you can press the second switch to raise the carriage to remove debris from the underside of the carriage even when a purge isn't required.
Switch 1 to purge ink
Switch 2 to raise carriage
Switch 3 to activate suction pump
 Maintenance Station Switches
Verify that the ink temperature is at least 40° Centigrade (104° Fahrenheit) before you begin printhead maintenance.
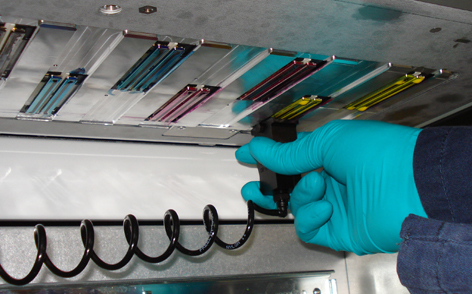
Be careful not to snag the coiled suction-head hose when removing the suction-head from the holder.
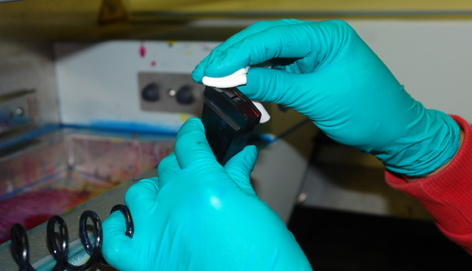 Clean Suction-Head
In the next step, start with the left printhead and work to the right as this limits the possibility that drops of ink will fall onto the coiled hose. Also, do not push up too hard on the printhead as you may dislodge it and this will require a service call to fix.
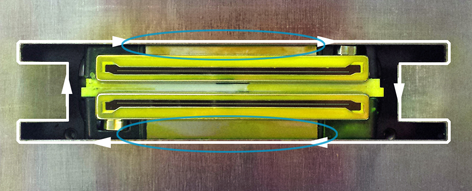
a) Visual inspection of the printhead shows signs of ink remaining on the nozzle plate;
b) Suction-head was not kept level during travel across the nozzle plate;
c) Suction-head was pulled too quickly or unevenly across the nozzle plate.
 Swipe Printhead
During maintenance, be careful not to touch the nozzle plates as this can damage the printhead.
Close the drawer gently to avoid disturbing the ink vacuum. A hard bump can break the meniscus vacuum in the ink lines and thus allow air into the lines, which blocks the nozzle until a purge is performed
If the Nozzle Check print shows that a printhead still has a few nozzles out you can slide the suction-head over that printhead again. Then print another Nozzle Check and if there are still nozzles out, you can perform printhead maintenance on the printhead of the same color only (See Maintenance for Select Printheads below).