Loading

How to Replace the Lamp Housing

Procedure

  1. Wipe both the top and bottom of the quartz window at the base of the UV lamp-housing carriage bucket with an alcohol wipe. Also check the bottom of the quartz window for any buildup of ink, which can be caused by misting if the carriage height is incorrect. If you see any ink, it can be removed by scraping with a razor blade or similar tool held at a 45-degree angle.
  2. Place the lamp housing back into the carriage bucket.
  3. Replace the old filter that was removed from the top of the housing with a new one.
  4. Rotate the interlock safety bracket back into position to lock the lamp housing in place.
  5. Make sure that the pins of the power cable connector of the UV lamp housing are not bent. Reconnect the UV power cable to the top of the UV lamp housing. Press the two blue tabs on both sides and push the connector on the opposite part until you hear a click.

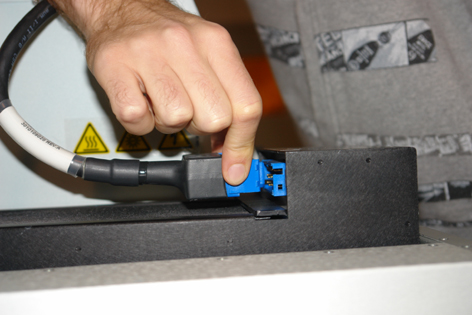
    Do not use excessive force to prevent the pins from bending. Bended pins can cause an unsafe situation.

  6. Repeat the above two sets of procedures to change the bulb in the other lamp housing.
    NOTE

    We recommend that both UV Lamp bulbs be replaced at the same time to ensure that the curing effect is balanced when printing in both directions.

  7. Replace the carriage guard onto the carriage base.
  8. Slide the maintenance station drawer gently to close it.
    NOTE

    A hard bump can break the meniscus vacuum in the ink lines and thus allow air into the lines, which blocks the printhead nozzle until a purge is performed.

  9. Unlock the AC power switch and power on the printer.
  10. Print a test image. If you see any gloss banding and if you only changed one UV bulb, you may need to change the other bulb as well.
  11. Dispose of the old UV lamp bulbs according to local environmental regulations.