-
From the workstation, click "Start -> Programs -> Xerox FreeFlow Production Software". Select one of the following, depending on your version of FreeFlow™.
-
Printer Administration
-
Printer Setup
-
The Servers and Connections window appears.
-
Click the 'Production Print' tab.
-
Select 'Add Printer'.
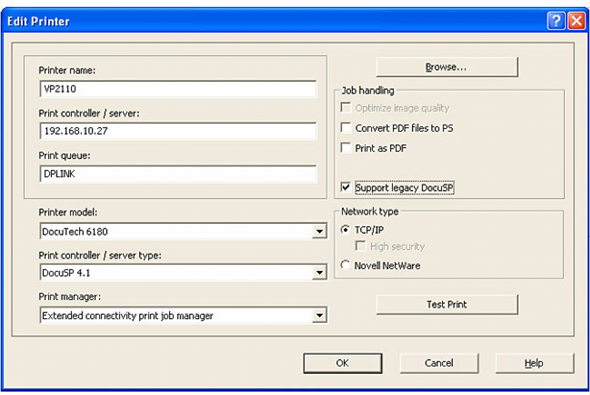
The Add Printer dialogue box appears.
-
Enter a printer name in the 'Printer name' field. You can enter any name.
-
Enter the host name or IP address of the PRISMAsync in the 'Print controller / server:' field.
-
Enter the destination of the print jobs in the 'Print queue' field, in this case DPLINK.
-
Select the printer model and the server type in the 'Printer model' box.
You must select DocuSP 4.1.'
-
Select 'Extended connectivity print job manager' in the 'Print manager' box.
-
Select your 'Network type': 'TCP/IP'.
-
Click 'OK'.
The printer is added to the Servers and Connections. You can now print directly to the varioPRINT 140 Series, just like you print to a Xerox® DocuTech™ 6180.


