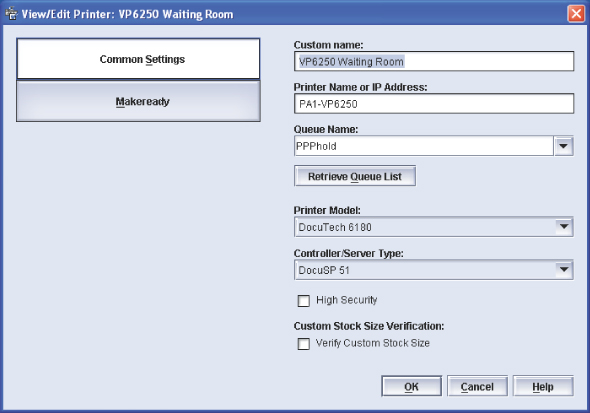

The 'Printer Registration' dialogue appears.

The “Add Printer Wizard” is started.
|
Step |
Action |
|---|---|
|
1 |
Define a printer name in the 'Custom name' field. You can enter any name. |
|
2 |
Define the hostname or IP address of the PRISMAsync in the 'Printer Name or IP Address' field. |
|
3 |
Define the destination of the print jobs in the 'Queue Name' field. You can enter any name. |
|
4 |
Define 'DocuTech 6180' for the 'Printer Model'. |
|
5 |
Define 'DocuSP 51' for option 'Controller/Server Type'. |
|
6 |
Deselect option 'High Security'. |
|
7 |
Deselect option 'Verify Custom Stock Size'. |
|
8 |
Click button 'OK'. |

|
Step |
Action |
|---|---|
|
1 |
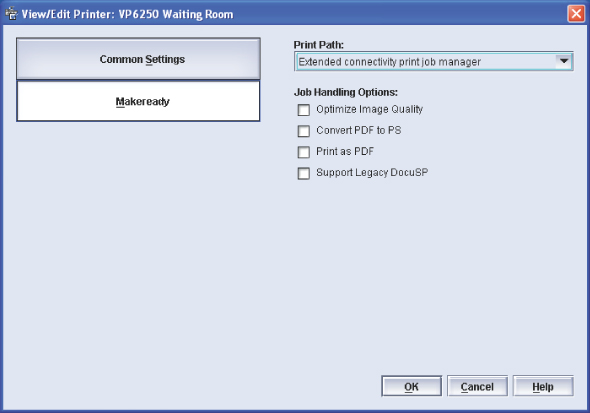
Select value 'Extended connectivity print job manager' for option 'Print Path'. Value 'Extended connectivity print job manager' is mandatory for all Océ VarioPrint 6000 Series printers. |
|
2 |
Deselect option 'Optimize Image Quality'. |
|
3 |
If the ASCII XJT job ticket type is required, select option 'Support Legacy DocuSP'. |
|
4 |
Click button 'OK'. |

|
Step |
Action |
|---|---|
|
1 |
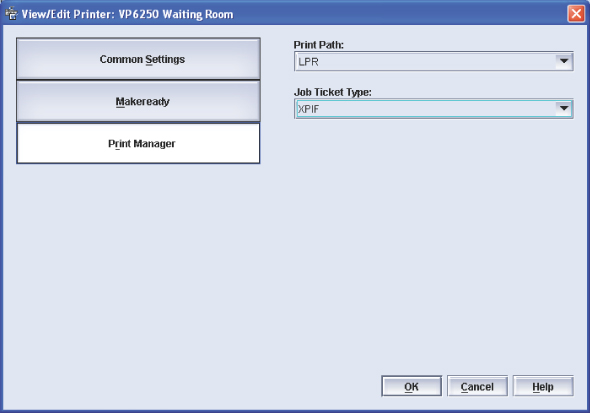
Define value 'LPR' for option 'Print Path'. Value 'LPR' is mandatory for all Océ VarioPrint 6000 Series printers. |
|
2 |
Define the 'Job Ticket Type'. The XPIF and XJT job ticket type is supported by the Océ VarioPrint 6000 Series Release 2 and higher. |
|
3 |
Click button 'OK'. |
