
Each ink color has a filter that removes any particulate matter from the ink as it is pumped from the ink bag toward the printheads. The ink filters are located to the right of the AC power switch at the electronics end of the printer around the corner from the ink bags.
The ink filter for each color of ink must be replaced at least every 12 months or after 11 bags (22 liters) of ink have been consumed. If an ink filter becomes clogged, it will trap color pigment and affect the color balance of printed images. It can also cause damage to the ink system. It is important to change the filter before this occurs.
If the Nozzle Check print shows one color weaker than normal, this is an indication that the ink filter for the affected color is clogged and the filter must be replaced. Also, If you notice that an ink reservoir takes a long time to fill, check your records for when the filter for that color of ink was last changed. Make sure that the ink tubing from that filter is not kinked.
New ink filters will contain air that must be released. Air in the ink filter can affect the vacuum and result in dripping ink and deteriorated image quality as a result of nozzle dropout. Bleeding the ink filters is a strategy to avoid persistent nozzle dropout. You must bleed any trapped air out of the ink filters to prevent an overflow of ink into the 0.2 micron ink purge filters associated with the purge valves located on the top of the carriage. If any of the 0.2-micron purge filters shows signs of ink contamination you will need to place a service call to have them replaced. However, the preferred preventative maintenance method is to bleed the ink filters on a regular basis.
IMPORTANT! Open the sliding maintenance station door to disable the ink pumps.
Close all of the purge valves on the top of the carriage.
Philips screwdriver (only if enclosure thumb-screws are too tight)
Lint-free cloth
A clogged ink filter can result in damage to your printer's ink system. Particulate matter buildup in the ink can cause problems that will require a service call. Be sure to change all ink filters every 12 months to avoid such problems.
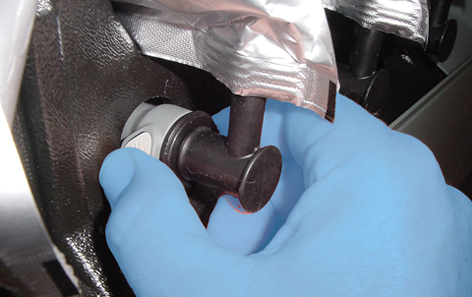 Remove Ink bag coupler
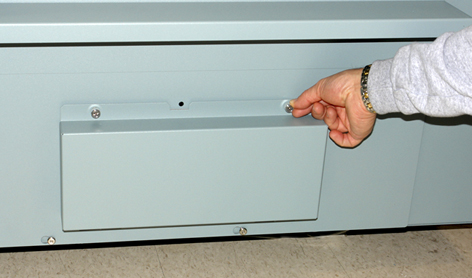 Remove Ink Filter Enclosure Cover
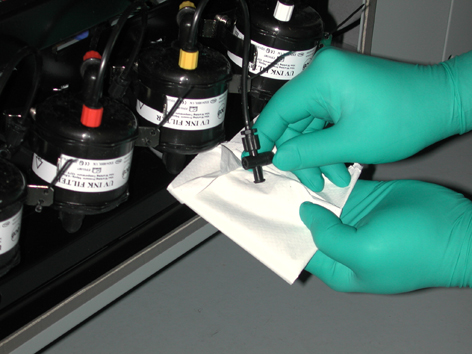 Ink bleed tube valve
The ink system is under pressure and so it is possible that some ink may spray out at first. Keep the cloth wrapped around the end of the bleed tube so that any ink spay is contained.
Wipe off any spilled ink.