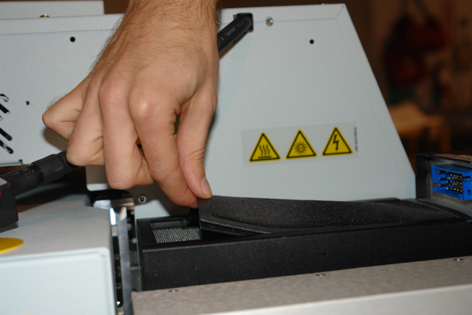

The top of the housings for the left and right UV lamps contain a filter that keeps dust and other airborne particles from entering the lamp housings. If the filter becomes clogged with dust and debris it can cause overheating of the lamps.
Check the condition of the filters weekly and clean them as needed. If dust accumulates, this can lead to overheated lamps and results in an error message. Clean the filters at least once every three months to avoid overheating. If you receive a lamp overheat error, check for dust or debris. If you get a lamp overheat error and there is no dust on the filter, call for service immediately.
When you change a UV lamp bulb, replace the filter.
Turn off the ink temperature.
Turn off UV lamps.
small hand vacuum cleaner
Always wear cotton gloves and protective safety glases when handling UV lamps and the reflecting shutters.
Failure to clean the filters can lead to overheating of the lamps and result in a shorter lamp life.
 Remove Lamp Filter