
If order to make use of the multi-layered Quality-Layered print mode in your printer, you must configure your layers and also set what inks will print on each of the layers.
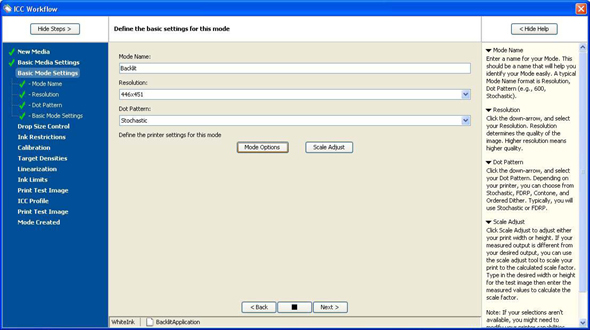 Mode Options
 Define Layers
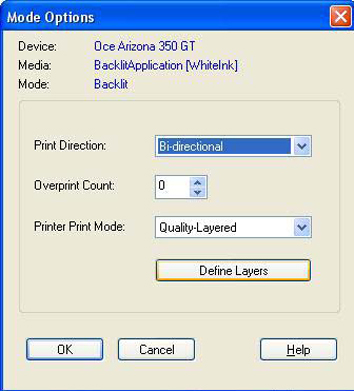 Define Layers
 Define Layers
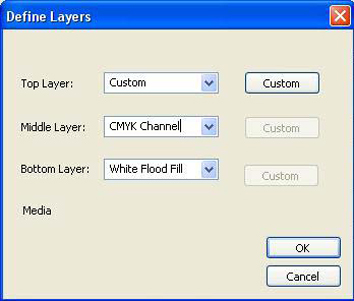 Define
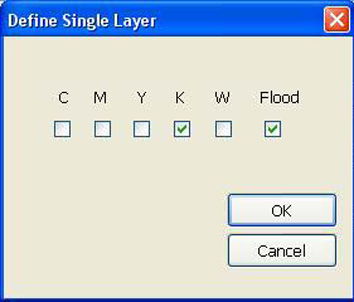 Define Single Layer
The data used in the white spot layer needs to comes from the spot data found in the image you have created in an image editing program such as Adobe Illustrator. If you want to auto-generate spot data from your image, use the Spot Layer Tool in Preflight to create the data for the white layers. To generate white flood (or any color flood) it is not necessary to set up files in any special way prior to opening in Production House, simply choose a media configuration that has Flood Fill enabled.