Introduction
This topic describes how you can create an new application. You can store this application as a recipe.
As example we create a block-out application. The block-out application is printed one side of clear media and will be viewable from both sides. The backside image will be will be part of the recipe. A black layer in the middle blocks out the light. Between the block-out layer and the two color layers that represent the 2 sides of the application, white masks will be used. Different print modes are used for the different layer types of the application.
Procedure
-
Open a PDF file in ONYX Thrive.
-
Select the PDF file and click on [PRISMAguide].
-
Select the PDF file in the job list and click on [New application] .
-
A new PRISMAguide XL Engine job is created with a single layer.
-
Open the [Files] tab.
Click on the button [New file] to add a file to your application.
-
Click on the icon to import the file.
In this example we added Image back.pdf to the application.
-
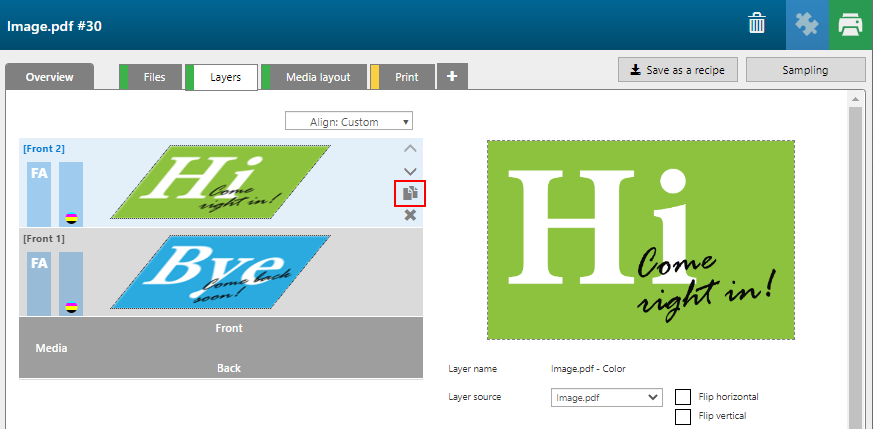
Open the [Layers] tab.
You can assign pages, layers or spot colors, present in the input file(s) as input to a print layer.
In this example the [Layer source] for [Front] 2 is Image.pdf and for [Front] 1 is Inputfile 1.
-
Click on the duplicate button to create 3 extra front layers.
-
Define the layer specifications of the 3 middle layers.
-
Change the [Type] of the 3 middle layers to [Image area mask].
-
When you choose [Image area mask] or [Bounding box mask], you must select the [Color] of the layer.
Select: [Block-out (black)] for [FRONT 3] and [White] for [FRONT 2] and [FRONT 4].
-
You can also use a different print mode for the [Color] and [Block-out (black)] layers - i.e. change it to [Express].
-
Open the [Overview] tab. Click-and-hold the left mouse button to rotate the 3D view and to check the back of the application. Notice that the back of the application is not displayed correctly.
-
Open the [Layers] tab. Select the bottom layer and click on [Flip horizontal].
-
Check the [Media layout] and [Print] specifications, then click on the [Print] button.