
An automated workflow bundles a series of preset settings to define jobs.
Open the Settings Editor and go to: .
 [Automated workflows] tab
Click [Add], [Edit] or [Copy].
Define the settings.
Click [OK].
The settings are divided in the following sections and are described in more detail below:
[General], [Media], [Layout], [Special pages], [Finishing], [Print quality], [Color], [Color and information bars], [Workflow], [Print range], [Accounting] and [Page numbering].
|
[General] settings |
Description |
|---|---|
|
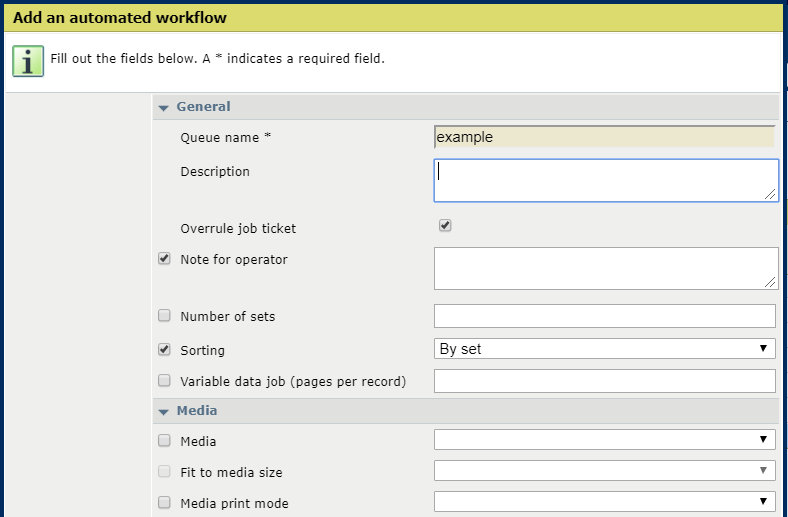
[Queue name] |
Name of the automated workflow. For LPR printing this name is the name of the queue. A print job submitted with an automated workflow can be identified by the [Job label] field. This name refers to the name of the automated workflow. |
|
[Description] |
Description of the automated workflow. |
|
[Overrule job ticket] |
The properties of the automated workflow can overrule the properties defined in the job ticket. This is the default behavior of an automated workflow. When you want to apply a JDF ticket in a hotfolder, ensure the check box is not checked. |
|
[Note for operator] |
Create a print or finishing instruction for the operator. |
|
[Number of sets] |
Enter the number of sets. |
|
[Sorting] |
Select if sorting occurs by set or by page. |
|
[Variable data job (pages per record)] |
Use this setting to indicate that the job is a variable data job. Enter the number of pages that composes a record. |
|
[Media] settings |
Description |
|---|---|
|
[Media] |
Select the media from the media catalog. |
|
[Fit to media size] |
Use this setting to indicate how the document pages are resized according to the size of the selected media: [Scale every page to media size], [Clip pages to media size], or [Ignore the media size]. When you select the setting [Ignore the media size], the media size defined in the job is applied. |
|
[Media print mode] |
Select the required media print mode. |
|
[Layout] settings |
Description |
|---|---|
|
[Print sides] |
Select if jobs are printed one- or two-sided. |
|
[Orientation] |
Select the reading direction of the prints: [Portrait] or [Landscape]. |
|
[Rotate 180 degrees] |
Use this setting to rotate the imposition 180 degrees. |
|
[Tumble] |
Select the binding edge of the output. The [Tumble] setting rotates the imposition of the back side 180 degrees. |
|
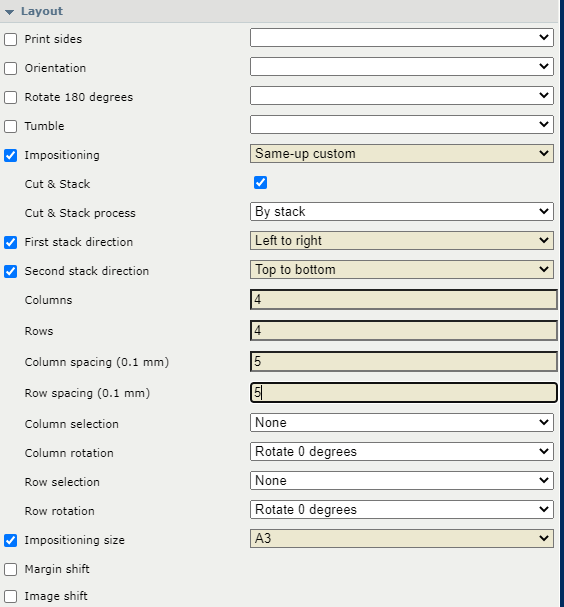
[Impositioning] |
Select the required imposition. |
|
[Impositioning size] |
Select the size of the imposition in case the media are unknown. |
|
[Margin Shift] |
Define the margin shift of the front side and the back side in two directions. Enter: '0' to indicate that there is not shift required. |
|
[Image shift] |
Select this setting to define the image shift of the front side and the back side in two directions. Enter: '0' to indicate that there is no shift required. |
|
If [Impositioning] is set to [Same-up custom], the following settings become available: |
|
|
[Cut and stack] |
Indicate if you want to cut and stack the sheets. |
|
[Cut and stack process] |
Select how you want to stack the sheets. |
|
[First stacking direction] |
Select the first stacking direction. |
|
[Second stacking direction] |
Select the second stacking direction. |
|
[Columns] |
Select the number of columns. |
|
[Rows] |
Select the number of rows. |
|
[Auto spacing] |
Indicate if you want to use the automatic gutter spacing option. The automatic gutter spacing option sizes gutters so that the document's pages fill the entire available space in the layout. The [Auto spacing] setting becomes available only if [Print trim marks] is selected. |
|
[Column spacing ({0})] |
Define the distance between columns. The [Column spacing ({0})] setting becomes available only if [Print trim marks] is selected. |
|
[Row spacing ({0})] |
Define the distance between rows. The [Row spacing ({0})] setting becomes available only if [Print trim marks] is selected. |
|
[Column selection] |
Select specific columns. |
|
[Column rotation] |
Select how you want to rotate the column(s) that you selected. |
|
[Row selection] |
Select specific rows. |
|
[Row rotation] |
Select how you want to rotate the row(s) that you selected. |
|
[Special pages] settings |
Description |
|---|---|
|
[Front or booklet cover] |
Select the media for the front cover. |
|
[Printing on front cover] |
Indicate if the cover is printed or not. |
|
[Media print mode of front cover] |
Select the required media print mode. |
|
[Back cover] |
Select the media for the back cover. |
|
[Printing on back cover] |
Indicate if the cover is printed or not. |
|
[Media print mode of back cover] |
Select the required media print mode. |
|
[Finishing] settings |
Description |
|---|---|
|
[Output tray] |
Select the paper tray of the prints. |
|
[Sheet order] |
Select the order of the prints in the output tray. |
|
[Feed edge] |
Select the orientation of the prints in the output tray. |
|
[Header orientation] |
Select the header orientation of the prints in the output tray. |
|
[Print order] |
Indicate the delivery order of the sheets. |
|
[Offset stacking] |
Indicate if the stacking occurs with or without an offset. |
|
[Offset after N sets] |
Indicate if a group of sets is delivered with an offset. N means the number of sets in a group. |
|
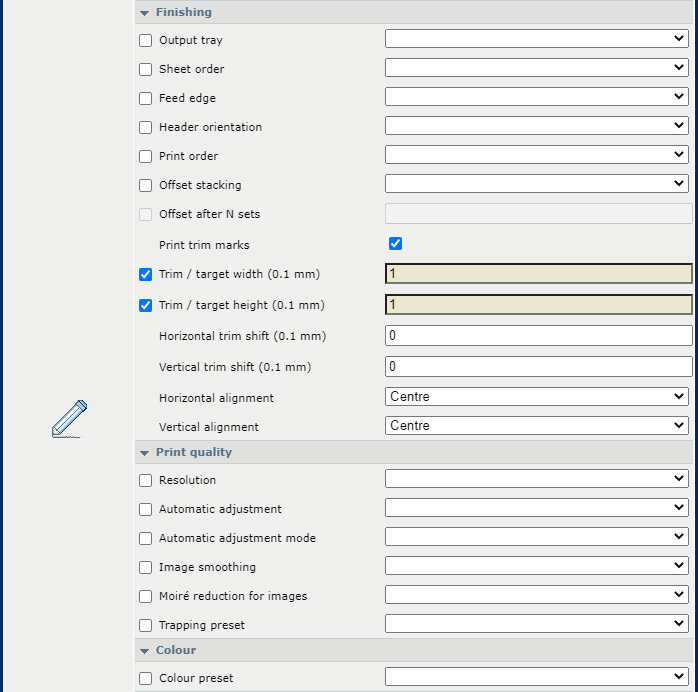
[Print trim marks] |
Indicate if you want to print trim marks. |
|
[Width ({0})] |
Enter the width of the trim marks. |
|
[Height: ({0})] |
Enter the height of the trim marks. |
|
[Horizontal trim shift: ({0})] |
Use this setting to shift the trim marks horizontally. |
|
[Vertical trim shift: ({0})] |
Use this setting to shift the trim marks vertically. |
|
[Horizontal alignment] |
Indicate if the trim marks need to be aligned horizontally. |
|
[Vertical alignment] |
Indicate if the trim marks need to be aligned vertically. |
|
[Print quality] settings |
Description |
|---|---|
|
[Resolution] |
Select the resolution: 600 x 600 dpi or 1200 x 1200 dpi |
|
[Image smoothing] |
Use this setting to prevent unsmooth lines and image blocks in the document. This occurs when source objects have a lower resolution than the printer. The [Image smoothing] interpolation method only affects images below 300 dpi. |
|
[Moiré reduction for images] |
Use the this setting to apply a Moiré reduction algorithm to enhance photographic images. Please note that when images have a resolution below 300 dpi, the Moiré reduction only takes effect when the [Image smoothing] setting is enabled. |
|
[Trapping preset] |
Select a trapping preset. |
|
[Color] settings |
Description |
|---|---|
|
[Color preset] |
Select a color preset. (Define a color preset) |
|
[Color and information bars] settings |
Description |
|---|---|
|
[Color bar], [Location], [Alignment] |
When you want to print a color bar, select one of the available color bars. You can also select the location and the alignment. |
|
[Information bar], [Location], [Alignment] |
When you want to print an information bar, select one of the available information bars. You can also select the location and the alignment. |
|
[Workflow] settings |
Description |
|---|---|
|
[Job destination] |
Select the destination of the jobs: the list of scheduled jobs, the list of waiting jobs or one of the DocBox folders. |
|
[DocBox name] |
Select the DocBox folder name, when the destination is DocBox. |
|
[Printing workflow] |
Select how the job processing occurs: select [Receive, then print while RIP is in progress] for large jobs and select [Streaming] for small jobs with multiple sets. |
|
[Banner pages for print jobs], [Trailer pages for print jobs], [Media of banner/trailer page] |
Indicate if individual sets in the job output are separated by a banner page and / or a trailer page. |
|
[Separator sheets for print jobs], [Separator sheet after N sets], [Media of separator sheets] |
Indicate if sets or a group of sets are separated by a separator sheet. N means the number of sets in a group. |
|
[PDF XObject optimization] |
Use this section to define how XObjects are processed. [Automatic]: the XObjects of a PDF/VT job are cached. [Enabled]: the XObjects of every PDF job are cached. [Disabled]: the XObjects are re-interpreted per page. |
|
[PDF to PostScript conversion] |
Indicate if you want to convert PDF to PostScript instead of only using the native PDF RIP, which is the default setting value. |
|
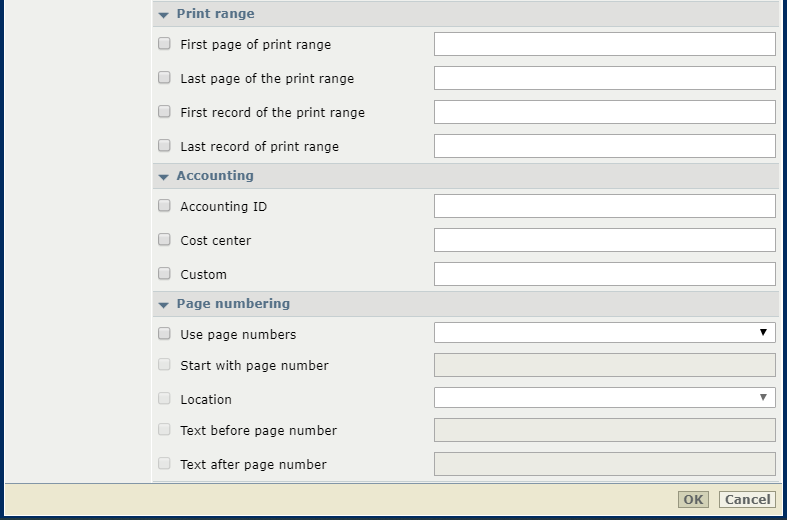
[Print range] settings |
Description |
|---|---|
|
[First page of print range] |
When you want to print a part of the document, enter the first page number of the print range. When you do not enter the last page, the range ends at the last document page. |
|
[Last page of the print range] |
When you want to print a part of the document, enter the last page number of the print range. When you do not enter the fist page, the range begins at the first document page. |
|
[First record of the print range] |
When you want to print a part of the document of a variable data job, enter the last page number of the print range. When you do not enter the last record, the range ends at the last record. |
|
[Last record of print range] |
When you want to print a part of the document a variable data job, enter the last page number of the print range. When you do not enter the fist record, the range begins at the first record. |
|
[Accounting] settings |
Description |
|---|---|
|
[Accounting ID] |
Enter the accounting ID. |
|
[Cost center] |
Enter the cost center. |
|
[Custom] |
Enter extra accounting information. |
|
[Page numbering] settings |
Description |
|---|---|
|
[Use page numbers], [Start with page number], [Location], [Text before page number], [Text after page number] |
Indicate if you want to use page numbers. The default font and the font size are pre-defined. Indicate if and where the page numbers are printed. Enter the text that is additionally printed before or behind the page number. |