
The [Devices] workspace gives you an overview on the status of the available devices. You can enable and disable devices in this list. You can also delete a device. In order to add devices, you will need to use the Cloud proxy. If you do not have it installed, the bottom of the page provides the link to the installation package for the supported platforms.
The main workspace area contains the list with all the devices.
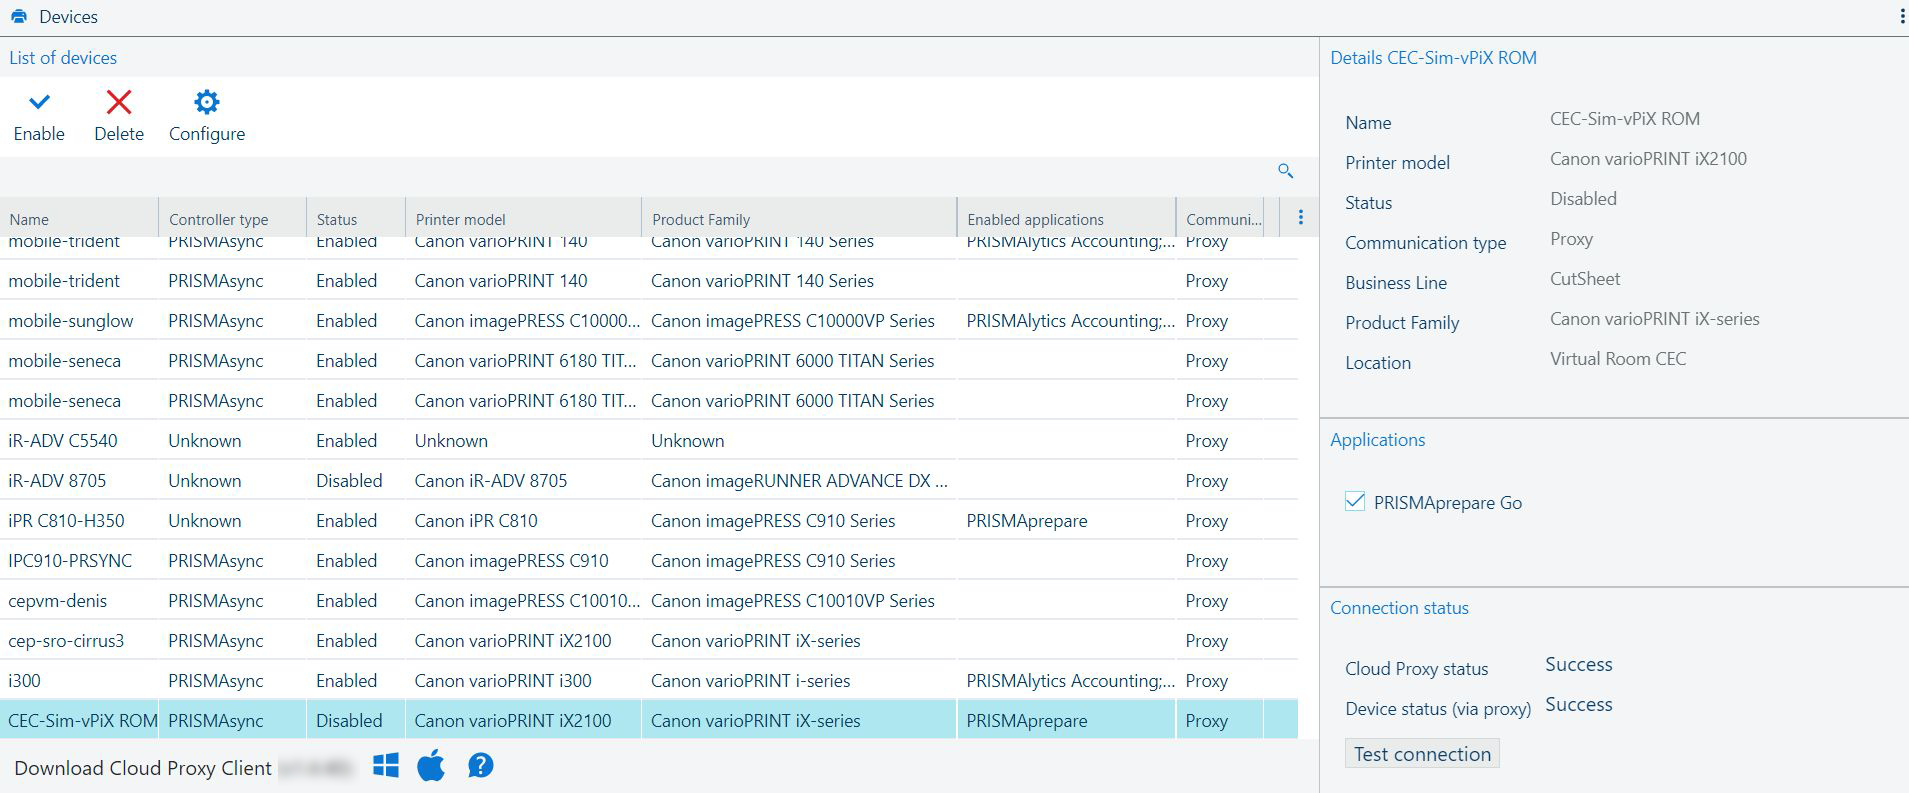
The toolbar contains actions possible with the devices in the [List of devices].
You can set whether a device can be used in the applications you control:
[Disable]:
Click the
![]() button to prohibit the device's usage.
button to prohibit the device's usage.
[Enable]:
Click the
![]() button to allow the device's usage.
button to allow the device's usage.
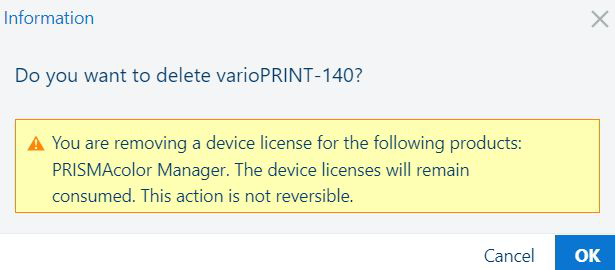
You can delete one of the devices:
[Delete]:
Click the
![]() button to delete the device.
button to delete the device.
A dialogue pops up and asks for confirmation.
When trying to delete a device tied to a paid subscription, the device license is not freed!
[Configure]:
You can to open the [Device configuration] workspace for the devices managed by Cloud proxy.
The
![]() [Configure] button has three states:
[Configure] button has three states:
Not present, for [Native] devices.
Visible and enabled, for devices assigned to printing apps.
Visible and not enabled, for the rest.
For each device, you are presented with the following information:
|
Field |
Description |
|---|---|
|
[Name] |
Name of the device. |
|
[Status] |
Status of the device:
|
|
[Printer model] |
Device model. |
|
[Hostname] |
The network host name, if available. |
|
[Serial Number] |
The serial number of the device. |
|
[Controller type] |
Type of the controller driving the device. Can be one of:
|
|
[Controller version] |
Version of the software of the controller. |
|
[Print engine version] |
Version of software installed on the device. |
|
[IP address] |
The network IP address of the device. |
|
[Communication type] |
Type of the communication between the application and the device. Can be one of:
|
|
[Business line] |
Can be one of:
|
|
[Product family] |
Generic name of the family of products. |
|
[Location] |
Custom optional information, as mentioned at device registration time. Should contain the physical location of the device. |
|
[Enabled applications] |
A list with all [Applications] enabled on this device. |
The panel displays all the available information regarding the device selected in the [List of devices] table. The content is not editable.
The [Applications] panel contains the list of all subscribed applications.
The device selected in the [List of devices] is available to the selected applications.
You can enable/disable the usage of any device for a particular application from the list by toggling the corresponding check-box.
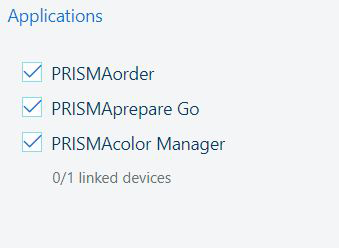
For some applications, the number of linked devices is also present.
The [Connection status] offers details regarding the availability of the Cloud proxy and of the devices.

|
Field |
Description |
|---|---|
|
[Cloud Proxy status] |
Connection status: will let you know if Cloud proxy is reachable or not. Status can be one of:
|
|
Depending on the type of connection to the PRISMA Home, one (or both) lines are present: [Device status (via proxy)] [Device status (native)] |
Connection status: will let you know if the device is connected or not. Status can be one of:
|
|
Button [Test connection] |
Press the [Test connection] button if the device has lost the connection. |
The setting [Connection status] in the main devices overview can be manually refreshed using the [Cloud Proxy status]. If you do not receive an [OK] status, you need to switch to the Cloud proxy for troubleshooting.
For the devices managed by Cloud proxy, you can open the [Device configuration] workspace.
The [Device configuration] workspace gives you the means of visualising the configuration of a registered device. To open this, you will have to navigate to
![]() .
.
Each device will supply information regarding its capabilities, such as the [Finishers], [Queues], and [Output locations]. If you have the role, you can enable or disable the use of certain finishers, which, in turn, will lead to the update of the available [Output locations].