Loading

Clean the guide plate and replace the foams and roller assy

Introduction

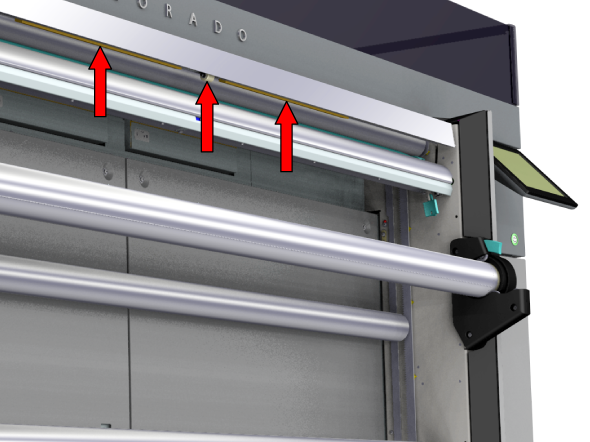
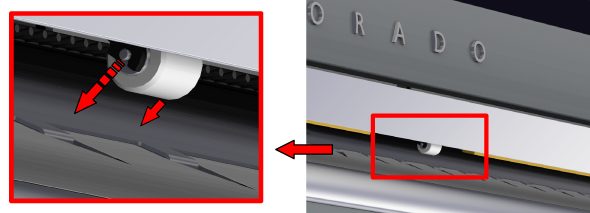
When you see your print is polluted with a clear ink stamp coming from the guide plate, you must clean the guide place and replace the foams and roller assy.

Before you begin

Use Océ Colorado 1640 prescribed:

  • Nitrile gloves for handling ink

  • Lint free cloths and swabs

  • Cleaning liquid (IPA)

NOTE

For information on the prescribed maintenance materials, see List of Océ Colorado 1640 maintenance materials.

CAUTION

Wear the Océ Colorado 1640 prescribed nitrile gloves. You can only wear the gloves for ten minutes. After ten minutes you must put on new gloves to prevent contact with the ink.

Procedure

  1. Make sure the printer is not printing and the guide plate is in open position.
  2. Remove the media before you replace the foams and roller assy. For more information, see Remove media from the paper path
  3. Put on the Océ Colorado 1640 approved nitrile gloves.
  4. Go to the media output side and locate the guide plate with the roller assy and foams.
  5. Locate the roller assy under the guide plate.
  6. Pull to take out the roller.
  7. Locate the foam left of the roller assy. A pin is placed at the left end of the foam.
  8. Pull the pin and plug out with your fingers.
  9. Locate the foam right of the roller assy. A pin is placed at the right end of the foam.
  10. Pull the pin and plug out with your fingers.
  11. Slide both foams towards the middle to remove them.
  12. Dispose the roller assy, foams, pins and plugs as chemical waste according to local regulations.
  13. Take a lint free cloth and clean any residue ink left on the guide plate.

    If necessary, dampen the cloth with the cleaning liquid to remove any remaining ink.

    IMPORTANT

    Use the prescribed cleaning liquid. Do not use any other cleaners.

  14. Dispose the gloves and cloth as chemical waste according to local regulations.
  15. Take the new foams and slide them in place.
  16. On the left end, push in a new plug and push in a new pin.
  17. On the right end, push in a new plug and push in a new pin.
  18. Push and click a new roller assy in place.