
To use the scan-to-SMB function, the system administrator must enable this function. The system administrator must add SMB shares. A scan job will be sent to the selected SMB share. When scanning to SMB is enabled the user can enter a SMB directory (subfolder) to send the scans to.
Place the originals face up into the automatic document feeder (ADF), or place one original face down on the glass plate.
On the control panel, touch [Jobs] -> [Copy/Scan] -> [Scan to SMB].
The job window opens.
Change the settings for the original and the file.
Select the SMB share in the [Destination] screen and touch [OK].
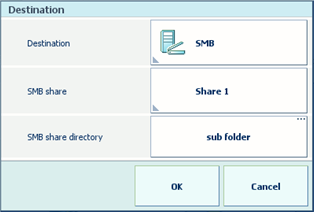
When desired you can enter a subfolder to send the scans to. When the subfolder does not exist yet, the subfolder will be created instantly.
Touch [Start]  .
.
The scanner scans the originals and sends the resulting file to the selected SMB share and SMB subfolder if applicable.