
The details area contains the information for the active printer only. You can click on a printer to make it the active printer.
The details area can display the following information:
Preview and settings, see Preview and settings
Enlarged preview, see Enlarged preview
The submitted jobs and the printer queue, see The submitted jobs and the printer queue
Templates, see Templates
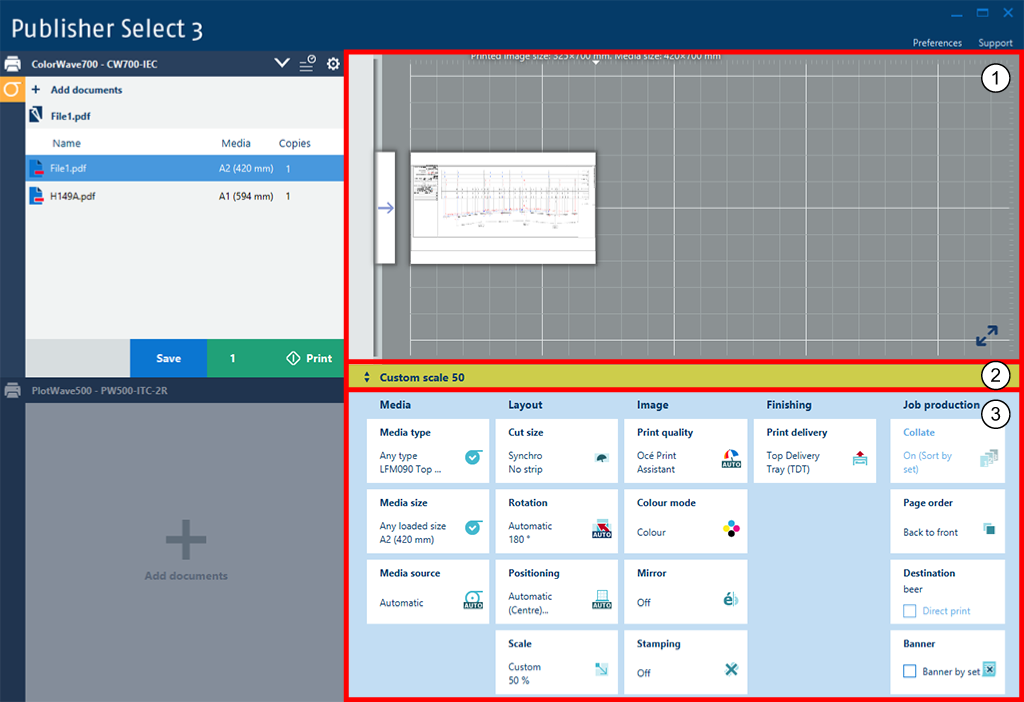
The print preview (when you create a job)
Dynamically preview the way documents of a job will be printed. When you are editing a job you can view the document in the print preview above.
Use the quick rotation tool on the preview to rotate the image counter-clockwise.
The template bar
The template bar displays the name of the template that is used for the document selection you made.
When you changed settings, the template bar displays an asterisk behind the original template name.
When not one unique template is applied to the document selection, the template bar displays [Multiple templates]
Click on the template bar to open the template screen.
The print settings (when you create a template or job)
Divided into four categories: [Media], [Layout], [Image], [Finishing].
Click on the tiles and adjust the print settings for each document of a job, for a complete job or for a template.
The preview and settings information is the default information in the details area.
|
Icon |
Action |
|---|---|

|
[Enlarge the preview] |

|
[Enable crop] |

|
[Cancel crop] |

|
[Open the overview] |

|
[Revert crop] |
Click on the enlarge preview icon at the bottom right corner of the print preview to open the enlarged preview screen.
The enlarged preview screen will be displayed in a new window. In this screen you can scroll to zoom in and out.
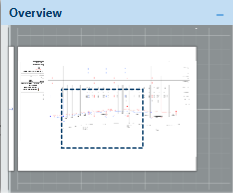
When the enlarged preview does not fit the screen, you can drag the enlarged preview to see the required part of the document. You can also open an overview of the document by clicking on the overview icon at the bottom right corner of the enlarged preview screen. In this overview screen you can drag the dotted rectangle to see the required part of the document.
Click on the crop icon at the bottom right corner of the enlarged preview screen to enable the crop functionality.
The crop functionality is only available for PDF files.
Drag the dotted lines to select the required part of the document. Click on 'Save and close' in the upper right corner of the enlarged preview screen to save the cropped document. The document in the list has been replaced by the cropped document. Click on the revert-crop icon to restore the original document.
Click again on the crop icon to cancel the crop.
Click on the close icon at the top right corner of the enlarged preview screen or press the <Esc> key to close the enlarged preview screen.
Click on the middle icon at the right side of the printer title bar to see the submitted jobs list and the printer queue in the details area.
You can switch the active printer while the submitted jobs list and the printer queue are displayed.
In the printer area, only the printer information is visible.
Submitted jobs:
Track the status of the jobs you submitted.
Perform actions on the submitted jobs (cancel, delete, save, duplicate, reprint).
Printer queue:
View the jobs in the printer queue.
Click on the close icon at the top right corner of the submitted jobs list or press the <Esc> key to hide the submitted jobs list and the printer queue.
Click on the template bar below the print preview to open the template screen.
The template screen will be displayed in a new window.
On the template screen you can:
Select a template for a complete job or for a selection of documents in a job.
Open the template manager. The template manager will be displayed in a new window.
In the template manager you can:
Create, edit and delete templates.
Set a template as default.
Import templates made for a same printer model.
Export templates.
Click on the close icon at the top right corner of the templates screen or press the <Esc> key to close the template screen.