
The purpose of this chapter is to guide you through the actions needed to setup and configure PRISMAlytics Dashboard to the PRISMA Home. Read the steps below carefully.
This is what you need to do to get started:
Register the printer(s) that you are going to use for PRISMA Home.
There are two ways to register your printers:
native connection for PRISMAsync and Canon continuous feed printers
proxy connection for other printers
PRISMAlytics Dashboard V2.1 supports the following Canon products:
imagePRESS models with PRISMAsync, Fiery and Canon PDL
varioPRINT 6000 series
varioPRINT 140 series
varioPRINT iX Series
ProStream
ColorSteam
imagePROGRAF
For more information on the printer registration, refer to the links below:
Allow the applications to use the newly added printer(s).
Once you have registered the printers, go to PRISMA Home to check whether PRISMAlytics Dashboard is allowed to access them.
Go to PRISMA .
For each device registered that you want to allow the application to access you must do the following:
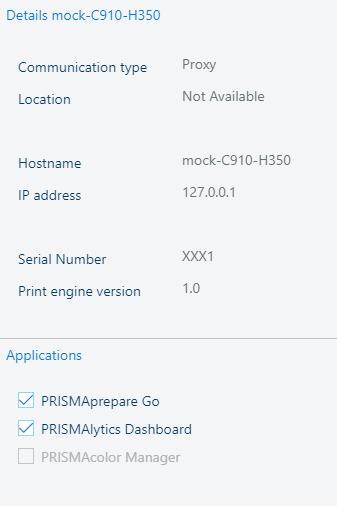
In the [Details] panel on the right, click on the device and check the checkbox next to the name of the application you want to enable for that device.
Sometimes you need to scroll down until you see the [Applications] list.
Repeat for each device you want to enable.
 PRISMAlytics Dashboard checkmark in PRISMA Configuration
Video: Enabling applications
Invite other users to create accounts in your tenant in PRISMA Home.
When you send the invitation, you have to select what type of user role to assign for the PRISMA Home.
.
Assign a role to each registered users in the available applications.
Video: Managing users