|
Go to the print quality settings
|
-
Open the Settings Editor and go to: .
|
|
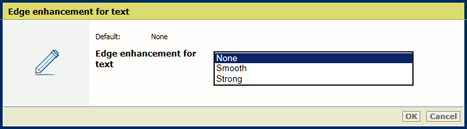
Improve the print quality of small text
|
-
Go to [Edge enhancement for text].
-
Indicate if you want stronger or smoother text edges.
-
Click [OK].
|
|
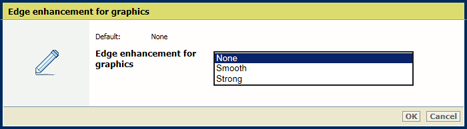
Improve the print quality of graphics
|
-
Go to [Edge enhancement for graphics].
-
Indicate if you want stronger or smoother text edges.
-
Click [OK].
|
|
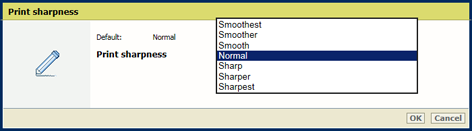
Change the print resolution
|
In general, a larger resolution improves the print quality but affects job productivity.
-
Go to [Print sharpness].
-
Indicate if you want smoother or sharper prints.
-
Click [OK].
|
|
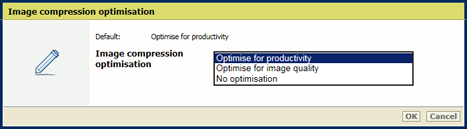
Give priority to image quality or productivity
|
-
Go to [Image compression optimisation].
-
Indicate the required mode.
-
Click [OK].
|
|
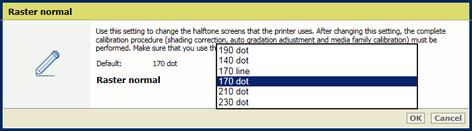
Change the default halftone screen for the raster normal
|
-
Go to [Raster normal].
-
Select the required raster.
-
Click [OK].
-
Calibrate the printer and media families. (Learn about calibration)
|
|
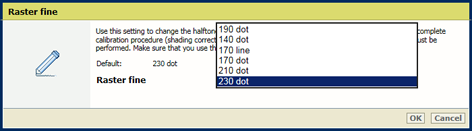
Change the default halftone screen for the raster fine
|
-
Go to [Raster fine].
-
Select the required raster.
-
Click [OK].
-
Calibrate the printer and media families. (Learn about calibration)
|
|
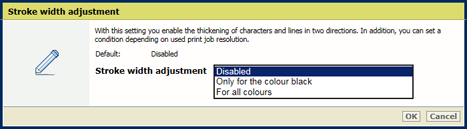
Print characters and lines thicker
|
-
Go to [Stroke width adjustment].
-
Indicate if you want thicker characters and lines for the color black only or for all colors.
-
Click [OK].
-
Go to [Width adjustment in horizontal direction].
-
Indicate the level of thickness in the horizontal direction.
-
Click [OK].
-
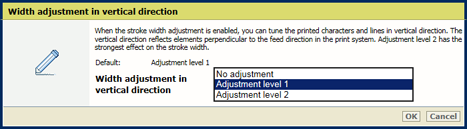
Go to [Width adjustment in vertical direction].
-
Indicate the level of thickness in the vertical direction.
-
Click [OK].
-
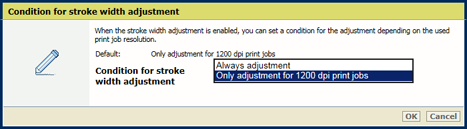
Go to [Condition for stroke width adjustment].
-
Indicate if you want thicker characters and lines for all jobs or for 1200 dpi jobs only.
-
Click [OK].
|

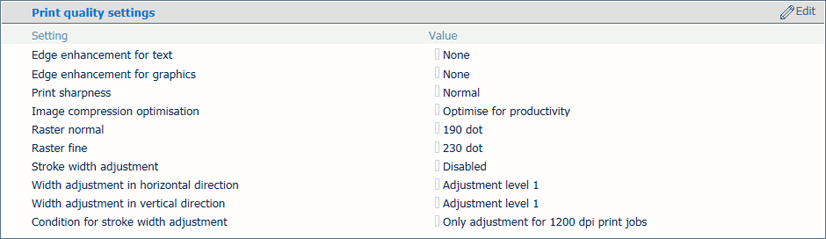 Print quality settings