
You must refill the cleaning cassette when it runs out of clean tissue.
The user interface gives an orange warning when you can replace the cleaning cassette.
The user interface gives a red warning when you must replace the cleaning cassette.
Use the Colorado XL-series prescribed:
Microflex gloves for handling ink
Lint free cloths
Cleaning liquid (IPA)
Cleaning tissue ribbon
Large sheet of paper
 CAUTION
Always wear protective gloves when opening the covers of the machine.
CAUTION
Wear gloves when contact with ink or maintenance materials is possible. Gloves should always overlap sleeves. Follow the ink related Safety Data Sheets (SDS) guidelines carefully in order to ensure maximum safety.
|
1 |
On the user interface tap on [Maintenance], then [Replace cleaning cassette.] |
|
|
2 |
Move to the media output side and wait until the carriage has moved into position. |
|
|
3 |
Put on the Colorado XL-series approved gloves. |
|
|
4 |
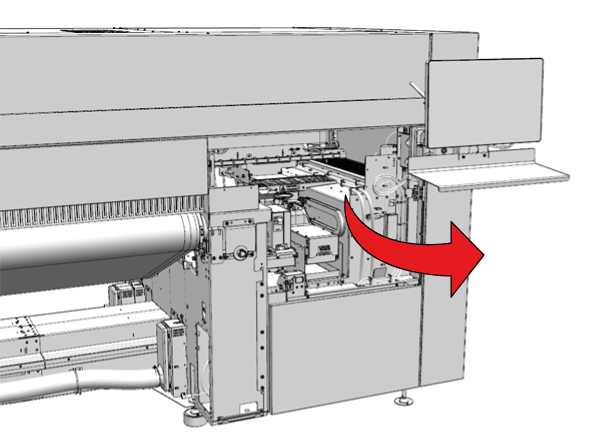
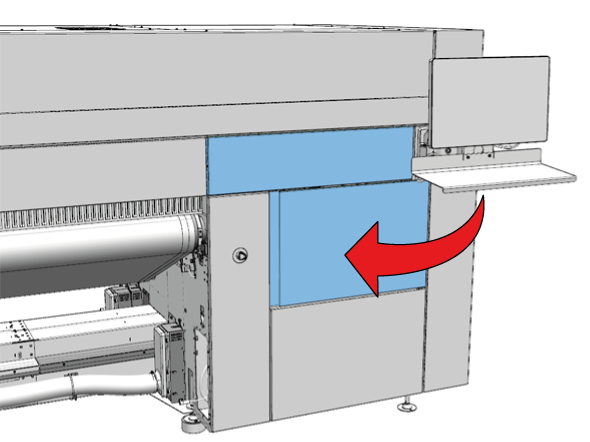
Open the maintenance door. |
|
|
5 |
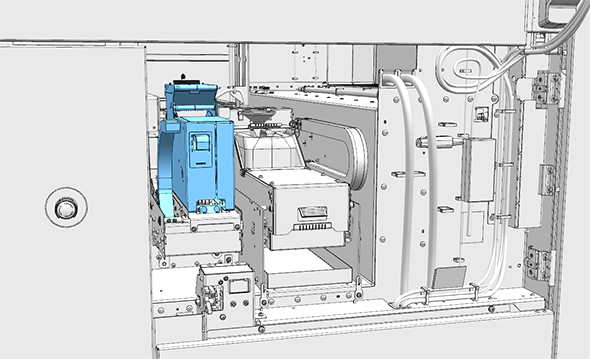
Locate the cleaning cassette. |
|
|
6 |
Put on the Colorado XL-series approved gloves. |
|
|
7 |
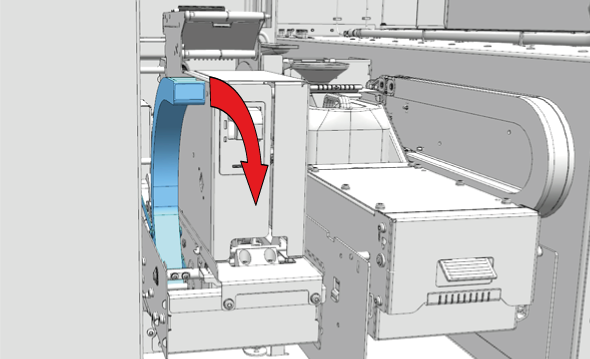
Pull the handle towards you to unlock the cleaning cassette. |
|
|
8 |
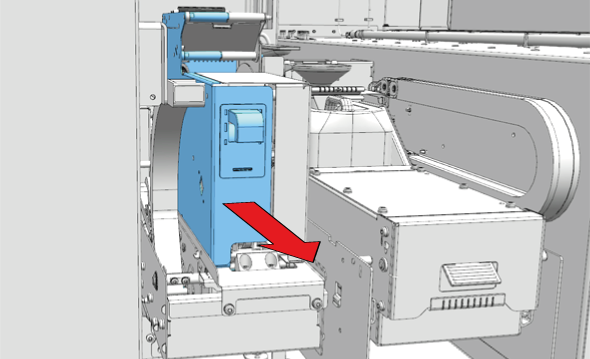
Hold the green handle and pull the cassette out of its slot. |
|
|
9 |
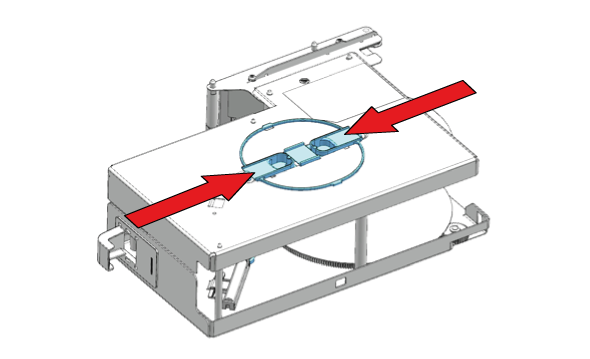
Remove the iron cover on the cassette.
|
|
|
10 |
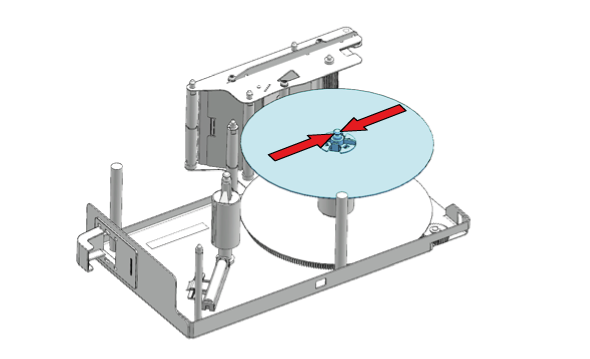
Squeeze the plastic circle and remove the round metal cover. |
|
|
11 |
Remove the left-over tissue ribbon from the left side tissue ribbon holder, leave the left tissue ribbon core on the holder. |
|
|
12 |
Remove the used up tissue ribbon. |
|
|
13 |
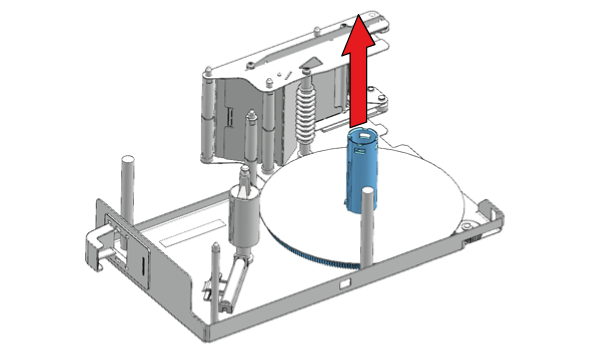
Take off the empty core of the tissue ribbon from the tissue ribbon holder on the left-hand side and place it on the right-hand side tissue ribbon holder (mind the keying). |
|
|
14 |
Clean the cassette. Dampen a lint free cloth with cleaner IPA and clean the entire cassette and the top roller thoroughly. Pay special attention to the areas in between the teeth of the top roller. |
|
|
15 |
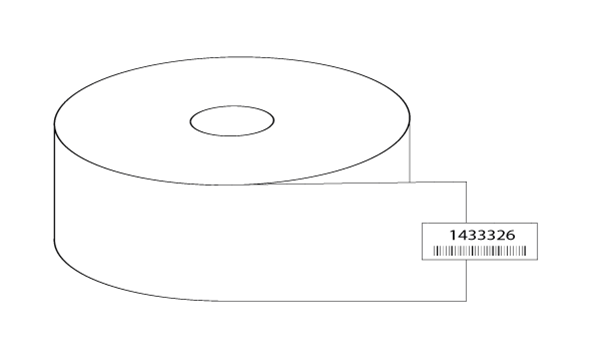
Take a new tissue ribbon and open it (do not completely remove the sticker, leave it attached to the end of the tissue ribbon) |
|
|
16 |
Place the new tissue ribbon onto the tissue ribbon holder on the left-hand side of the cassette (mind the keying). |
|
|
17 |
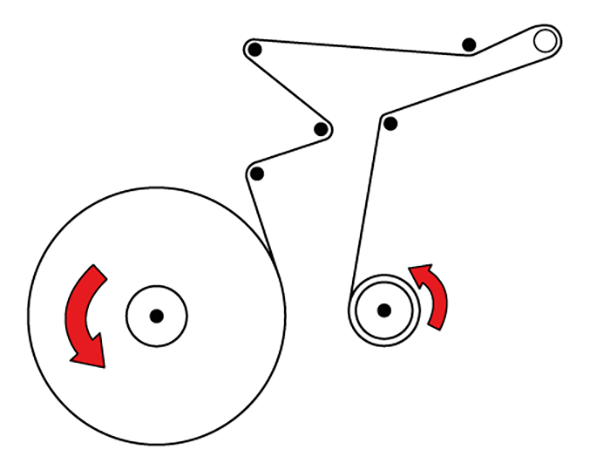
Attach the end of the new tissue ribbon to the empty core of the tissue ribbon holder on the right-hand side of the cassette with the original sticker.
|
|
|
18 |
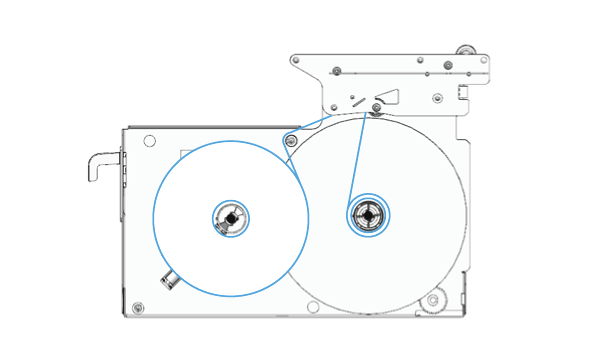
Wind the core for 2 full rotations. |
|
|
19 |
Install the two metal covers on the cassette.
|
|
|
20 |
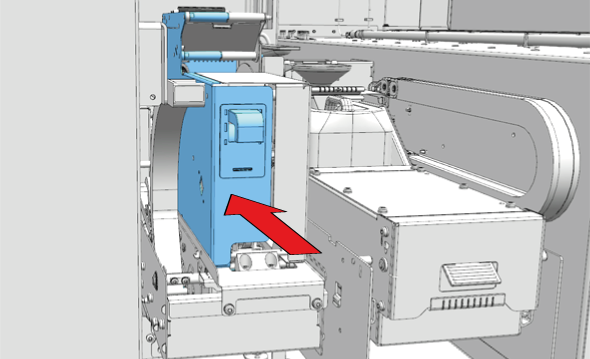
Take the refilled cleaning cassette and place the new cassette in the slot. Make sure it is fully inserted. |
|
|
21 |
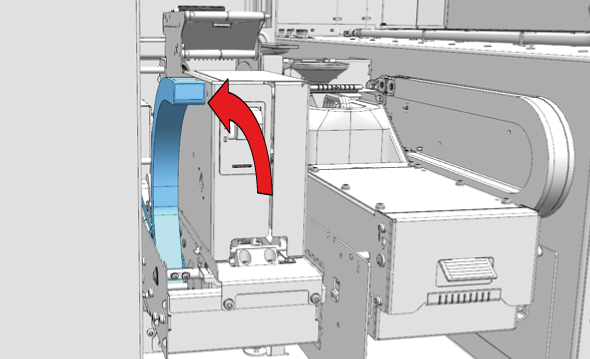
Push the green handle up to lock the cassette in its slot. |
|
|
22 |
Dispose the gloves as chemical waste according to local regulations. |
|
|
23 |
Close the maintenance door. |
|
|
24 |
On the user interface, tap [Confirm] to end the maintenance action. |
