Loading

Create a new media profile in Onyx

Introduction

When you are working with a new media that does not have a profile, you can create a new profile in Onyx.

NOTE

This manual provides you with basic information in order to create and change media profiles. Profiling is an expert task which requires additional information and tools not covered by this manual. Contact your local support organisation when you want to create or change media profiles.
Procedure

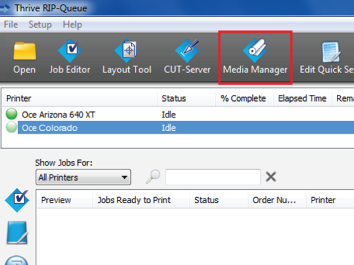
  1. Open the Onyx RIP queue.
  2. Click on [Media Manager]. The Media Manager application opens.
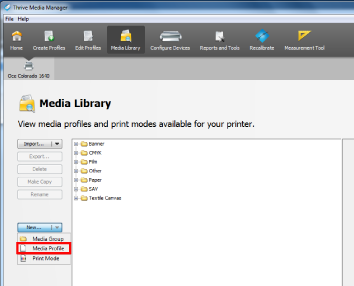
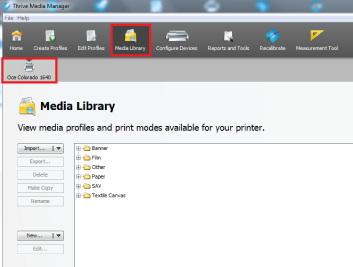
  3. Click on the Océ Colorado 1650 printer icon and click on [Media library] above.
  4. Click on [New...]  → [Media Profile].
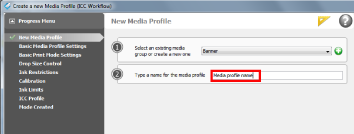
  5. Click on [Ok] for the new ICC workflow. A new window opens.
  6. Fill in the new media profile name.
  7. Follow all the steps. For more information on the general steps use the Onyx documentation.
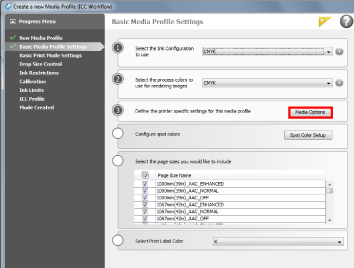
  8. You can change the specific media category and media settings under [Basic Media Profile Settings].
  9. Click on [Media options]. A new window opens.
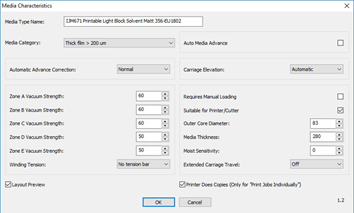
  10. You can choose a new media category and/or change the media settings. For more information, see Choose a media category, Change the media settings.
  11. Give the media a new [Media Type Name] and click on [Ok]. The window closes.
  12. Follow the steps.
  13. You can change the specific print mode settings under [Basic Print Mode Settings].
  14. You can select the print mode and fill in the print mode name. For more information, see Select a print mode.
    NOTE

    Fill in the same name as the selected print mode to avoid confusion.
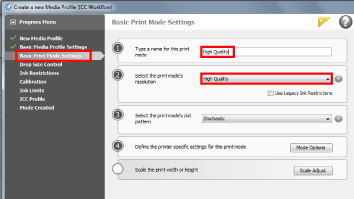
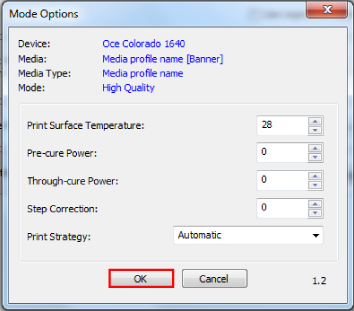
  15. Click on [Mode options]. A new window opens.
  16. You can change the rest of the media settings. For more information, see Change the media settings.
  17. Click on [Ok]. The window closes.
  18. Finish all the steps to create the media profile.