
In the [Peripherals] screen you see installed and uninstalled peripherals.
The behavior and the workflow is the same as in , but related to peripherals.
The table with the modifications is organized as in a tree-like structure, and displays the following information:
[Name] of the maintenance item
[Type]:
Lifetime
Counter
Time
Single
Condition
Manual
[% Used]
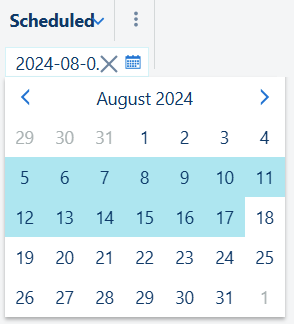
[Scheduled]
When an item on the worklist shows a scheduled date, this means that the item was scheduled via the maintenance scheduler in PRISMAservice (On Remote Service) of the CPP backoffice. An agreement with the customer has been made to execute the maintenance item on a fixed date.
This field denotes a date interval, allowing you can apply a filter by choosing your desired start date and end date from the calendar selector, which appears when you click the calendar icon
![]() :
:
Press the
![]() icon if you want to remove the date filtering.
icon if you want to remove the date filtering.
The toolbar offers a quick way of reaching the following functions:
![]()
Lets you add a new maintenance operation as an action for the visit activities.
![]()
Lets you delete one or more manual maintenance items.
This action is only available when the selected item in the worklist is a manually added maintenance operation. To select, tick the checkbox in the first column.
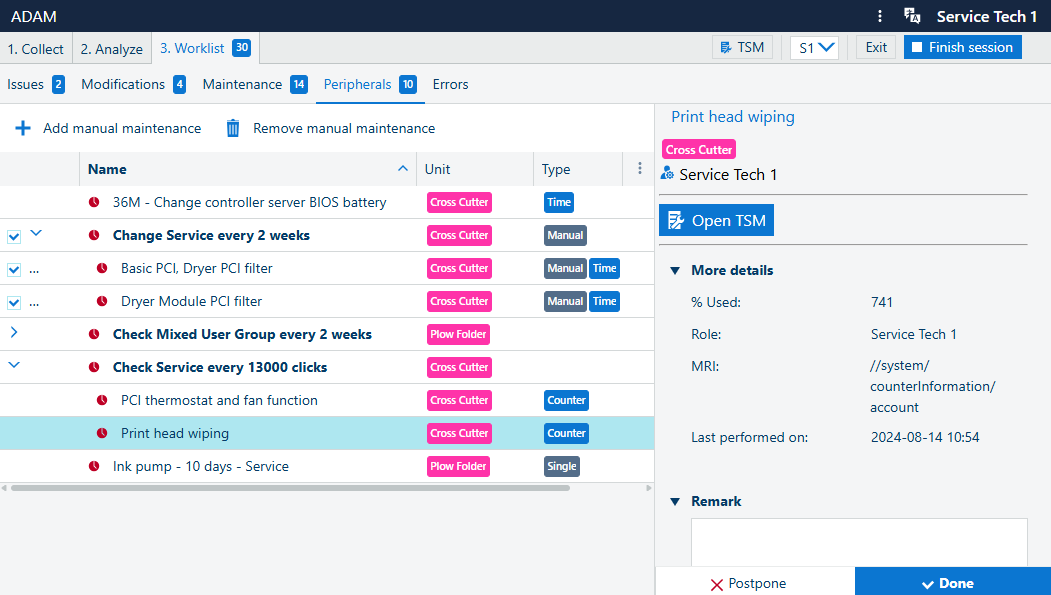
The left-hand-side panel shows some extra details for the selected modification in the main list. The title is taken from the [Name], followed by read-only information like the , the . Down below, the initially collapsed section offers same details from the table.
You can:
(if available)
![]() [Add to worklist]
[Add to worklist]
Open the TSM document that describes this peripheral.
Add an optional [Remark]
To the bottom of this panel, you can use the default actions
![]() [Postpone] and
[Postpone] and
![]() [Done] to close the maintenance item.
[Done] to close the maintenance item.