When you have not yet configured the printer after installation of the Touchstone Driver.
Procedure
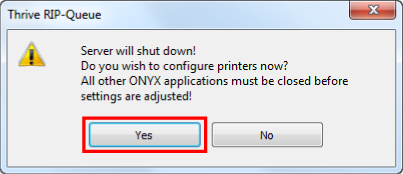
Open Onyx Thrive, select your printer and click on [Configure Printer].
Click on [Yes].
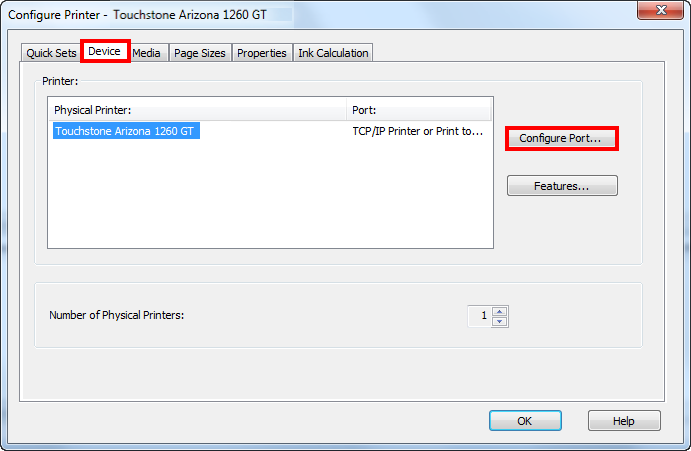
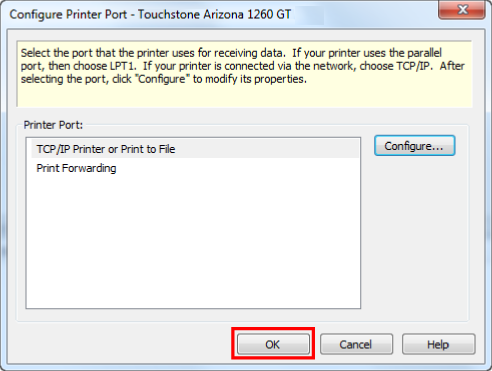
Select the [Device] tab and click on [Configure Port].
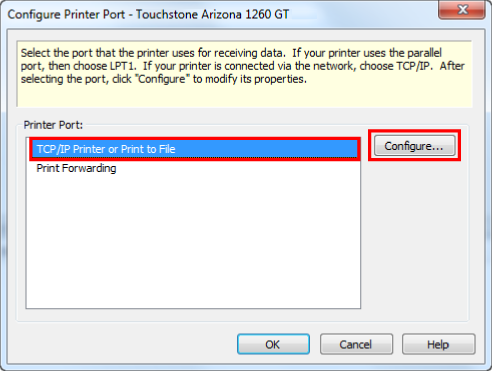
To configure the printer port select 'TCP/IP Printer or Print to File' and click on [Configure].
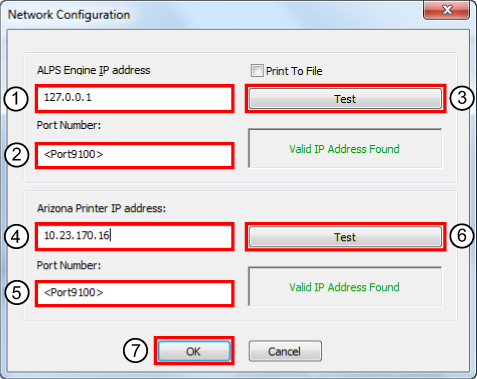
Enter the configuration settings:
Enter the IP address of the computer on which the Touchstone ALPS Engine has been installed.
Enter the port number that you have declared during the installation of the Touchstone ALPS Engine.
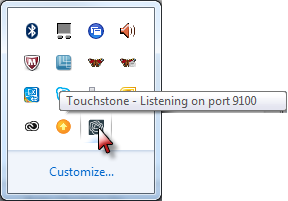
You can move your mouse over the Touchstone icon in your system tray to check the port number.
Test the IP address.
Enter the IP address of the printer.
Enter the input port number of your printer (by default 9100).
Test the IP address.
Click on [OK].
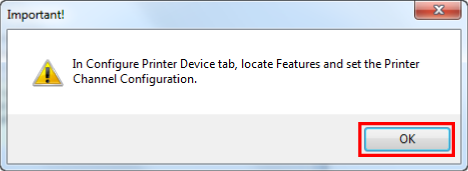
Next, you need to go to the Printer Channel Configuration. Click on [OK].
Click on [OK].
Select the Touchstone Driver and click on [Configure Printer].
Click on [Yes].
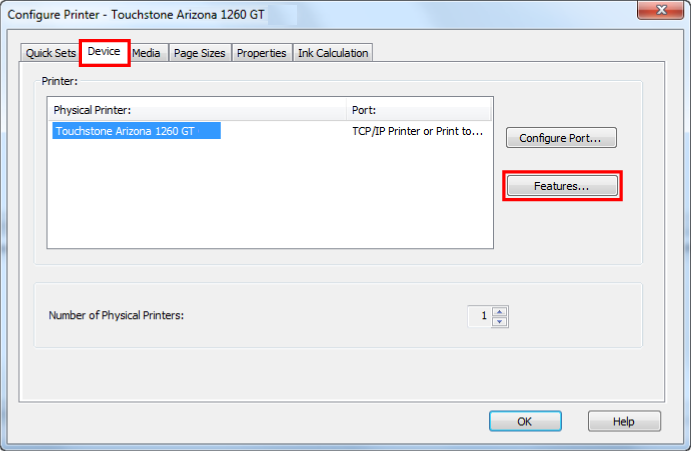
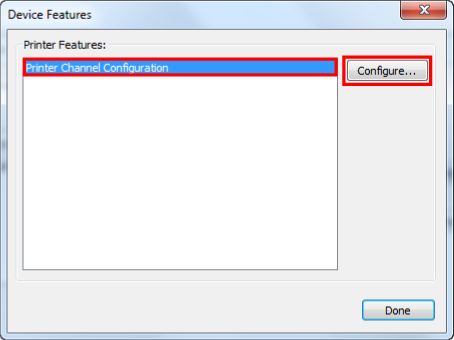
Select the [Device] tab and click on [Features].
Select 'Printer Channel Configuration' and click on [Configure].
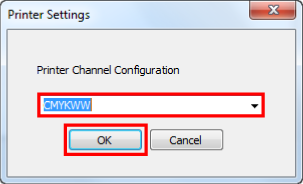
Select the correct Printer Channel Configuration and click on [OK].
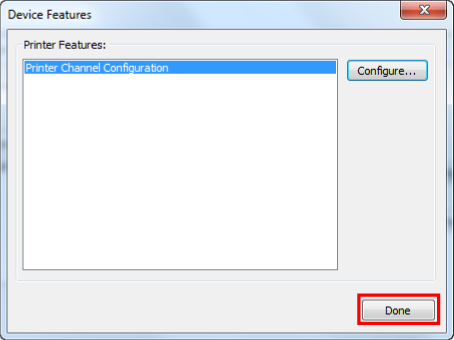
Click on [Done].
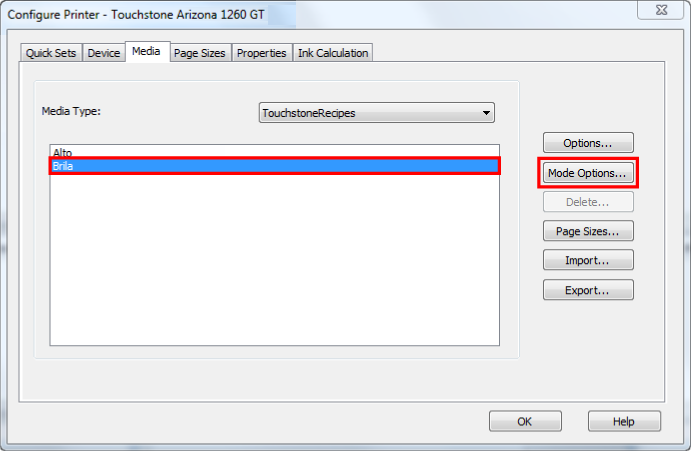
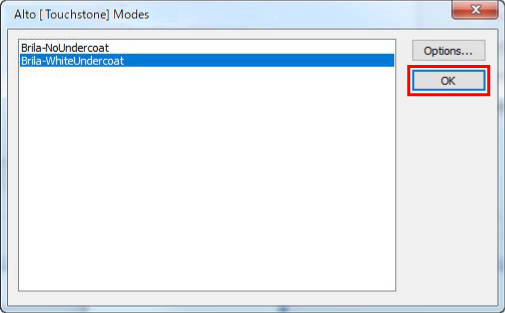
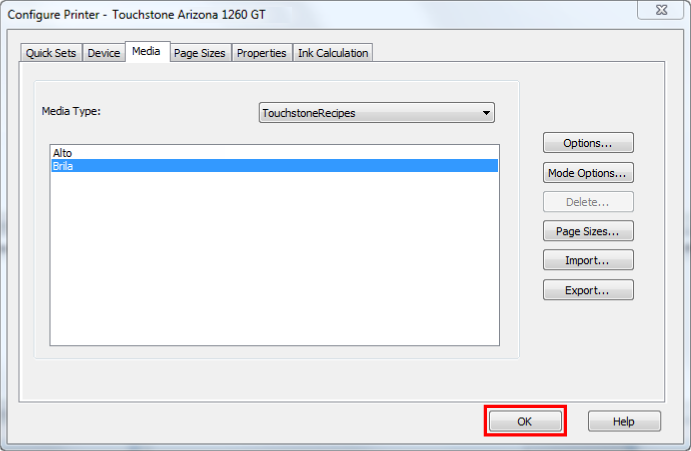
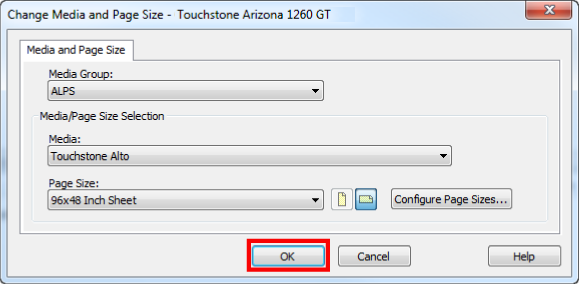
Select the [Media] tab, choose the effect type of the elevated artwork that you want to print ('Alto' or 'Brila') and click on [Mode Options].
Select the effect type of the elevated artwork that you want to print (in this case 'Brila-NoUndercoat' or 'Brila-WhiteUndercoat'). This is a default value that you can change in the job settings windows before you actually print your artwork. Click on [OK].
Click on [OK].
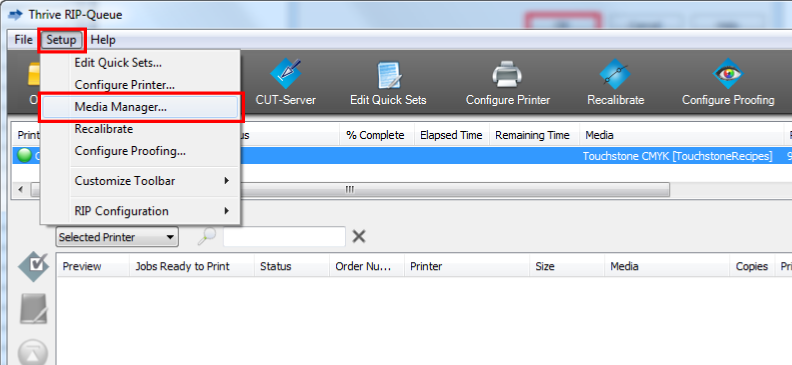
Go to [Setup] and open the [Media Manager].
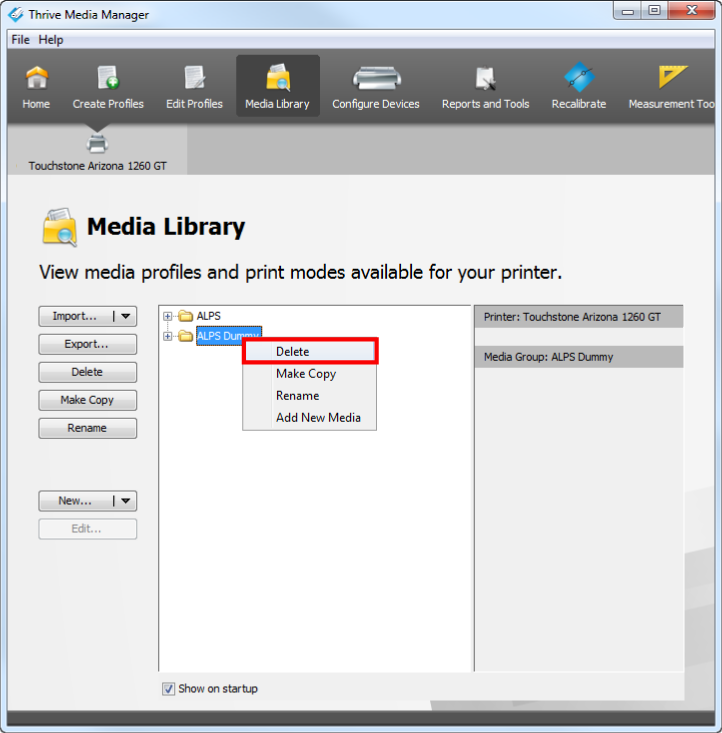
Right-click on the ALPS Dummy, click on [Delete] > [OK].
Close the Media Manager.
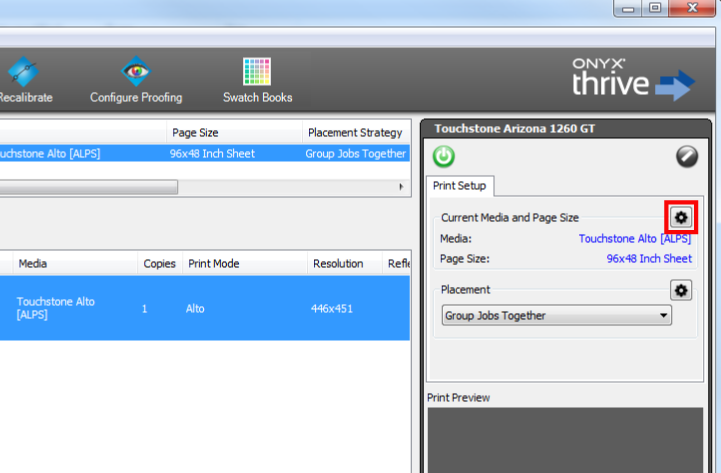
Click on the button indicated below to change the media settings.