
You can check the validity of an NFC smart card and NFC smart card reader after you configured the PRISMAsync Print Server NFC smart card options.
Connect the reader to a free USB port at the back side of PRISMAsync Print Server.
Open the Settings Editor and go to: .
 [Users] tab
Click [Configure NFC smart cards].
 [Configure NFC smart cards] option
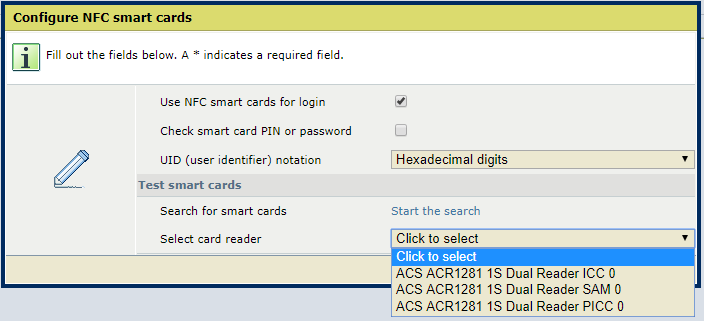
In the [Test smart cards] section, click [Start the search].
 Test smart cards
Use the [Select card reader] drop-down list to select the attached reader.
 Test smart cards
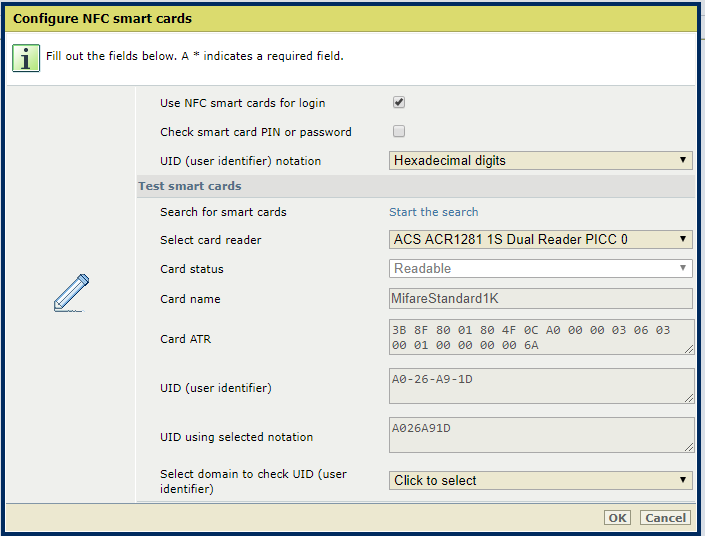
The [Card status] field shows the status of the read smart card:
[Readable]: PRISMAsync Print Server can read the smart card.
[Unreadable]: PRISMAsync Print Server cannot read the smart card.
[No smart card found]: there is no smart card in the reader.
The [Card name] and [Card ATR] fields show the details of the smart card.
 Test smart cards
Use the [Select domain to check UID (user identifier)] drop-down list to select the domain where the smart card users are configured.
Now, PRISMAsync Print Server checks the selected domain.
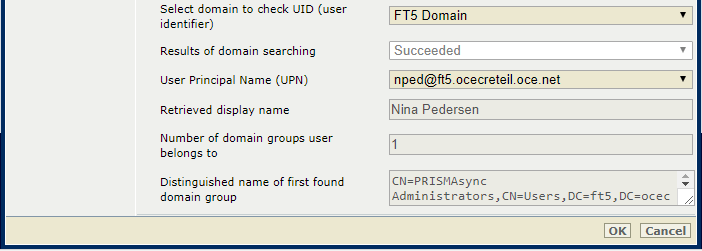
When the domain can be found, the test results show: [Succeeded]. When the test reveals any problems, they are specified.
 Test smart cards
When there are more users that represent the UID (user identifier), use the [User Principal Name (UPN)] drop-down list to select the user you want to test.
Now, PRISMAsync Print Server retrieves the user information.
[Retrieved display name]: name of LDAP user account.
[Number of domain groups user belongs to]: number of LDAP user groups the user belong to.
[Distinguished name of first found domain group]: LDAP specification of the first found domain user group.
Click [OK].