
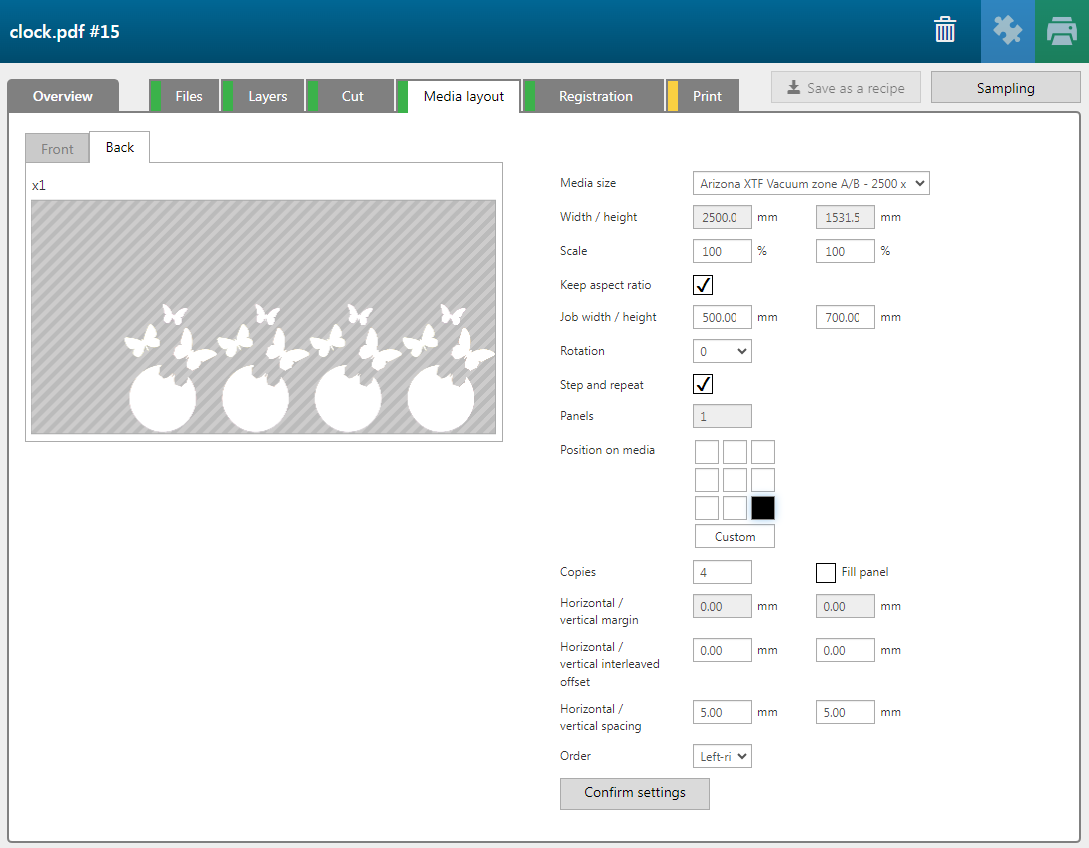
In the [Media layout] tab you can define how many copies of your application should be printed on the media and how these copies should be divided.
|
Setting |
Description |
|||
|---|---|---|---|---|
|
[Media size] |
Select a media size available for your printer model. |
|||
|
[Width / height] |
This setting is only available when you have selected [Media size] - [Custom]. Otherwise the [Width / height] is filled in automatically. |
|||
|
[Scale] |
Enter the scale percentage in the [Scale width / height] text boxes. |
|||
|
[Keep aspect ratio] |
When the [Keep aspect ratio] check box is ticked, the file size is scaled proportionally to fit the box defined by [File width / height]. |
|||
|
[Job width / height] |
Calculated value. Cannot be changed. |
|||
|
[Rotation] |
Enter the rotation of your job in degrees (0, 90, 180, 270). When you have ticked the checkbox [Fill panel], you can select [Auto]. The software then attempts to rotate all the copies 90 degrees to see if it can fit more copies on a panel. |
|||
|
[Step and repeat] |
Tick this checkbox to enable step and repeat. |
|||
|
[Panels] |
The number of panels is calculated automatically. It depends on the number of copies and the size of the media. |
|||
|
[Position on media] |
|
Select one of the squares to position the print application on the media automatically. |
|
Click [Custom] to add the offset values manually. |
|
[Copies] |
Enter a specific number of copies or tick [Fill panel] to let the software compute how many copies can be fitted on the selected media size, using all the other specified settings. |
|||
|
[Horizontal / vertical margin] |
Enter the horizontal and the vertical margin for the set of jobs. |
|||
|
[Horizontal / vertical interleaved offset] |
Enter the horizontal and the vertical interleaved offset for the jobs. These settings, together with horizontal and vertical spacing can be useful to define tighter layouts. It works best for non-rectangular shapes - i.e. circles/ellipses. |
|||
|
[Horizontal / vertical spacing] |
Enter the horizontal and the vertical spacing between the jobs. |
|||
|
[Order] |
[Left-right] [Bottom-top] |
|||
|
[Confirm settings] |
Click the button to confirm the settings. |
|||