
 Job properties
The job properties depend on the product.
 Print delivery
Go to the job location and select the job.
Click the edit job button  .
.
Click [Print delivery].
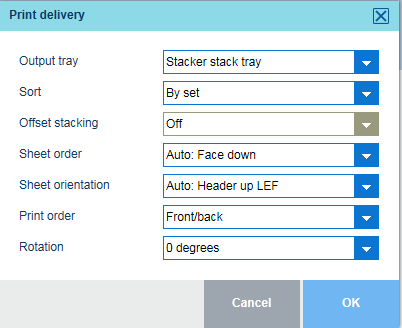
Use the [Output tray] drop-down list to select the required tray.
Use the [Sort] option to select the sorting method.
[By set]: prints are sorted by set.
[By page]: prints are sorted by page.
Use the [Offset stacking] to indicate if you want to apply offset stacking for each delivered set or per group of sets.
Use the [Sheet order] to define the sheet order in the output tray:
[Face up]: front side of first printed sheet is visible.
[Face up reverse]: front side of last printed sheet is visible.
[Face down]: back side of last printed sheet is visible.
[Face down reverse]: back side of last document page is visible.
Use the [Sheet orientation] to define the sheet orientation in the output tray.
[Header up LEF]: long-edge feed direction, header of printed document pages points to the back side of printer.
[Header up SEF]: short-edge feed direction, header of printed document pages points to the back side of printer.
[Header down LEF]: long-edge feed direction, header of printed document pages points to the front side of printer.
[Header down SEF]: short-edge feed direction, header of printed document pages points to the front side of printer.
Use the [Print order] option to define which source file page is printed first.
[First sheet first]: the first source file page is printed first.
[Last sheet first]: the last source file page is printed first.
Use the [Rotation] option to indicate if the imposition must be rotated.
[0 degrees]: the imposition is not rotated.
[180 degrees]: the imposition is rotated 180 degrees.
Click [OK] to save the changes.