
Before you print from Microsoft 365, make sure the Microsoft 365 environment is set up. For more information see, Setting up the Microsoft 365 environment.
Before you print from Microsoft 365, make sure the Microsoft 365 environment is defined as an external location. For more information see, Create an external location (Microsoft 365).
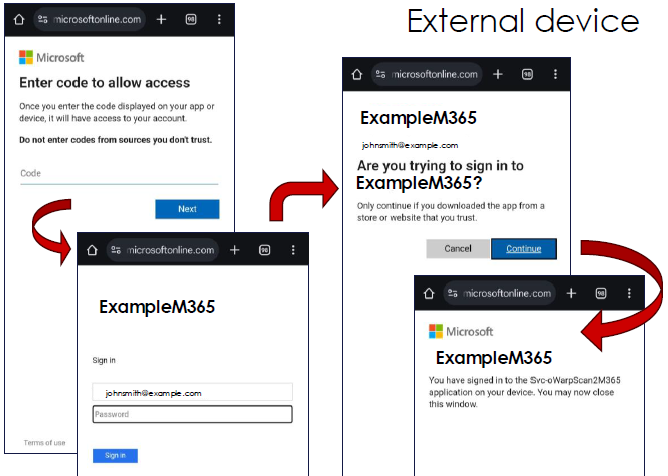
This process is completely managed by Microsoft.
Once the user is logged in, a white bust icon appears at the top of the user panel, with the username below it.
The breadcrumb bar at the top can be used to browse to higher levels in the folder structure.
When you want to make more settings, you can tap on the job name and job settings. The preset window opens, and you can make additional settings.