
This topic describes the replacement of consumables in the ink cabinet.
The dashboard indicates when you must prepare the replacement of an empty consumable box (Filling levels of supplies and waste). Moreover, the LEDs of consumable boxes that are almost empty switch on to indicate that the action is necessary.

|
One of the consumable boxes (ink, PML, or ColorGrip) is empty. To know which consumable box is empty, touch the empty container symbol to go to the [Supplies] pane. |
|||

|

|

|
The total supply of one or more consumables is nearly used up. |
|

|

|

|
||

|

|

|
The total supply of one or more consumables is used up. An action required screen appears and shows how to replace the empty consumable box. |
|

|

|

|
||
To learn how the print system processes ink, see Ink, ColorGrip and maintenance liquid supplies in the printer.
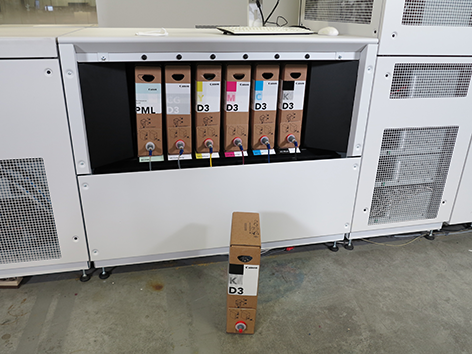
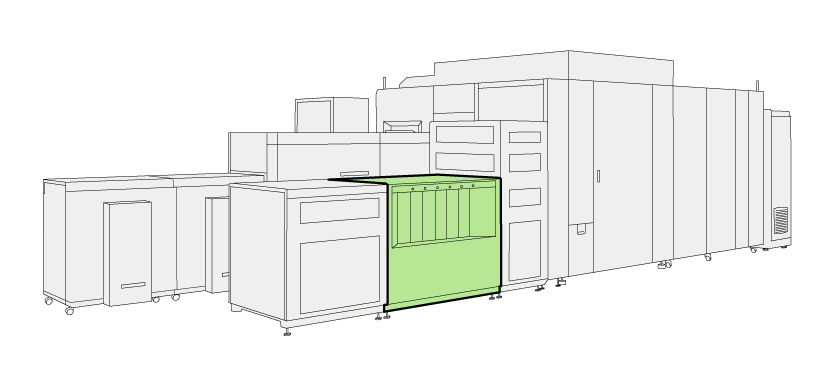 Location of the ink cabinet
In order to keep your hands clean, it is advised to use nitrile gloves when you work with ink, ColorGrip, PML, or SU70. For details, see the related material safety data sheets (Learn about printer maintenance).
Inks, ColorGrip, PML and/or SU70 contain 1,2-Benzisothiazol-3(2H)-one. From the point of view of occupational health and safety, it is not recommended that people who are sensitive to chemicals (e.g., people with asthma) work with ink or chemicals.
When you spill any liquid, wipe up the drops with disposable towels and transfer the used towels to a sealable container appropriate for disposal.
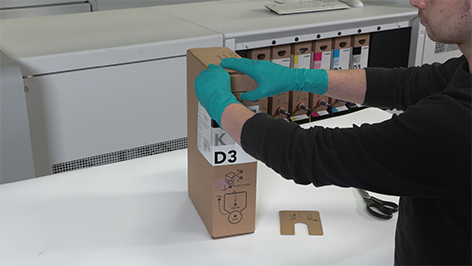
Take a full consumable box.
Keep a bottle of PML and some cleaning cloths handy to clean up any spills.
The instruction video for this maintenance action is available, see Replace a consumable box in the ink cabinet.
|
Action |
|||
|---|---|---|---|
|
1 |
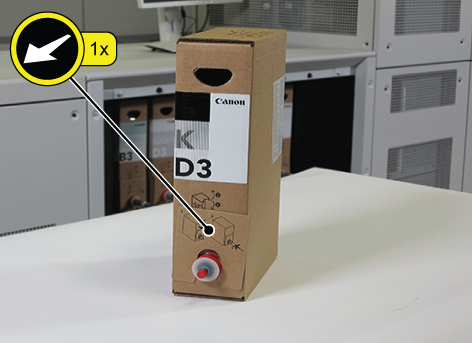
Remove the plastic cover of the consumable box. The spout fixation tool is inside the plastic cover, so make sure to not throw it away with the plastic. |

|
|
|
2 |
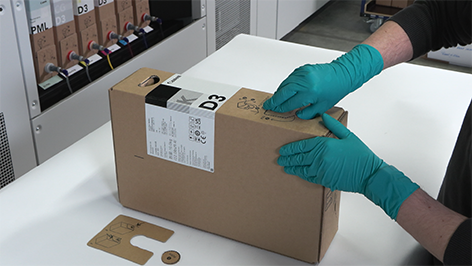
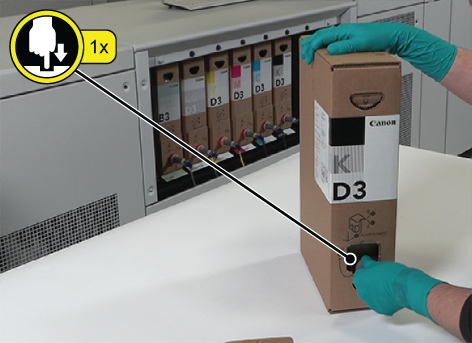
Create a handle for easier use.
|
|
|
|
3 |
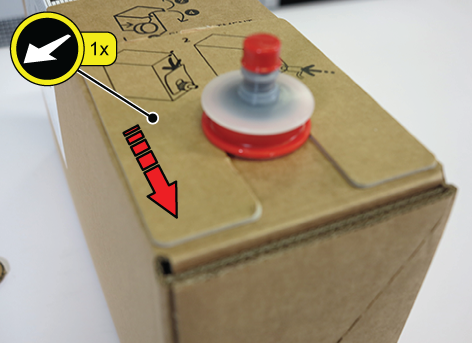
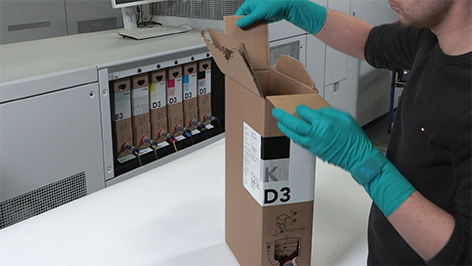
Prepare the spout opening.
|
|
|
|
4 |
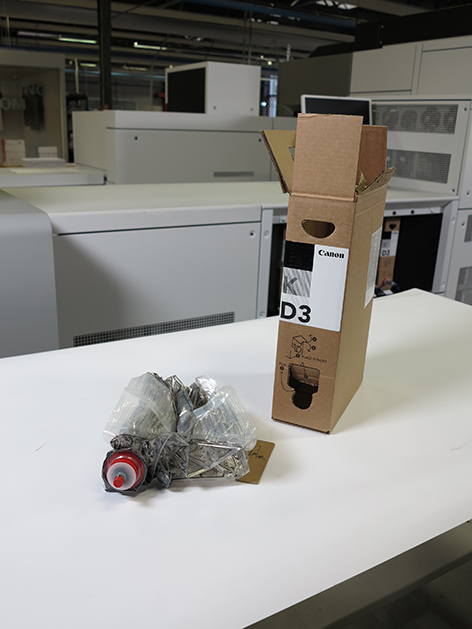
Fit the spout.
|
|
|
|
5 |
Place the full consumable box next to the ink cabinet. |
|
|
|
6 |
Detach the connector from the empty consumable box.
|

|
|
|
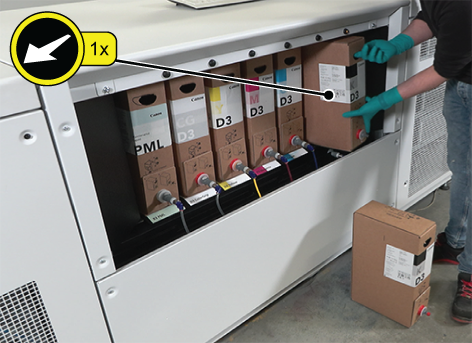
7 |
Take out the empty consumable box. |
|
|
|
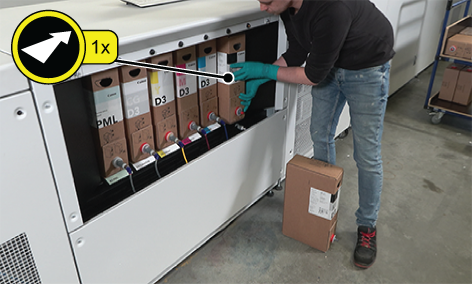
8 |
Place the full consumable box in the ink cabinet. |
|
|
|
9 |
Attach the connector.
|

|
|
|
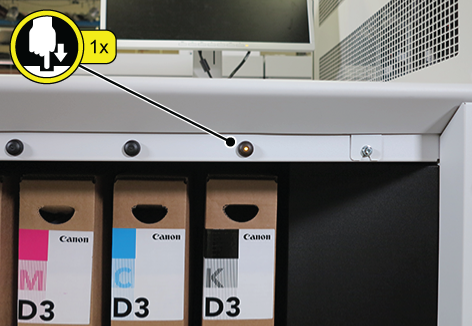
10 |
Press the black button to confirm that you placed a full container. The LED blinks slowly for about 10 seconds while the RFID tag of the consumable box is being read. Then, the LED switches off. When the LED continues to blink fast, there is important information that you need to read on the control panel. |
|
|
When you have an empty consumable box, you have two options:
dispose of the consumable box;
reuse the consumable box as a waste box.
The respective procedures are described below.
Dispose of the consumable box
The instruction video for this maintenance action is available, see Recycle an empty ink box.
|
Action |
|||
|---|---|---|---|
|
1 |
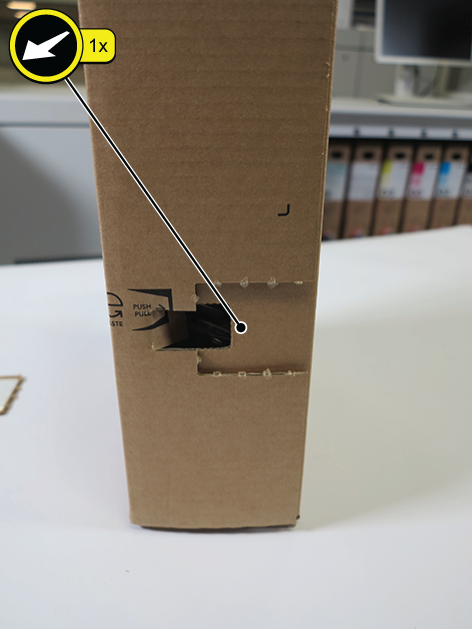
Remove the spout fixation tool. |
|
|
|
2 |
Push the spout back inside the box to allow for the removal of the ink bag. |
|
|
|
3 |
Open the top of the consumable box. |
|
|
|
4 |
Remove the empty ink bag. |
|
|
|
5 |
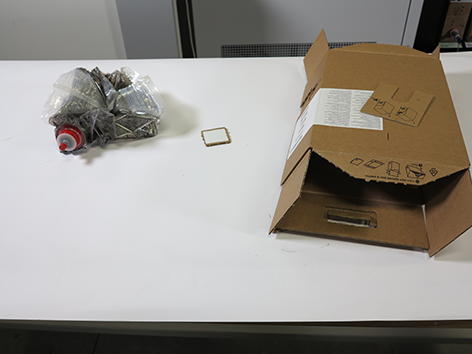
Remove the RFID tag from the consumable box.
Dispose of the RFID tag as electronic waste. |
|
|
|
6 |
Open the other side of the consumable box. |

|
|
|
7 |
Flatten the consumable box for easy disposal. |
|
|
|
8 |
Dispose of the ink bag and consumable box according to the local guidelines and policies of waste processing companies. |
||
Reuse as a waste box
|
Action |
|||
|---|---|---|---|
|
1 |
Remove the RFID tag from the consumable box.
It is important to remove the RFID tag from the consumable box to prevent its incidental reuse as a new consumable. |
|
|
|
2 |
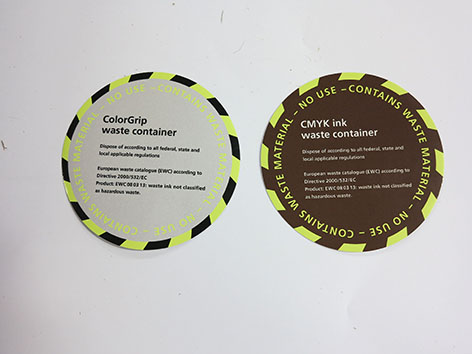
Place a new sticker from the roll of waste box stickers over the present sticker on the empty consumable box. There are two types of waste box stickers: one for CMYK ink waste and one for ColorGrip waste.
|
|
|