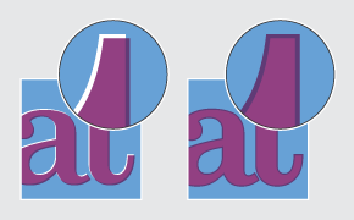

When you notice unwanted white edges between color planes, use a trapping preset to correct the connection between the color planes. A trapping preset is a collection of trapping settings for a job or job subset. Use the trapping preset editor to create your own trapping presets. You can select a trapping preset for a print job.
 Printed output without trapping preset (left-hand side) and with trapping preset
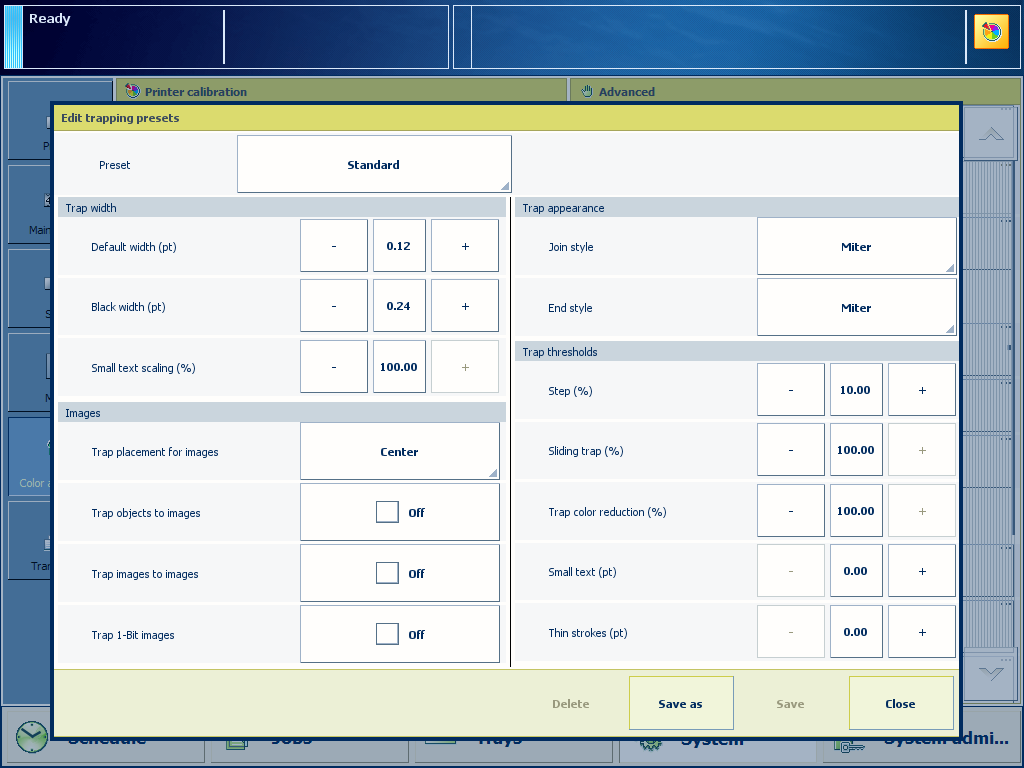
The trapping preset window provides an interface to create trapping presets. The following groups of settings are available:
Trap width: value to specify the overlap for each trap
Trap appearance: options to control the shape of the trap joins
Images: options how to trap images
Trap threshold: values to specify when trapping occurs
Be aware that an edge can appear at locations where color planes overlap each other.
Calibrate the printer.
You must always perform a printer calibration before you continue with this procedure.
Check the print quality to decide if you want to proceed.
Perform the automatic color mismatch correction.
Check the print quality to decide if you want to proceed.
Touch .
Touch [Edit trapping presets].
 [Edit trapping presets]
 Select one of the available trapping presets.
Define the trapping settings in the [Trap width], [Trap appearance], [Images] and [Trap thresholds] panes.
Touch [Save as] to save the settings and enter a name for the preset.
Touch [OK].