
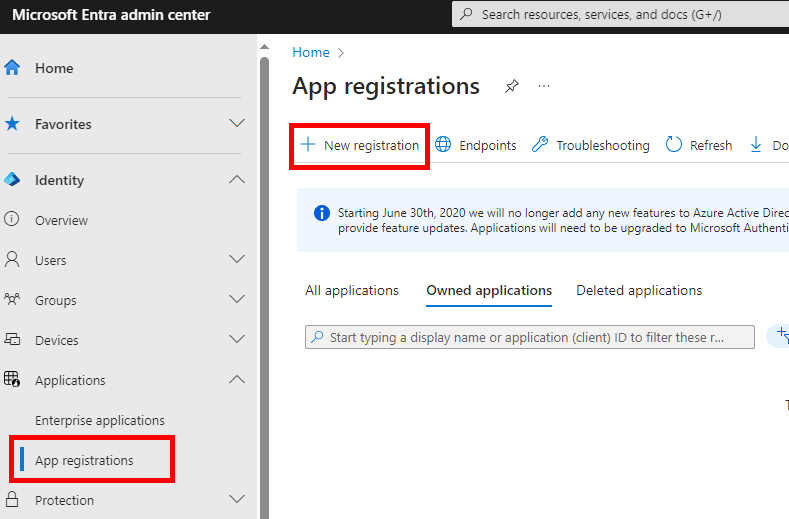
To establish a connection to a Microsoft 365 cloud server, the user needs to configure it first in the Microsoft Entra admin center.
There are three steps that need to be followed:
Register the application
Provide the required permissions to the users
Retrieve the Application and Directory IDs.
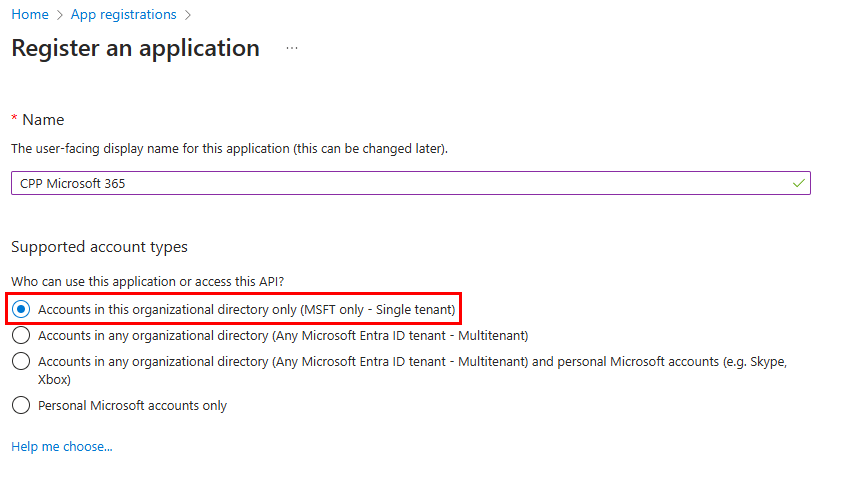
'CPP Microsoft 365' in this procedure is an example.
Open Microsoft Entra admin center and create a new registration.
Select [Accounts in this organizational directory only (MSFT only - Single Tenant)].
The Microsoft Graph permissions are required for this application, so that this cloud server can be used as an external location for POWERsync+ based printers.
Add the following permissions:
|
User.Read |
for signing in and reading the user profile |
|
Files.ReadWrite |
for read/write access to the OneDrive files and folders of the signed-in user |
|
Sites.ReadWrite.All |
for read/write access to the SharePoint Sites that the signed-in user has access to |
|
Offline_access |
required to guarantee access to the refresh token, which are needed for the OAuth 2.0 protocol used to login to the cloud server; |
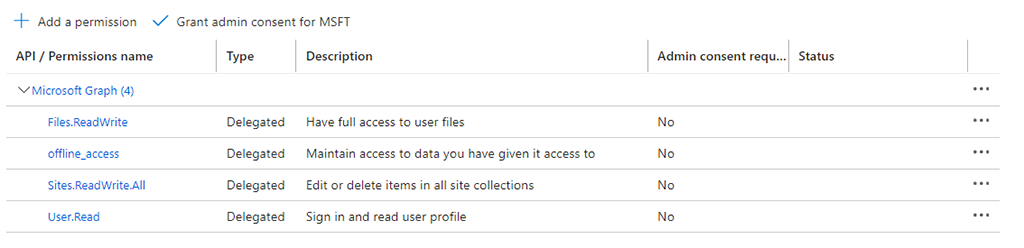
The access type here is delegated. With delegated access, the app calls Microsoft Graph on behalf of a signed-in user. In app-only access, the app calls Microsoft Graph with its own identity, without a signed-in user. For POWERsync+ based printers, only delegated access is supported.
For more details, see https://learn.microsoft.com/enus/graph/permissions-reference
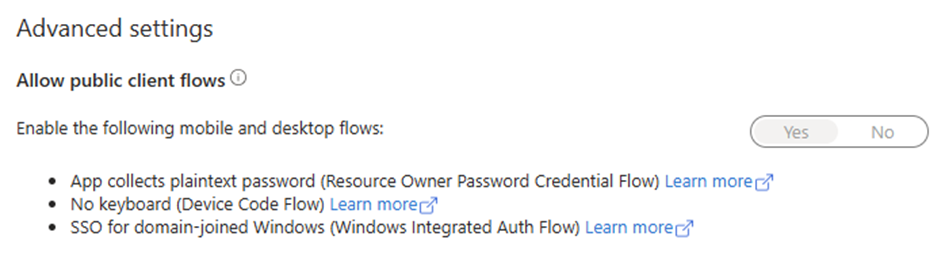
In [Advanced settings], enable [Allow public client flows]. By default, this setting is set to disabled, but it is required to allow the users to login to their Microsoft 365 accounts, via the code provided at the user panel.
In the overview of the application, the [Application (client) ID] and [Directory (tenant) ID ] can be retrieved.
These IDs must be entered when adding this Microsoft 365 environment as an external location.
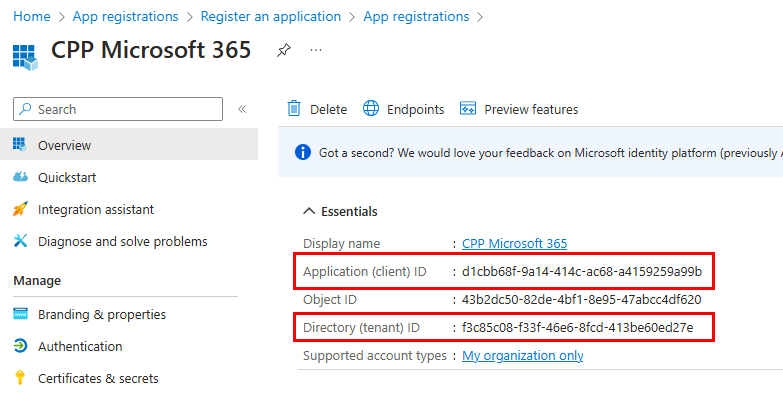
'CPP Microsoft 365' in this image is an example.