
To use the printer in one or more PRISMAsync Print Server cloud service applications, the following tasks must be performed.
Required licenses have been installed
Ensure the proxy server is configured on the printer.
Prepare the proxy server for PRISMAsync Remote Match communication.
Ensure the remote connection is configured on the printer.
Enable the PRISMAsync Print Server cloud service applications on the printer
For PRISMAsync Remote Match, the PRISMAsync Remote Match licence must be created and activated in On Remote Service (ORS). This license is based on the serial number of the printer.
For PRISMAlytics Dashboard, the PRISMAlytics Dashboard licence must be created and activated in On Remote Service (ORS). This license is based on the serial number of the printer.
The On Remote Service (ORS) licence is included in the Base licence.
Configure the proxy server settings when the printer uses a proxy server to access the Internet and when you want to use PRISMAsync Remote Match.
When the proxy server is not yet configured, go to the Settings Editor or the control panel of the printer.
Configure the proxy server settings in the Settings Editor
Open the Settings Editor and go to: .
In the [Proxy server] option group define the proxy server settings.
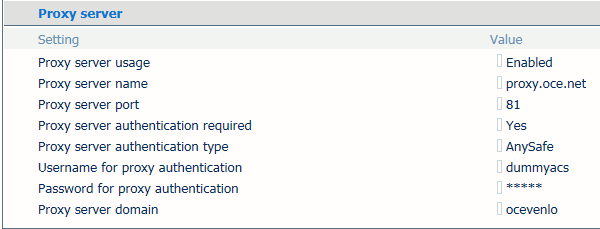 Configure proxy server
Configure the proxy server settings on the control panel
Go to the control panel.
Touch .
 System configuration control panel
Open the [Proxy server] option group.
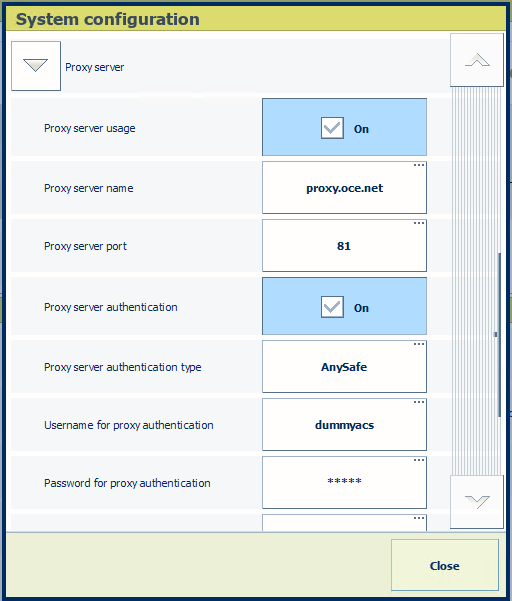 Proxy server settings on control panel
Define the proxy server settings.
Touch [Close].
The data communication of PRISMAlytics Dashboard and PRISMAsync Remote Control runs directly via the licensed On Remote Service (ORS). The PRISMAsync Remote Match data is transferred via the proxy server. This requires that you adjust your proxy server settings so that the PRISMAsync Remote Match data communication is accepted by the proxy server.
To allow the PRISMAsync Remote Match communication channel, you add the following web site entry to the proxy server whitelist: https://remotematch-prx.cpp.canon.
When the remote connection is not yet configured, perform the following instruction.
Go to the control panel.
Touch .
Open the [Remote connection] option group.
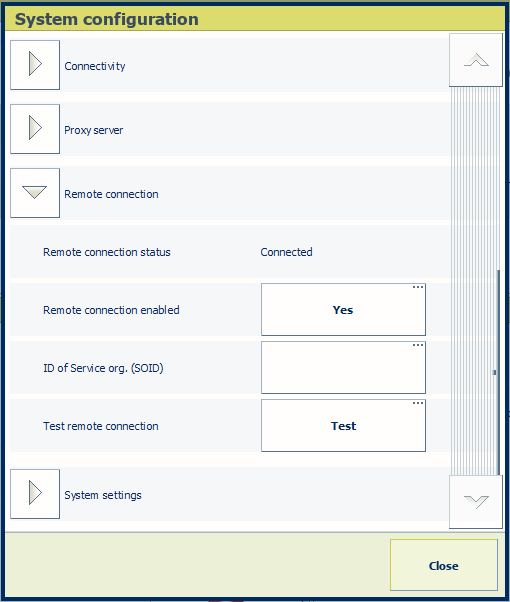 Remote connection settings on control panel
In the [Remote connection enabled] field, touch [Yes].
Enter the SOID in the [ID of Service org. (SOID)] field. Your Service organization can provide the SOID.
Touch [Test remote connection] to test the proxy server settings.
Touch [Close].
Open the Settings Editor and go to: .

In the [Cloud service] option group, use the [PRISMAsync Remote Control] , [PRISMAlytics Dashboard] and [PRISMAsync Remote Match] options to enable the required applications.
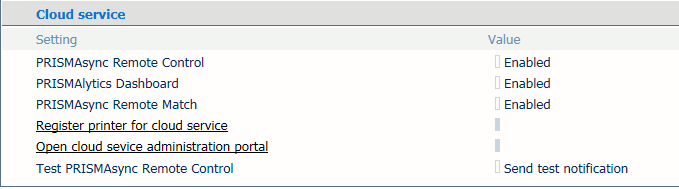 Cloud service settings